brunch

Flavorful - yet Salt-Free - Blueberry Muffins

image.jpg

People frequently joke about the fact that after you reach a "certain age" -- whatever that is -- you get "conditions." So you have to watch what you eat because maybe your LDL cholesterol level is too high or your blood sugar is too high or your weight is, well, let’s not discuss that…. 

But when you think about it, however old and/or fit you are, it's always a good idea to eat more or less healthy food. Especially at this time of year when we’ve spent the last month or so indulging through the holidays.

I'm not suggesting that we never indulge in rich, fattening, sugary or fried food. I have posted recipes for fried onion strings and chocolate cake, haven’t I?

Just as a general matter, I think it's smart to be aware of your body and the consequences of what you feed it.

Over the new year weekend, I had to prepare recipes that contained less salt because one of our guests has high blood pressure and needed to cut down on salty foods.

Not a problem. In many cases, for multitudes of recipes, other flavor enhancers come in handy — think citrus peel, extracts, ground spices such as nutmeg or cinnamon, herbs such as thyme and basil, chili peppers, fresh ginger, hot sauce — there are loads of choices.

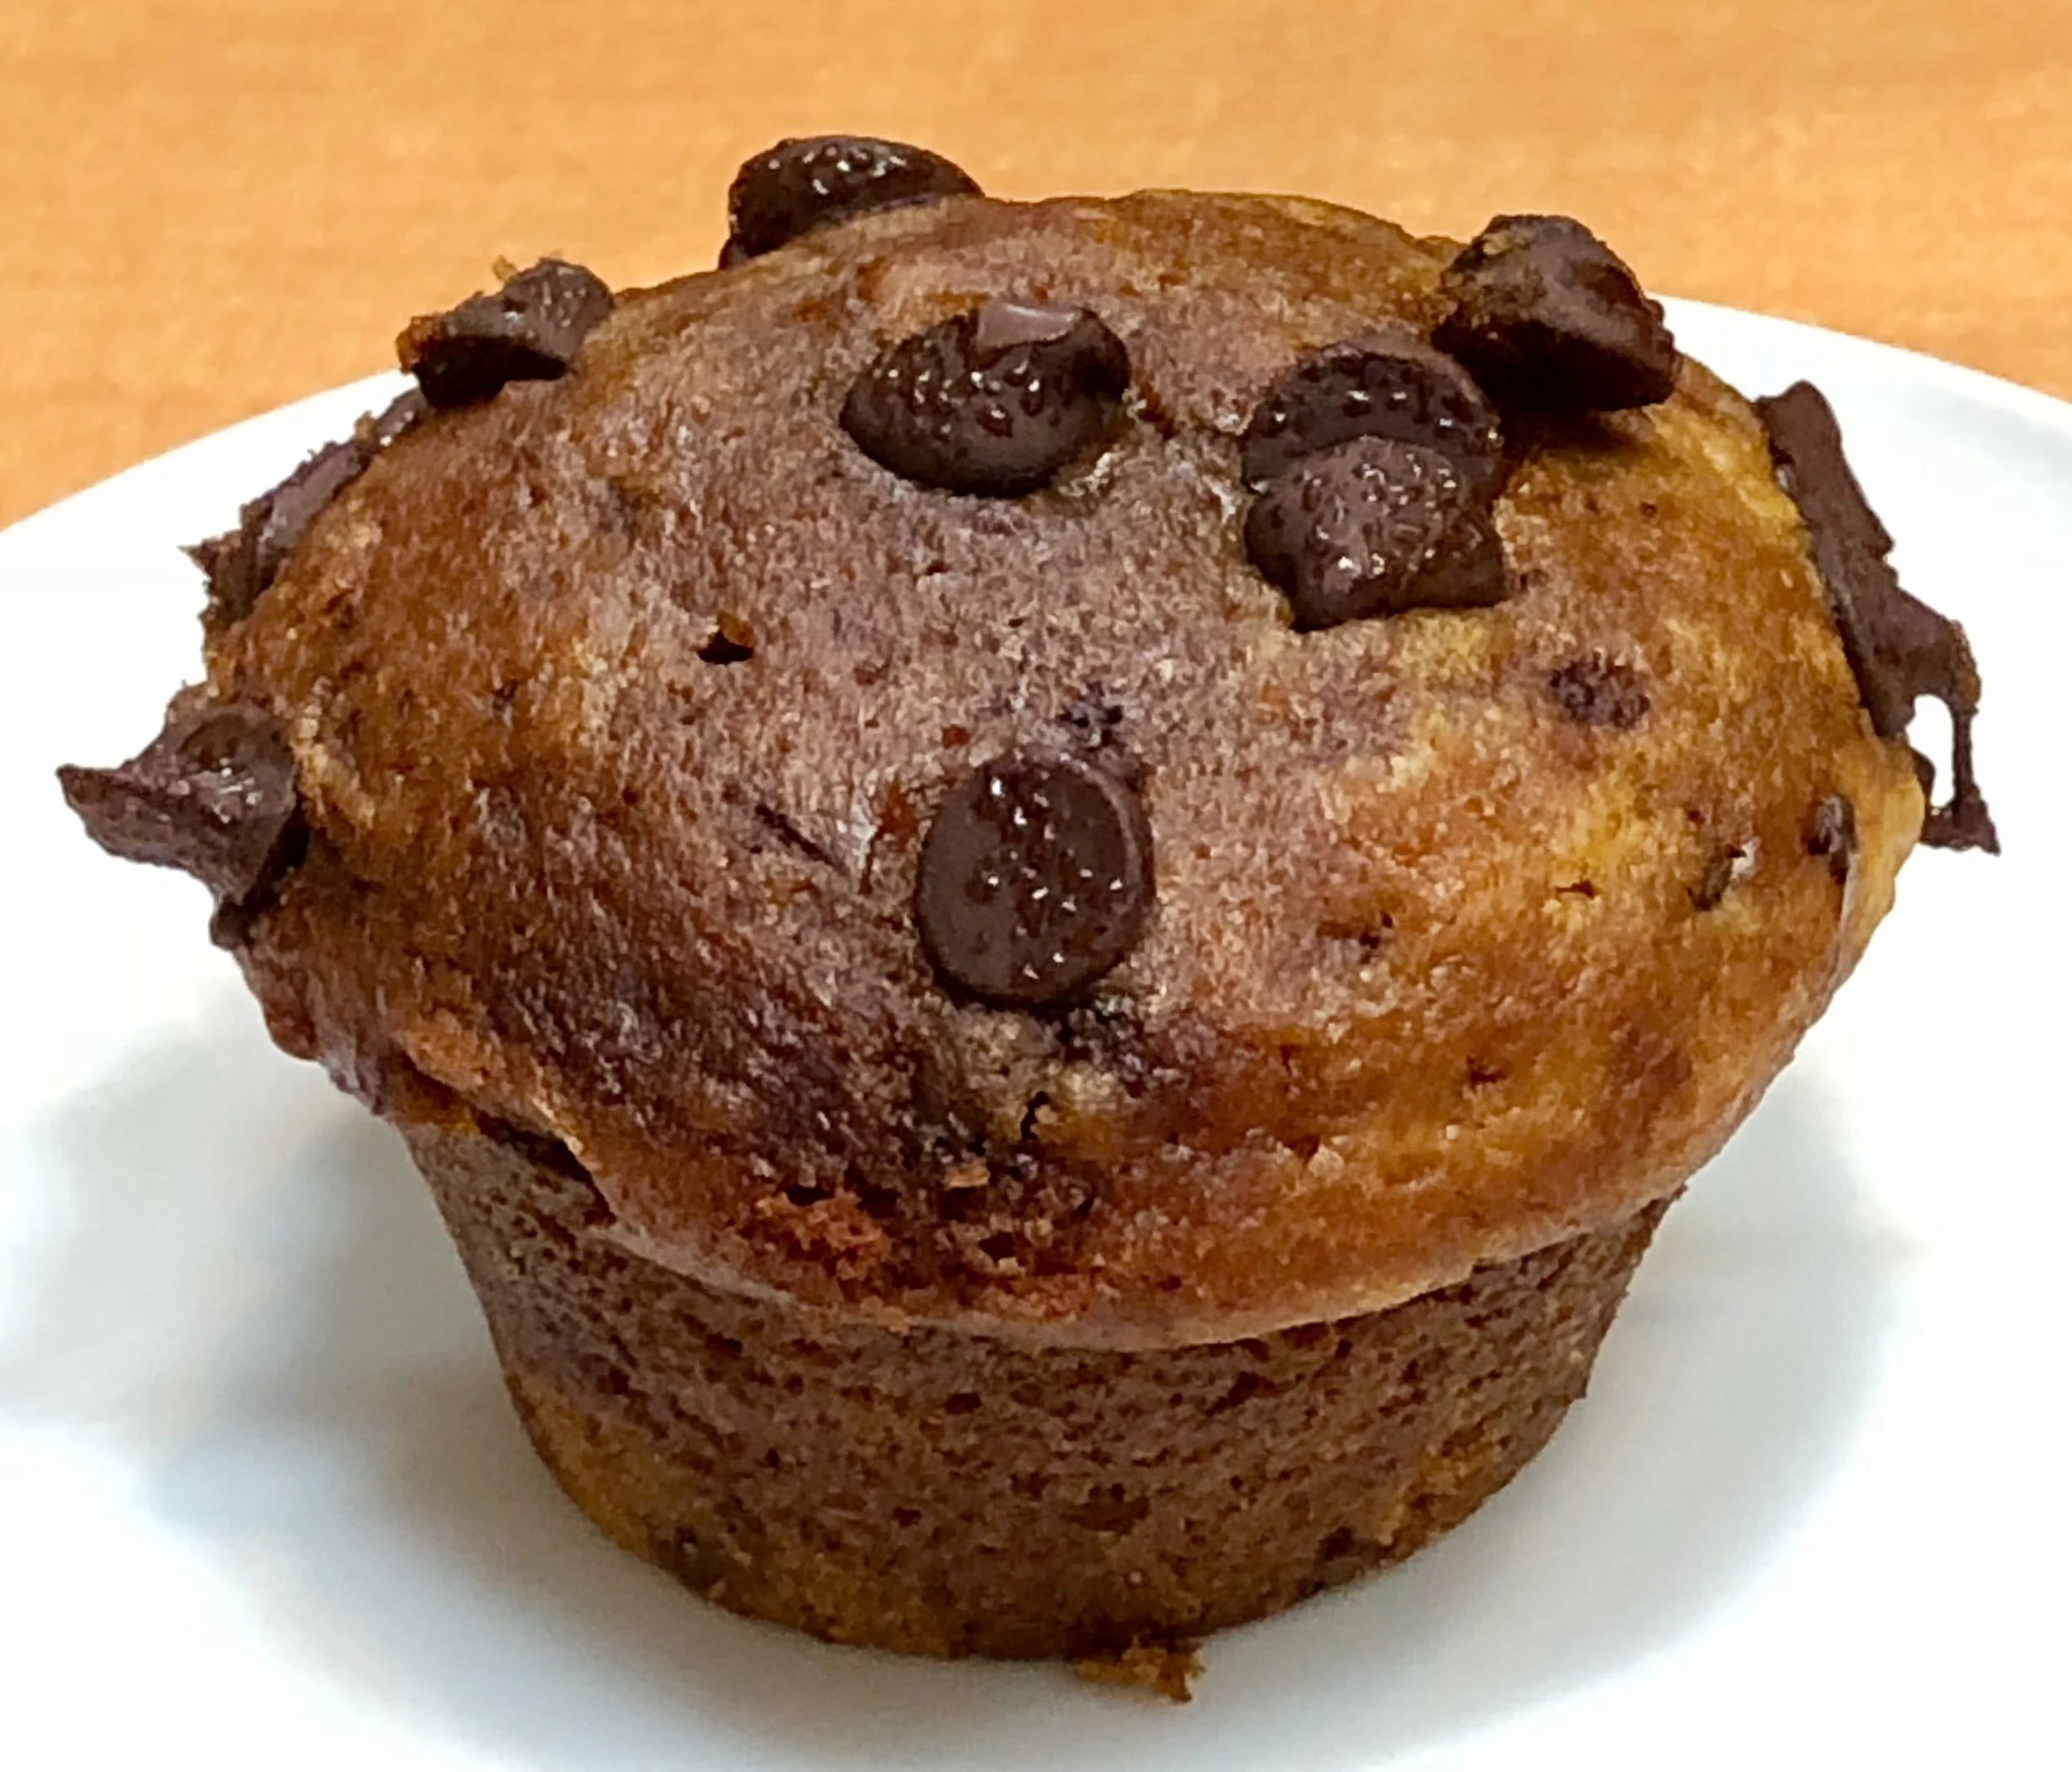
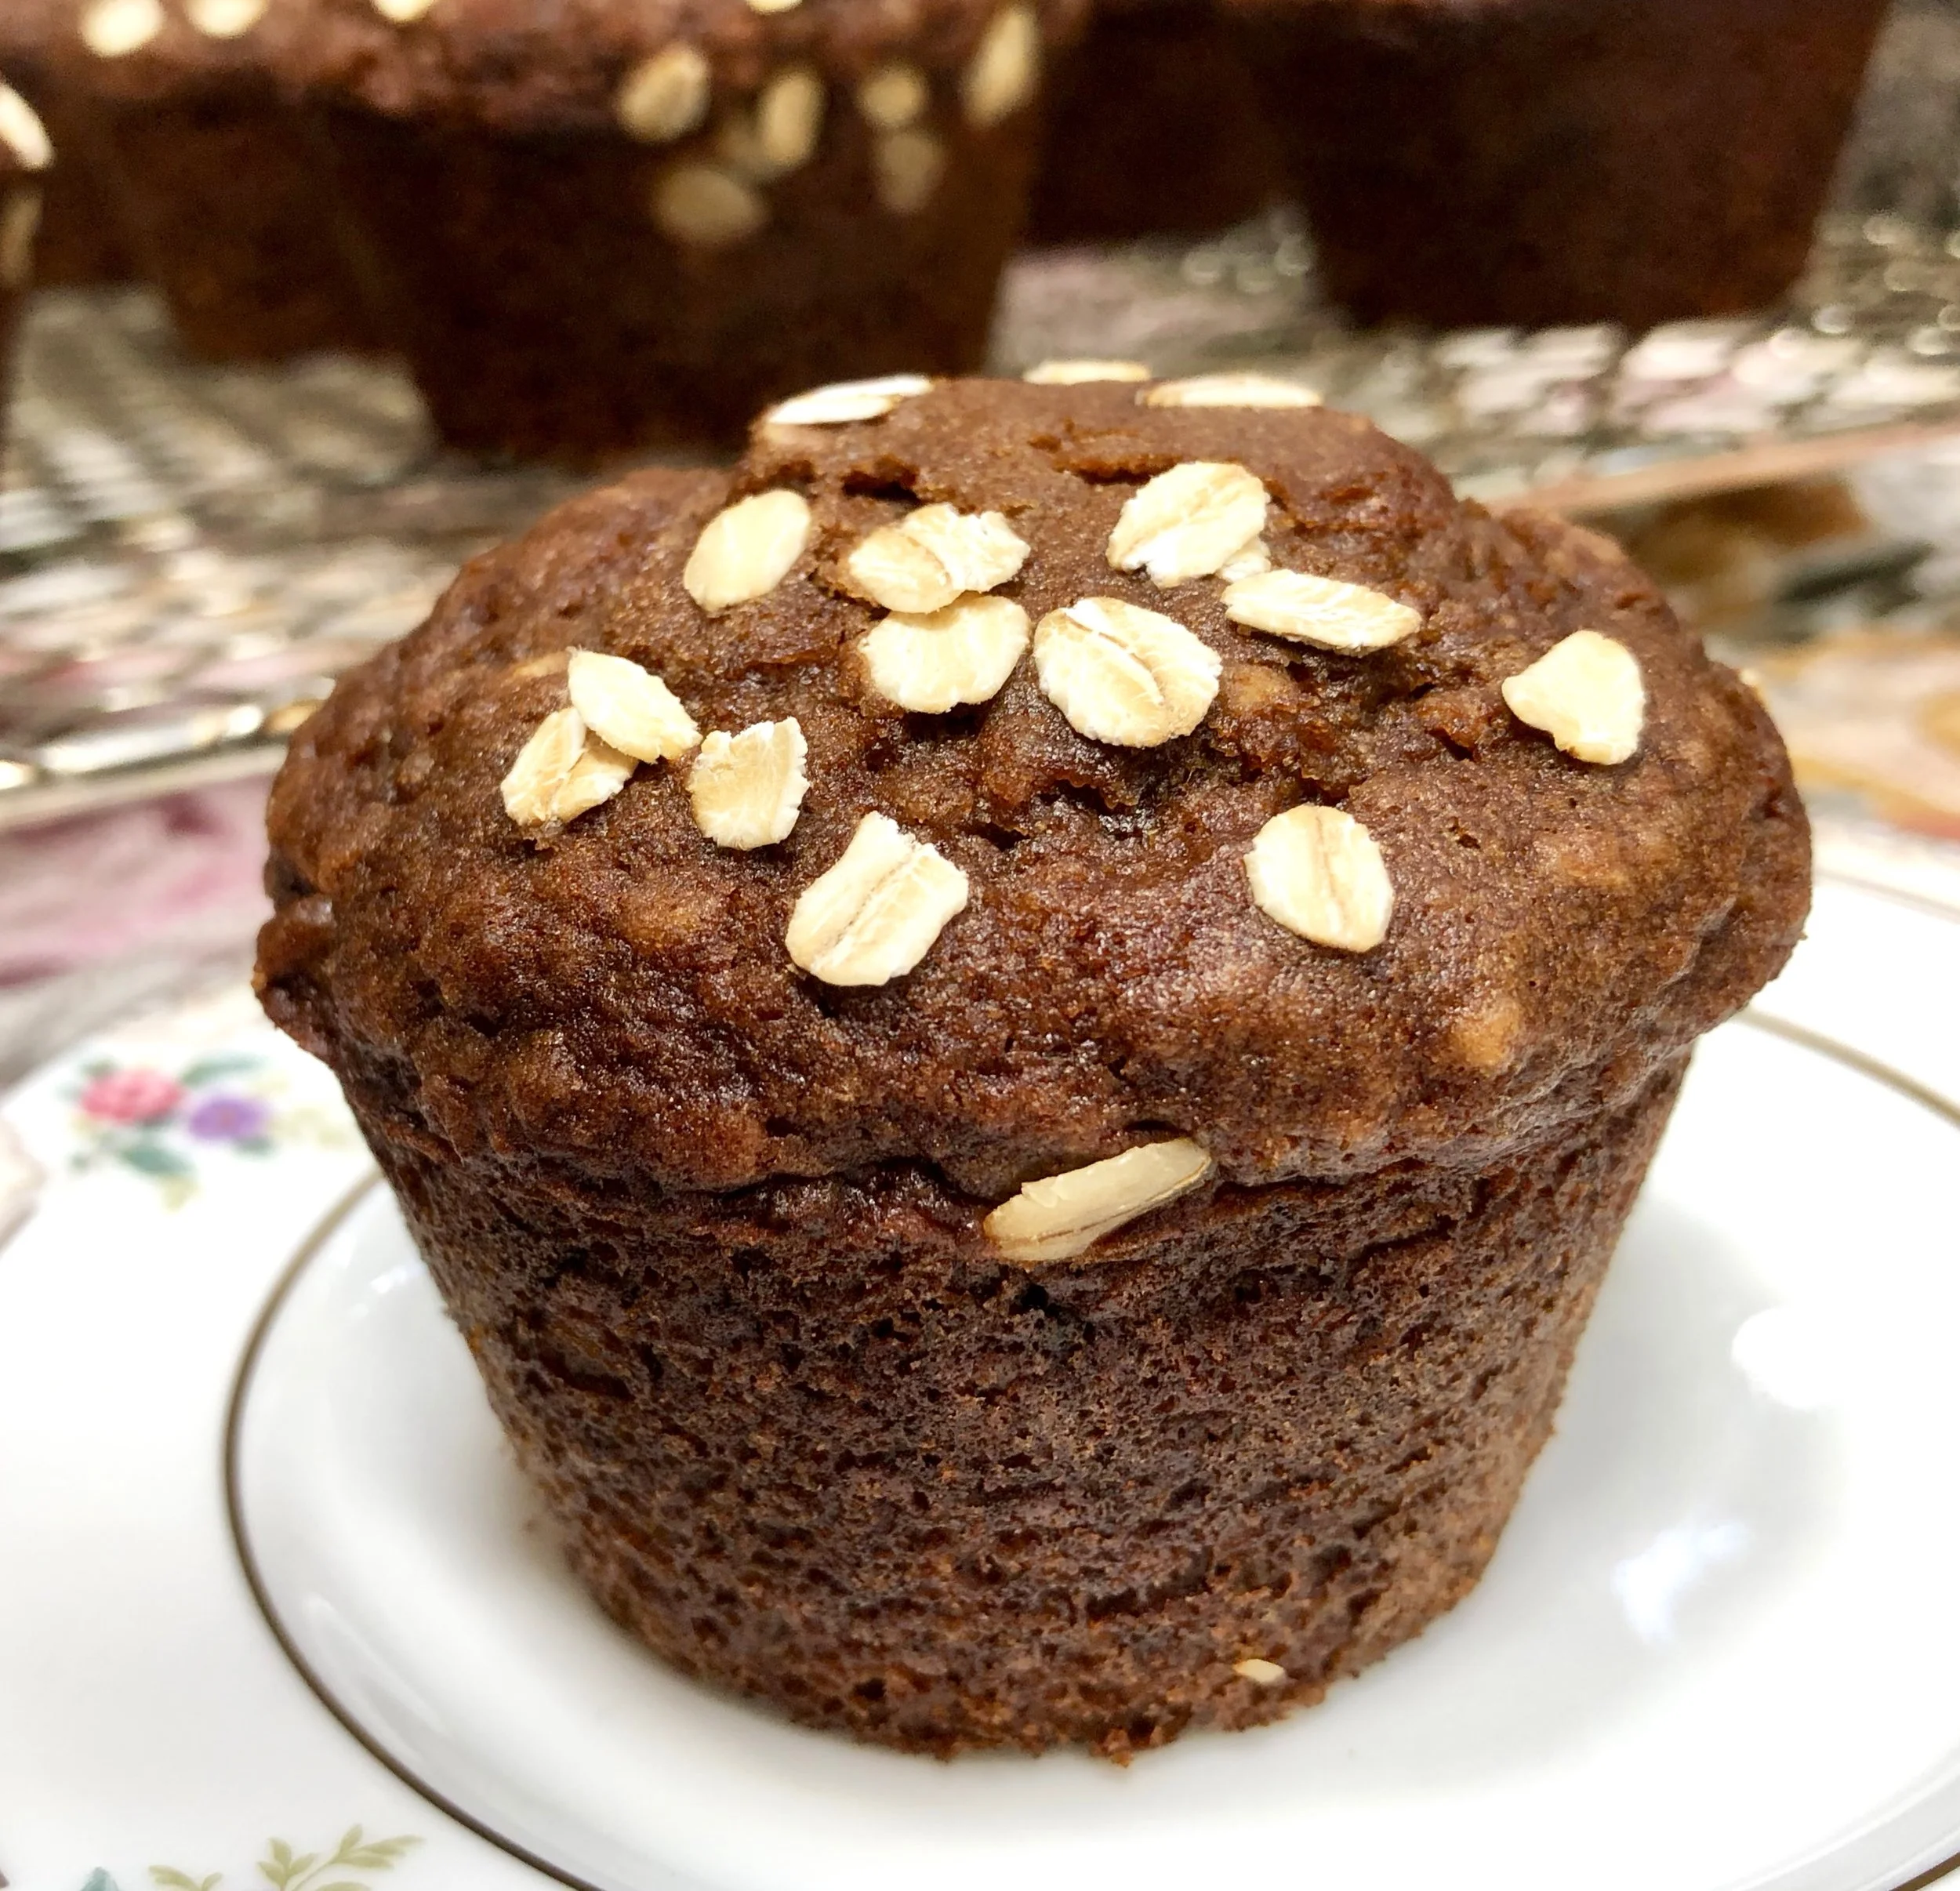
Here’s the recipe for Blueberry Muffins I served. I added both cinnamon and orange peel as well as vanilla extract (I recommend pure Bourbon vanilla extract, not imitation). You could also stir some chopped nuts into the batter.

No salt necessary. They were terrific for breakfast.

Remember these next Purim — they make excellent edible gifts!

Salt-Free Blueberry Muffins

  • 6 tablespoons butter

  • 2 cups all-purpose flour

  • 1/2 sugar

  • 2 teaspoons baking powder

  • 1/2 teaspoon ground cinnamon

  • 3/4 cup milk

  • 2 large eggs

  • 1 teaspoon grated fresh lemon or orange peel, optional

  • 1/2 teaspoon vanilla extract

  • 1 cup blueberries

Preheat the oven to 400 degrees. Lightly grease 10 muffin tins. Melt the butter and set it aside to cool. In a large bowl, combine the flour, sugar, baking powder and cinnamon. Whisk the ingredients until well blended. In another bowl, combine the milk, eggs, peel, if used, and vanilla extract. Pour the liquid ingredients and the melted butter into the flour mixture and stir until thoroughly blended. Fold in the berries. Spoon equal quantities of the batter into the prepared muffin tins. Bake for about 25 minutes or until a cake tester inserted into the center comes out clean and the tops are lightly golden brown. 

Makes 10 muffins

India-style Shakshuka

fullsizeoutput_abe6.jpeg
fullsizeoutput_ac19.jpeg

We always have sleepover guests — my cousins — for New Year’s Eve. The next morning it’s always the same brunch: smoked fish, herrings, whitefish salad, bagels and coffee.

Perfect.

Except this year, for a variety of reasons, we have to consider less-salty meals.

I decided on a complete change. Something delicious, different and needs no extra salt because the seasonings are so bountiful and flavorful (the recipe says salt to taste, which can be zero).

I’ve made this for dinner and brunch. Works either way. Add a hunk of bread (naan if possible).

May become a new tradition.

Happy New Year 2020.

India-style Shakshuka

  • 1/4 cup olive oil

  • 1 medium onion, chopped

  • 1 red bell pepper, deseeded and chopped

  • 1 small habanero, serrano or other chili pepper, deseeded and chopped

  • 1 large garlic clove, chopped

  • 2 teaspoons chopped fresh ginger

  • 8 plum tomatoes, coarsely chopped

  • 2 teaspoons curry powder

  • Salt to taste

  • 4-6 large eggs

  • 2 tablespoons chopped fresh mint

  • 1 tablespoon chopped fresh parsley

Heat the olive oil in a large sauté pan over medium heat. Add the onion, bell pepper and habanero peppers. Cook for 3-4 minutes or until softened slightly. Add the garlic and ginger and cook briefly. Add the tomatoes, curry powder and salt to taste. Stir, cover the pan, turn the heat to low and cook for about 10 minutes, stirring occasionally, or until vegetables are very soft and sauce-like. Crack the eggs into a small bowl one at a time then transfer each one next to the other over the vegetables. Cover the pan and cook for 4–5 minutes or until the eggs are set but yolks are still slightly runny. Sprinkle with mint and parsley. Serve each person an egg with some of the vegetables.

Makes 4-6 servings.


Pumpkin Chocolate Chip Muffins

fullsizeoutput_a171.jpeg

Years ago I bought small, sweet “sugar” pumpkins, cut them, baked the pieces and mashed the roasted flesh to make pumpkin soup, quickbreads, pie, cake and muffins, and so on.

When I’m not busy I still do that, but these days, more often than not, I buy canned mashed/pureed pumpkin. NOT pumpkin pie filling (which has mixed-in spices).

Yes, I know that most canned “pumpkin” is a mixture of different varieties of winter squash. That’s fine with me — pumpkin is just a variety of winter squash after all. The point is, it tastes good and it works.

Canned pumpkin worked perfectly for the muffins in the photo, they’re dotted with mini-chocolate chips. These are a really good nosh for kids and parents coming in from the cold night out Trick-or-Treating.

Pumpkin Chocolate Chip Muffins

  • 3 ounces semisweet chocolate

  • 1 cup pumpkin puree

  • 3/4 cup sugar

  • 1/2 cup vegetable oil

  • 1/3 cup coconut milk

  • 2 large eggs

  • 1-3/4 cups all-purpose flour

  • 1 teaspoon baking soda

  • 3/4 teaspoon salt

  • 1/2 teaspoon ground cinnamon

  • 1/2 teaspoon grated fresh nutmeg

  • 1/2 cup mini-chocolate chips

Preheat the oven to 350 degrees. Lightly grease 10 muffin pan cups. Melt the chocolate and set it aside to cool. Combine the pumpkin puree, sugar, vegetable oil and coconut milk in a large bowl and whisk the ingredients for 1-2 minutes or until thoroughly blended. Whisk in the eggs. Combine the flour, baking soda, salt, cinnamon and nutmeg and add them to the pumpkin mixture. Whisk the ingredients for 1-2 minutes or until thoroughly blended. Fold in the melted chocolate, creating swirls — do not blend it in completely. Fold in the chocolate chips, reserving some for the tops. Spoon equal amounts of the batter into the prepared cups. Scatter some chocolate chips on top of each muffin. Bake for 25-30 minutes or until a cake tester inserted into the center of the muffins comes out clean.

Makes 10 muffins


Spinach and Tomato Egg Scramble

fullsizeoutput_acdb.jpeg

After the eating fest that takes place over Rosh Hashanah/Break-the-Fast through Sukkot and before the onslaught of a zillion-calorie Thanksgiving dinner plus leftovers, I need a break from heavy meals. Meaning, something other than a meat-and-potatoes type dinner.

For example? This omelet-y dish, only it’s scrambled eggs, which means it’s even easier to cook because you don’t even have to fold it. It’s filling enough for dinner if you include a hunk of crusty bread or challah. It’s versatile too: you can add diced cooked potatoes and use any green vegetable instead of spinach; substitute onions or shallots for the scallions; add some crumbled goat cheese or shredded hard cheese such as Swiss or Mozzarella.

But we like it as is. Simple. Tasty. Easy to make. Easy going down. Just right for between holiday feasts.

Spinach and Tomato Egg Scramble

  • 2 tablespoons vegetable oil (butter if you prefer; let it melt before adding ingredients)

  • 4 thick scallions, chopped

  • 1 tablespoon finely chopped fresh chili pepper

  • 2 cloves garlic, chopped

  • 1 large bunch spinach

  • 4 medium tomatoes, cut into quarters

  • 8 large eggs, beaten

  • salt and freshly ground black pepper to taste

Heat the vegetable oil in a large sauté pan over medium heat. Add the scallions, chili pepper, garlic and spinach and cook, stirring occasionally, for about 2 minutes. Add the tomatoes and cook for another minute. Pour in the eggs, let the eggs set partially, then mix gently to scramble the ingredients together and cook to desired consistency. Season with salt and pepper to taste.

 Makes 4 servings

Honey Cake Muffins

fullsizeoutput_9422.jpeg

I make honey cake every year for Rosh Hashanah, using my Aunt Belle’s family-famous recipe.

Every once in a while I change the recipe — a different honey, an additional spice (or less seasoning), and so on, just to see if we like it better or I should just stick to the original. I’ve even adapted the recipe to make it with date honey.

They’re all delicious. I love honey cake and I look forward to it every year as a special holiday treat.

Last year I decided to make honey cake into muffins. So — breakfast or afternoon snack instead of for dessert. They are sweet — it is honey “cake” after all — but not as sweet as the recipe I use for dessert. The muffins are also mellowed a bit with oats.

During the year I made these muffins again, several times, using several different spice blends. The recipe below is the more traditional Rosh Hashanah flavor, but you could delete the cinnamon and nutmeg and use one teaspoon Hawaij spice instead. They’re a convenient riff on honey cake; freezable too.

Honey Cake Muffins

  • 1-1/3 cups all-purpose flour

  • 2/3 cup quick oats

  • 2 teaspoons baking powder

  • 1-1/2 teaspoons baking soda

  • 1/2 teaspoon salt

  • 2 teaspoon grated fresh orange peel

  • 1/2 teaspoon cinnamon

  • 1/2 teaspoon grated nutmeg

  • 3/4 cup honey

  • 1/2 cup cold coffee

  • 6 tablespoons vegetable oil

  • 2 large eggs

  • old fashioned oats, optional (or use chopped nuts)

Preheat the oven to 375 degrees. Grease 10 muffin tins. In a bowl, mix the flour, oats, baking powder, baking soda, salt, orange peel, cinnamon and nutmeg together until uniform in color. Heat the honey and coffee together over low heat briefly, so that they are easy to blend with a whisk. Add the vegetable oil and eggs and whisk the ingredients until they are uniform in color. Stir in the flour mixture and mix until thoroughly combined. Spoon the batter into the greased muffin tins. Top, if desired, with old fashioned oats or chopped nuts. Bake for about 18 minutes or until a cake tester inserted into the center comes out clean.

Makes 10


Fried Green Cherry Tomatoes

fullsizeoutput_adfb.jpeg

This year my tomato crop was such a bonanza that we ate tomato-something almost every day!

I am not complaining. Fresh garden tomatoes are among the treasures of the food world.

But it’s getting on in the season, the weather is turning, the Jewish holidays are around the corner and hundreds of those little things will never ripen from green to red in time.

I made some chutney of course.

I like fried green tomatoes in a sandwich but the cherry tomatoes are too small for slicing, coating and frying.

So I tried making them whole.

Yes!

Crunchy outside — and when you bite in, you get spurts of sweet-tart juicy tomato.

Terrific as an hors d’oeuvre. If you have extra, little, green tomatoes, try this:

Fried Green Cherry Tomatoes

  • 1/2 cup mayonnaise

  • 2 tablespoons chopped fresh basil

  • lemon juice

  • 18-24 small green cherry tomatoes

  • 1/4 cup all-purpose flour

  • 1 large egg

  • 1/4 teaspoon Sriracha or other hot sauce

  • 1/2 cup matzo meal or breadcrumbs

  • salt, freshly ground black pepper and garlic powder to taste

  • vegetable oil

Combine the mayonnaise, basil and a teaspoon or two of lemon juice in a small bowl. Taste and add more lemon juice if desired. Set aside. Wash and dry the tomatoes. Place the flour in a bowl, add the tomatoes and toss them around to coat them completely. Beat the egg and hot sauce together. Immerse the tomatoes into the egg and roll them around to coat each one completely. In a bowl, combine the matzo meal with salt, pepper and garlic powder to taste. Add the egg-coated tomatoes a few at a time and roll them around to coat them completely. Place the coated tomatoes on a cake rack or other surface for at least 20 minutes, to “air dry” slightly. Heat vegetable oil in a deep pan to a depth of about 2-inches. When the oil is hot enough to make a crumb sizzle quickly, add the tomatoes, a few at a time and cook them, turning them occasionally, for 4-5 minutes, or until golden brown. Remove the tomatoes and set the on paper towels to drain. When all the tomatoes are fried, serve them with the basil mayonnaise.

Makes 6-8 servings

Gluten-Free Peach Crisp

fullsizeoutput_945d.jpeg

Some summers the peaches are glorious.

And then there’s this year. I haven’t had an excellent peach or nectarine yet.

I bought a bunch a few times and they tasted ok, but not really flavorful. Some were cottony and mealy.

I used the cottony/mealy ones to make sauce — like applesauce only made with peaches (with a bit of cinnamon and a squirt of lemon juice). It was very good. We ate some and I used the rest for quickbread.

I used the sort-of-tasty ones for this peach crisp. This was perfect. Baking — plus some other stuff — brought out the best of the fruit.

And look how easy this dessert is!

Plus, it’s gluten-free, in case you need…

Gluten-Free Peach Crisp

Filling:

  • 6 ripe medium peaches

  • 2 tablespoons sugar

  • 2 tablespoons minute tapioca

  • 1 tablespoon lemon juice

Crust:

  • 1-1/2 cups quick cooking oats

  • 2/3 cup brown sugar

  • 1 teaspoon ground cinnamon

  • 1/4 teaspoon salt

  • 6 tablespoons butter (margarine or solid coconut oil), cut into chunks

To make the filling: Lightly butter a baking dish. Preheat the oven to 400 degrees. Slice the peaches and place the pieces in the baking dish. Add the sugar, tapioca and lemon juice, toss the ingredients and let rest for 15-20 minutes. 

To make the crust: Mix the oats, brown sugar, cinnamon and salt in a bowl. Add the butter and work it into the dry ingredients until the mixture is crumbly. Place on top of the fruit. Bake for 30-35 minutes or until the crust is golden brown.

Makes 6 servings


Vegetable Salad

fullsizeoutput_a6ee.jpeg

Light, refreshing food. That’s what we want during the summer.

Also, easy to make. And as quick as possible.

I made this vegetable salad using leftovers from the veggies we had over a couple of meals. Added some fresh tomatoes, an avocado and some herbs. Not only did I get to use up stuff from the fridge, the dish took less than 10 minutes to make.

It’s a side dish. But you can add some tofu, cheese or hard-cooked eggs and make it into a main course (or add leftover fish, meat or poultry).

Add crusty bread and it’s a sandwich filling.

Mix it into cooked penne or ziti and it becomes pasta primavera.

Use whatever vegetables you have in proportions suggested. There’s no magic here, no actual recipe that will fail if you don’t have one of the ingredients.

Vegetable Salad

  • 3 cups cooked cut up cauliflower

  • 1 cup cooked, cut up green beans

  • 1 cup cooked cut up yellow squash

  • 3-4 cut up small tomatoes

  • 1 avocado, cut into small chunks

  • 3 tablespoons chopped fresh basil

  • 2 teaspoons chopped fresh oregano

  • 2 tablespoons olive oil

  • 2-3 tablespoons fresh lemon juice (or use white wine vinegar)

  • salt and freshly ground black pepper to taste

Place the cauliflower, green beans, yellow squash, tomatoes, avocado, basil and oregano in a bowl and toss the ingredients to distribute them evenly. Pour the olive oil over the vegetables and toss again. Pour 2 tablespoons of the lemon juice over the vegetables and toss again. Taste for seasoning and add more lemon juice and salt and pepper to taste.

Makes 4-6 servings

Bulgur Wheat Varnishkes

fullsizeoutput_86ca.jpg

Tisha B’av isn’t one of the better-known Jewish holidays. I’ve heard people say “oh yeah, I think that’s when you can’t get married.” Or, “you can’t get a haircut or listen to music.”

All true, and much more, and that’s because, unlike holidays when we celebrate joyful occasions such as a new year or deliverance from Pharaoh, Tisha B’av is when observant Jews mourn the destruction of the First and Second Temples. In addition, we remember the numerous times throughout history that the Jewish people were subjected to pogroms, exile and a multitude of other catastrophes. These are days that we don’t celebrate; we grieve.

Mournful times deserve respect and reflection. During the nine days leading up to the actual holiday (which begins at sundown on August 10th) many families will refrain from the usual pleasure-filled events and activities that make up our lives.

That includes getting married or getting a haircut or listening to music.

It also includes refraining from eating certain foods.

Tisha B’av is a full fast day, but during the days leading up to it many families don’t eat meat. Fish, dairy, vegetarian — is on the menu, and especially eggs and lentils, which are considered “mourner’s food.”

It’s just as well frankly. Skipping heavy meat meals during the hot weather makes good sense. It’s a whole lot smarter to eat fish, dairy and vegetarian.

Whether or not you follow the culinary guidelines during the Nine Days, this dish will do!

Anytime.

It’s my particular riff on classic kasha varnishkes. Our family really doesn’t like kasha, so I make the dish using bulgur wheat. Not only does it taste better, it’s easier to prepare and easier on the digestion.

Bulgur wheat or kasha varnishkes is usually a side dish, but it becomes a full meal if you add a fried egg or two on top.

Bulgur Wheat Varnishkes

  • 6 tablespoons vegetable oil

  • 1 cup bulgur wheat

  • 1-3/4 cup water, vegetable stock (can use chicken stock)

  • 2 large onions, chopped

  • Salt and freshly ground black pepper to taste

  • 6 ounces bow-tie pasta

  • 6 fried eggs

Heat 3 tablespoons of the vegetable oil in a sauté pan over medium heat. Add the bulgur wheat and cook, stirring occasionally, for about 3-4 minutes or until lightly toasted. Pour in the water or stock, bring to a boil, lower the heat and cover the pan. Cook for about 20 minutes or until all the liquid has been absorbed. Heat the remaining 3 tablespoons vegetable oil in a sauté pan over medium heat. Add the onions, sprinkle with salt and pepper and cook for about 20 minutes, stirring often, or until the onions are soft and browned. Cook the pasta according to directions on the package. Combine the bulgur wheat, pasta and onions in a large bowl. Sprinkle with salt and pepper. Keep warm while you fry 6 eggs, sunnyside-up style.

Makes 6 servings


Grilled Crispy Pineapple

Grilled Pineapple

Grilled Pineapple

If you’ve never tasted grilled pineapple, you’ve missed a real treat.

Cut into thick slices, it’s a fabulous side dish for dinners of grilled or roasted chicken, lamb, duck or fish.

But it has a sort of rum-like flavor, so I also think of it as a “solid cocktail.” Which makes it the perfect accompaniment to such items as grilled chicken wings and other savory nibbles. In that case, cut the large slices into cubes and skewer the chunks onto toothpicks.

OR — this dish is so versatile — top each slice with whipped cream, ice cream or sweetened mascarpone cheese (garnish with some chopped pistachios or mint) and use it as a dessert.

Any way at all — you can’t go wrong.

Grilled Pineapple

  • One whole pineapple

  • 2 tablespoons brown sugar

  • 2 tablespoons coconut oil, vegetable oil, melted butter or a mixture of these

  • 2 tablespoons orange juice

  • 1 teaspoon grated orange peel

  • sea salt

  • mint for garnish, optional

Cut the leaves off the pineapple. Remove the outer fibrous rind. Cut the peeled pineapple in slices about 3/4-inch thick. Set aside in a single layer in a pan. Heat the brown sugar, coconut oil, orange juice and orange peel in a saucepan over medium heat, stirring until the sugar is dissolved. Pour over the pineapple slices, turning the pieces to coat both sides. Let macerate for about 45 minutes. Preheat an outdoor grill to medium (or use a grill pan or the oven broiler). Grill the slices for about 4 minutes per side or until well glazed and tender, brushing occasionally with some of the liquid. Sprinkle lightly with sea salt. Garnish with fresh mint if desired.

Makes 6 servings