Quinoa Stuffed Portobello Mushroom Caps with Raisins and Pine Nuts

It’s amazing how so many so-called “poor people’s foods” have become mainstream. Potatoes (forced on peasants by Germany’s King Frederick Wilhelm). Oats (defined in Samuel Johnson’s famous dictionary as a grain eaten by people in Scotland but fit on…

It’s amazing how so many so-called “poor people’s foods” have become mainstream. Potatoes (forced on peasants by Germany’s King Frederick Wilhelm). Oats (defined in Samuel Johnson’s famous dictionary as a grain eaten by people in Scotland but fit only for horses in England). And beans. A life-saver for millions, but which writer Don Marquis said there would be none of in the “almost perfect state.”

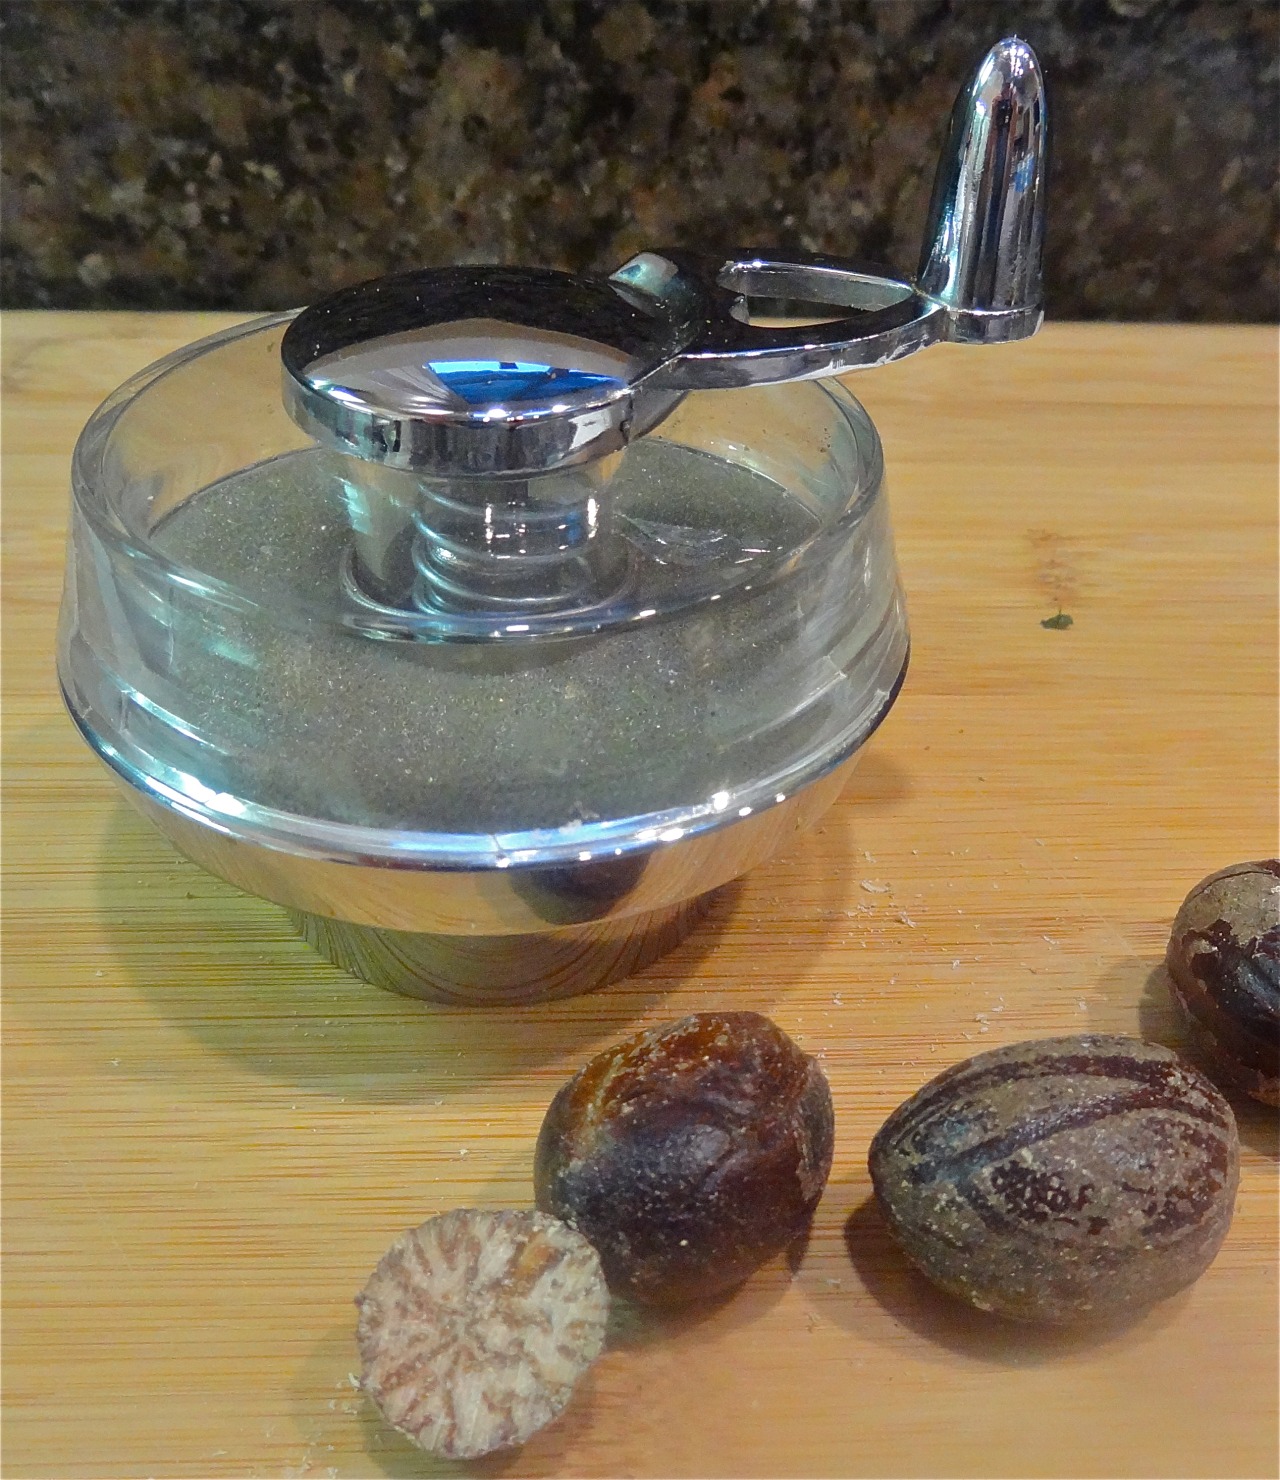
In South America, mostly Peru, quinoa is a staple for the poor, and particularly for women who are pregnant and can’t afford meat.

That’s because this grain-like seed is so high in protein. It contains all the essential amino acids one needs for good health.

All of these foods — potatoes, oats, beans — are everyday parts of our modern American diet.

Quinoa is the “newcomer.” Sales of the stuff have soared in recent years. 

And not just because it is healthy. But also because it is tasty, filling and versatile. It’s perfect for a vegetarian diet but also goes nicely as a side dish for meat-eaters.

Last, but not least, quinoa is kosher for Passover (caution here: some rabbis think otherwise so if you are in doubt, check with your local authority).

It is kosher for Passover because even though it cooks like a grain, looks like a grain and is as versatile as a grain — used for soups, salads, side dishes and so on — it is not one of the prohibited grains or other ingredients.

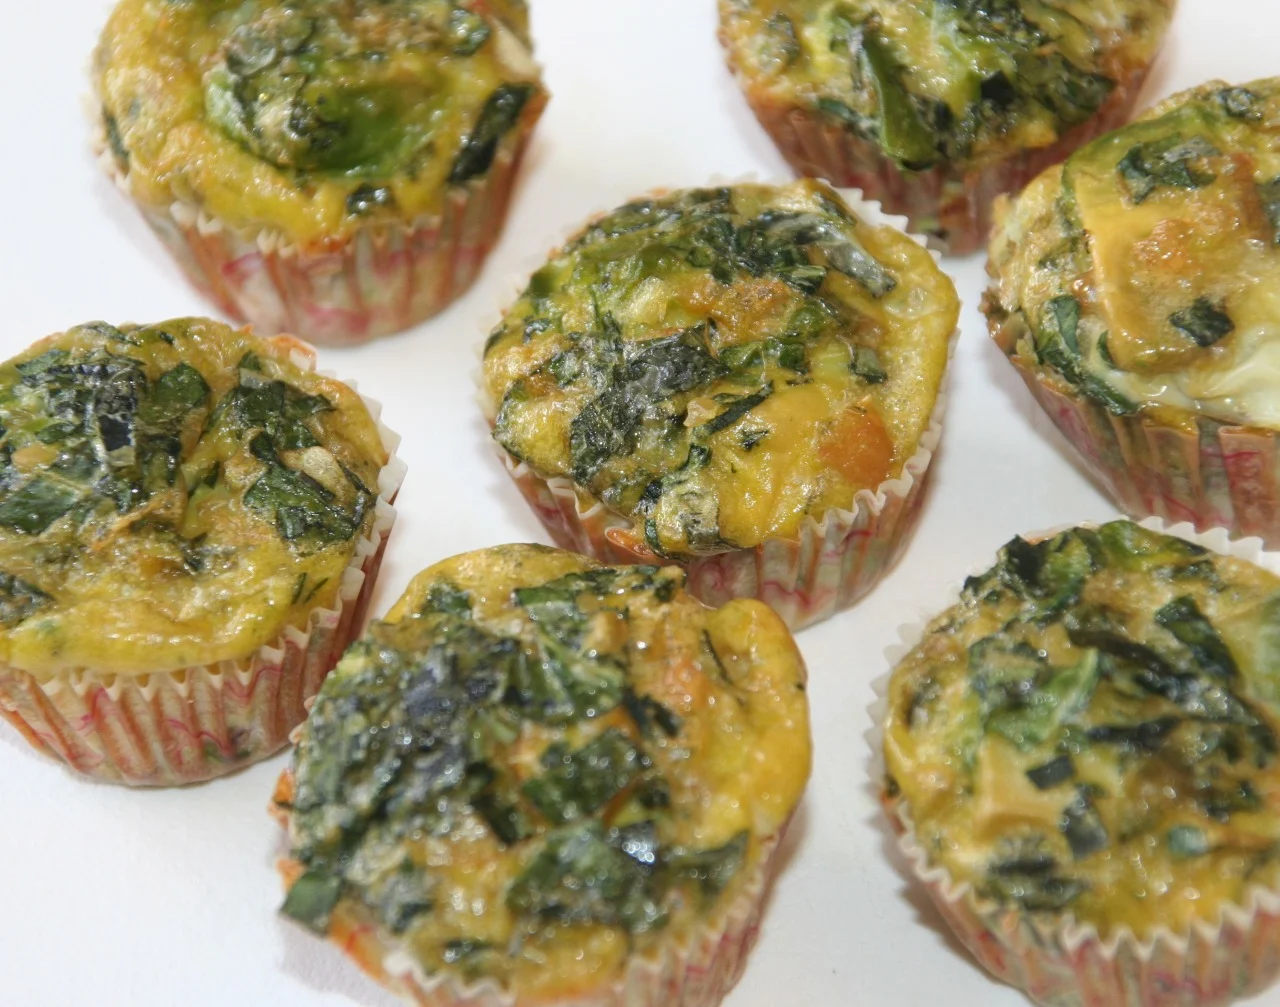
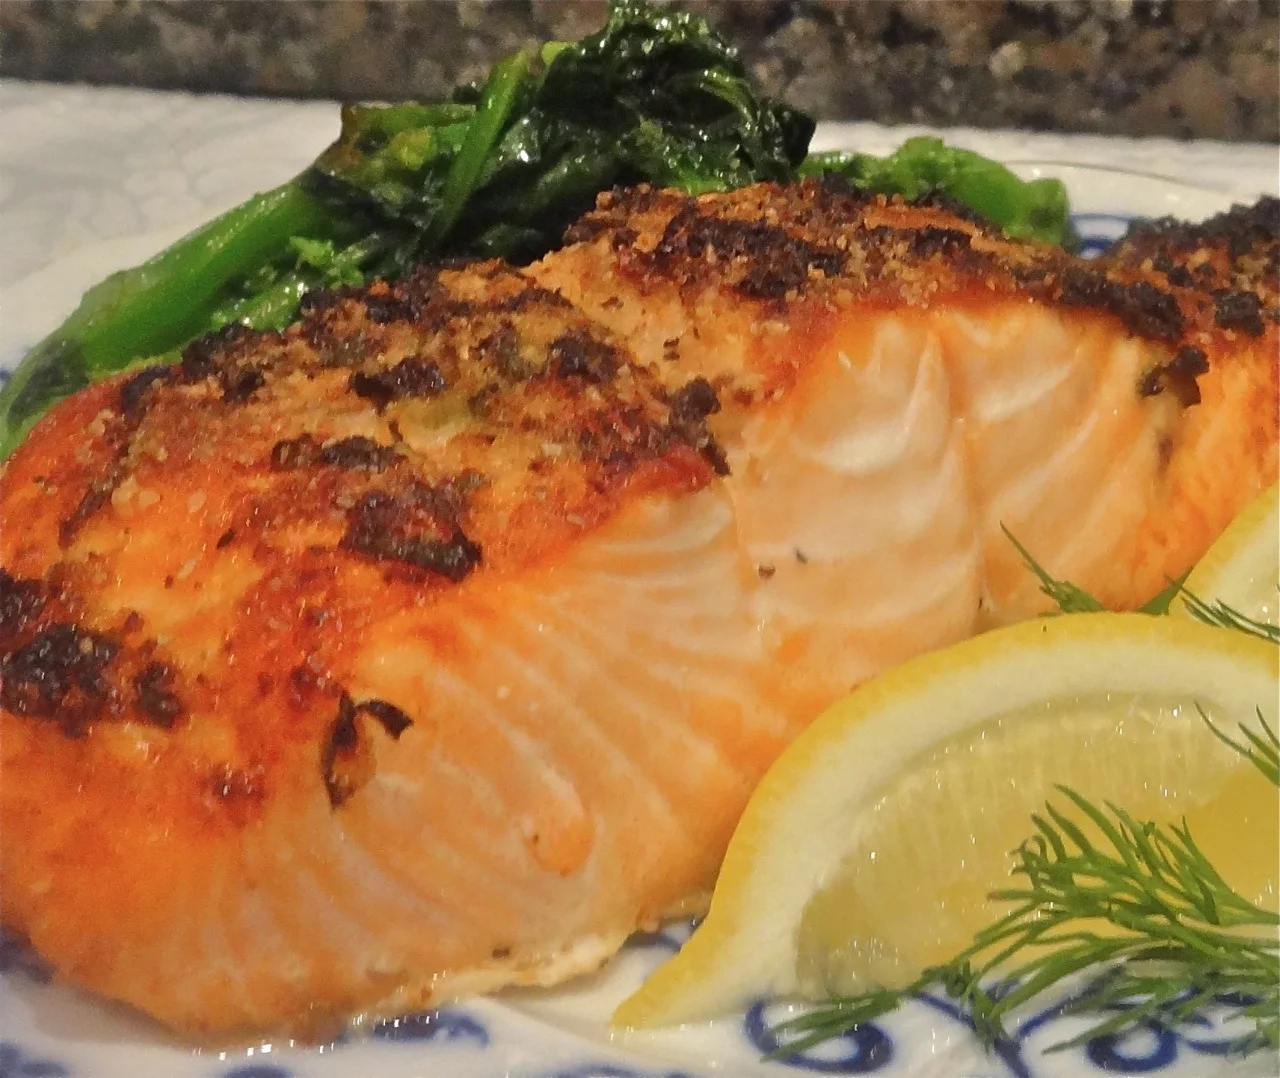
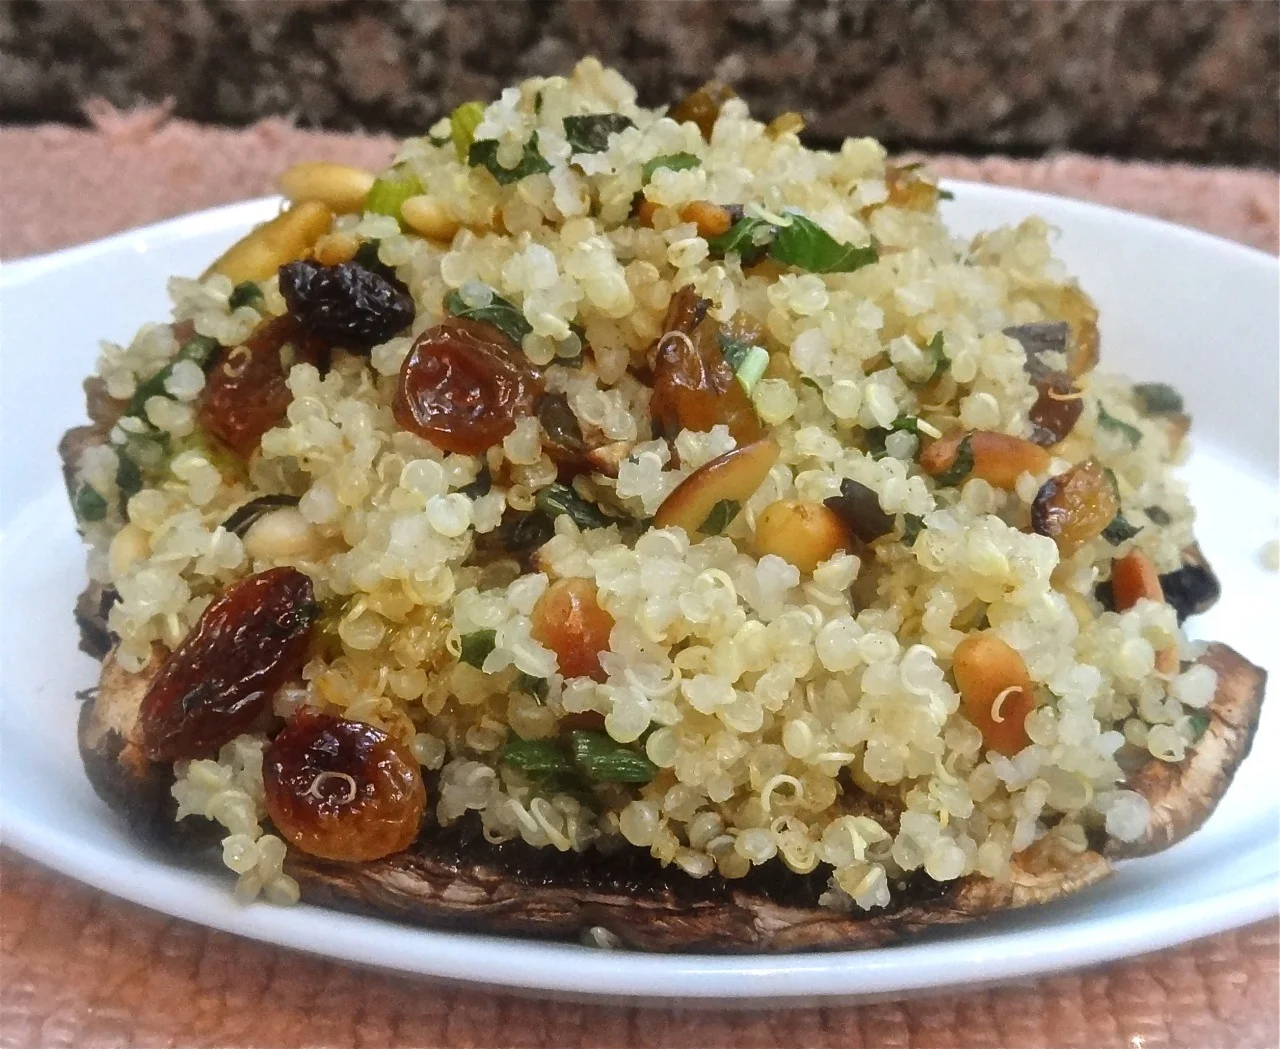
This Quinoa Stuffed Portobello Mushroom Cap is a satisfying, filling main course for vegetarian, dairy or meat meals during Passover or any other time of year. 


Quinoa Stuffed Portobello Mushroom Caps with Raisins and Pine Nuts


6 large Portobello mushroom caps

3 tablespoons olive oil

Salt and freshly ground black pepper to taste

4 thick scallions, chopped

1/4 cup pignoli nuts

1 large clove garlic, chopped

1/4 cup golden raisins

2 cups cooked quinoa

2 tablespoons chopped fresh mint

Preheat the oven to 350 degrees. Wipe the mushroom caps clean, remove the inedible steams and place them outside up on a baking sheet. Brush the outsides with about 1 tablespoon of the olive oil. Sprinkle with salt and pepper. Turn the caps over (the gills side up). Bake for 10 minutes or until softened. While the caps are baking, heat the remaining 2 tablespoons olive oil in a sauté pan over medium heat. Add the scallions and pignoli nuts and cook for 1-2 minutes. Add the garlic and raisins and cook for another minute. Add the quinoa and mint and cook briefly to distribute the ingredients evenly. Taste for seasoning and add salt and pepper to taste. Spoon equal amounts of the quinoa mixture onto each mushroom cap. Just before serving, bake the caps for 10-12 minutes or until the mushroom is tender.

Makes 6 servings


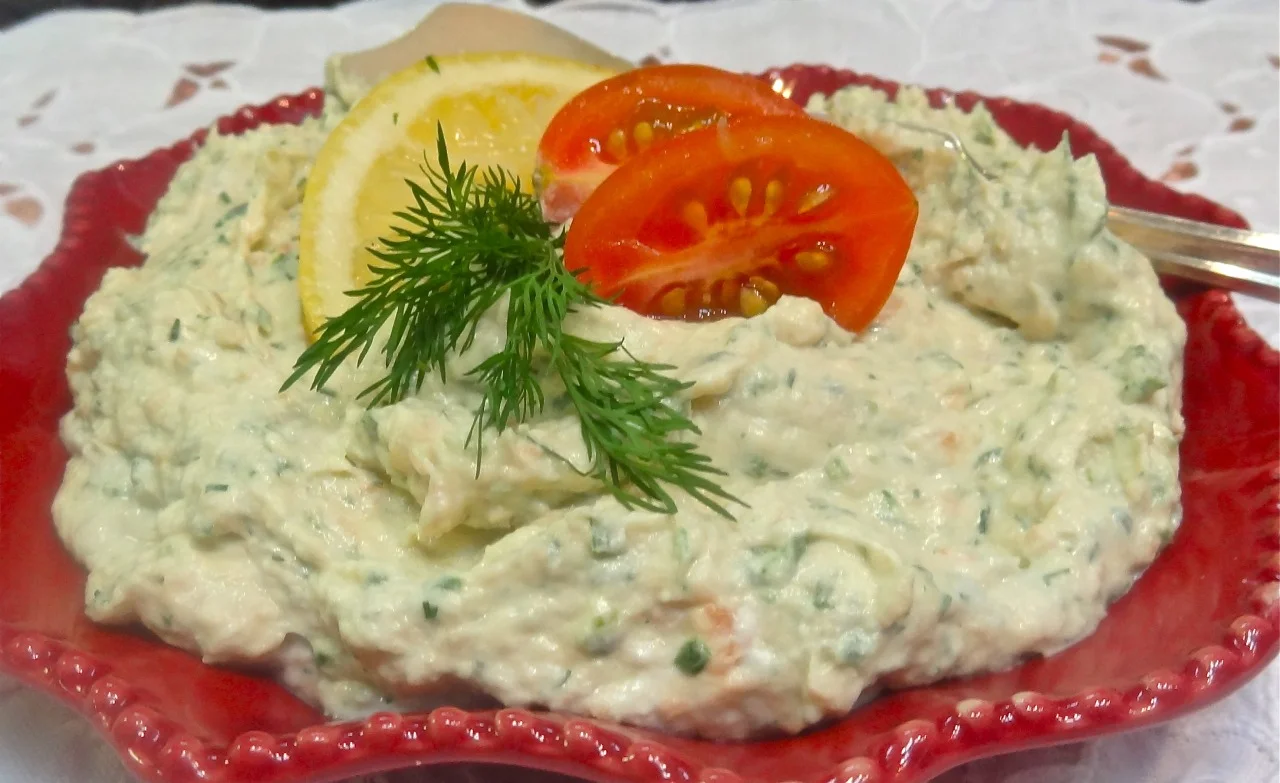
It’s beautiful too, don’t you think?


Egg Nibbles

Are you always rushing? On the go? Need a snack for your children (or yourself) while you’re out? Or a more substantial bite to eat?
Try these Egg Nibbles.
My daughter Gillian invented these because her kids had grown bored with breakfast and …

Are you always rushing? On the go? Need a snack for your children (or yourself) while you’re out? Or a more substantial bite to eat?

Try these Egg Nibbles.

My daughter Gillian invented these because her kids had grown bored with breakfast and there were the usual morning tantrums about what to eat. She wrote about it on her blog (www.lalalunchbox.com) and you can read about it here.

But basically, with three kids to get ready for the day, trips to school, winter attire zippered up, baby fed and so on and so on —- anyone who has ever had kids knows the morning routine —- sometimes you need a “to-go” breakfast or snack that the kids can nibble on instead of sitting down for a real meal.

Grownups too.

Yes, I understand that is not the proper way to have breakfast. But hey, as I just said, anyone who has ever had kids knows how it is.

It’s sometimes easier this way. And sometimes you need easy, right?

Give yourself a break and tote along some of these. 

Egg Nibbles

6 large eggs

1 avocado, peeled and cut into 1-inch chunks

1 tablespoon olive oil

1 cup raw, chopped spinach

1 clove garlic, chopped

1/3 cup chopped chickpeas, optional

salt and freshly ground black pepper to taste

Preheat the oven to 350 degrees. Line mini muffin tins with paper liners. Crack the eggs into a bowl, beat them until the mixture is uniform in color. Mix in the avocado pieces and set aside. Heat the olive oil in a small saute pan over low-medium heat. Add the spinach and garlic (and chickpeas, if used) and cook for about 3 minutes or until the spinach has wilted. Let the mixture cool slightly, then mix in with the eggs. Pour the mixture into the prepared muffin tins. Bake for about 20 minutes or until set and lightly golden brown on top. Makes 24

Lemon Almond Tea Cake

In the old days Passover desserts were the predictable two: macaroons or spongecake.

We’ve come a long way since then.

Not that I have anything against macaroons and spongecake. In fact, they rank right up there in the favorites category for me.

But now Passover desserts are so gourmet. And there’s lots to choose from and to cook or bake at home. I remember when flourless chocolate cake first appeared on the Passover scene. Now that seems old hat too. There’s so much more.

At any rate, I make a variety of different Passover desserts every year, some tried-and-true and always a couple of new ones. Some sweet with honey, some chocolatey. Some plain like this one for Lemon-Almond Cake. It’s a good choice after a heavy meal because it is light and fluffy and there’s no a sugar load of frosting or anything gooey.

This cake is wonderful as is. But of course, goes nicely with fresh fruit or sorbet or ice cream. Or with the Roasted Fruit Cocktail I wrote about yesterday. If you just can’t resist, there’s always a sauce you can pour on top, like zabaglione or caramel.

Lemon Almond Tea Cake

1-1/2 cups finely chopped almonds

1/2 cup potato starch

1 tablespoon kosher for Passover baking powder

2 tablespoons finely grated lemon peel

4 large eggs, separated

3/4 cup sugar

3/4 teaspoon of salt

1/2 cup vegetable oil

1/4 cup coconut oil, melted and cooled

6 tablespoons lemon juice

Passover Confectioner’s sugar 


Preheat the oven to 350 degrees.
 Lightly grease a 9-inch round cake pan and place a parchment paper circle on the bottom of the pan. Place the almonds in a bowl. Add the potato starch, baking powder and lemon peel and whisk ingredients thoroughly. Set aside. Place the egg yolks, sugar and salt in a food processor and process until thick and lighter in color. With the machine running, add the vegetable oil and melted, cooled coconut oil until all has been incorporated. Using the pulse feature, work in the ground almond mixture and lemon juice. Spoon the mixture into a large bowl. In another bowl (or bowl of an electric mixer), beat the egg whites until they are glossy and stand in stiff peaks. Mix about 1/3 of the beaten whites into the batter, to lighten it, then fold the remaining beaten whites into the batter. Pour into the prepared pan. Bake for 45-50 minutes or until a toothpick inserted into the center of the cake comes out clean. Place the pan on a cake rack. Let the cake cool in the pan. Remove from the pan. Dust with Passover confectioner’s sugar.

NOTE: you can make this without the baking powder; the cake will be more dense, but taste delicious


Roasted Fruit Cocktail

No matter how close you and your significant other are and how long you know each other, you didn’t discuss everything and so, when you finally settle into daily life together there are always some new discoveries.Like, he looked in the cabinet…

No matter how close you and your significant other are and how long you know each other, you didn’t discuss everything and so, when you finally settle into daily life together there are always some new discoveries.

Like, he looked in the cabinet for Wise potato chips but you bought Herr’s because that’s your favorite.

Little stuff like that.

With Ed and me the first difference we noticed were the assumptions about dessert that we had brought to the marriage.

I came from a coffee and cake family, he came from a canned fruit family. My mom baked often so there was always some wonderful pastry or other at the end of a meal (like her famous Fannies (butter cookies) or apple pie). Ed’s mom was a good cook, but not a baker. Their go-to dessert was canned fruit cocktail because it was Ed’s favorite.

Of course my mom served that occasionally too. Every kid I knew asked for extra of those carcinogenic red dye #2 maraschino cherries (of which there were always too few to satisfy all of us).

To this day Ed passes up the cakes, cookies and pies (which I find astonishing) and prefers the fruit cocktail. Although I have to say, in an effort to be a good wife I bought lots of that stuff in the early days and even he got sick of it.

But he does love fresh fruit cocktail and it is amazingly easy to make: cut up fresh fruit.

There, that’s the whole recipe. Fresh fruit usually doesn’t need much, if any, sugar, though it is easy to sprinkle some on. Or, you could go to the trouble of poaching a variety of different kinds and serving it with the syrup, a la the canned kind.

But my favorite fruit cocktail is this version, which starts out with roasted fruit. Roasting brings out the fruit sugars in a tantalizing way with hints of rum and molasses (do I sound like a wine taster talking?).

After a huge, heavy, meat-laden Passover Seder meal (or any big dinner), Roasted Fruit Cocktail is an excellent choice for dessert. I am in Ed’s corner on this one. I’ll save the cake and baked goods for later, when I’m less full. 

Roasted Fruit Cocktail

1 ripe fresh pineapple

2 fresh mangos

3/4 cup orange juice

1/4 cup honey

cinnamon

18-20 strawberries, hulls removed

1 cup seedless red grapes

1/4 cup chopped fresh mint

sorbet or ice cream, optional

Preheat the oven to 450 degrees. Line a jelly roll sheet with parchment paper. Set aside.

Using a chef’s knife, remove the leaves and hard outer shell of the pineapple. Cut the pineapple lengthwise into 1-inch thick strips. Using the knife, remove and discard the middle, fibrous core (from each slice you will be left with two strips of pineapple cut from both sides of the core). Place the strips on the parchment-lined jelly roll pan. 

Peel the mango and cut the flesh into strips. Set aside.

Place the orange juice and honey in a saucepan and bring to a boil over high heat. Lower the heat slightly and cook for 5-6 minutes or until the liquid is slightly thickened. Generously brush all surfaces of the pineapple strips with the orange juice mixture. Sprinkle with cinnamon. Roast for 4-5 minutes. Turn the strips over. Add the mango strips, strawberries and grapes to the pan. Brush with the remaining orange juice mixture. Roast for another 6-7 minutes or until fruit is soft and lightly caramelized. Remove the pan from the oven and let cool. Cut the pineapple and mango strips into bite size pieces. Place all the fruit and accumulated pan juices in a bowl, sprinkle with the mint and toss. Place into serving dishes. Serve plain or with sorbet or ice cream. Makes 8 servings


Quickie Hors D'oeuvre

Warmer weather means more company. At least at our house. Whether it’s Passover or Memorial Day or just a nice, sunny afternoon or balmy evening, there’s more entertaining to do.

And that means more food. Including hors d’oeuvre. Quickies. The kind you can make when you weren’t even expecting company. The kind you can whip up with a few household staples.

Like Temp Tee Whipped Cream cheese, which you can mix with all sorts of ingredients to create almost instant spreads and dips for crudites, chips, crackers, matzo. Whatever. 

I confess that Temp Tee hooked up with JoyofKosher.com and several food bloggers, asking us to create recipes using their product. It was amazingly easy for me to do though because I had been a fan for ages. I recently mentioned it in a post about when my mom “discovered” this product, and gave recipes for Inside Out Strawberries Romanoff and Baked Stuffed Potatoes.

For hors d’oeuvre it couldn’t be easier. Here’s how: place some of the cream cheese in a food processor (blender, hand mixer and bowl), add some flavoring ingredients and mix away until the spread is more or less uniform. To make a spread into a dip, mix in dairy sour cream or plain yogurt until it becomes the consistency you need.

Most of the time I use smoked or cooked salmon as the primary flavoring ingredient. (btw, you can buy the MUCH cheaper smoked salmon pieces that some stores sell rather than the expensive, hand sliced slices). But any smoked fish will do: trout, mackerel, bluefish. Because the smokey taste and the cream cheese richness are perfect together.

I always add some sort of onion: scallion, shallot, cooked leeks, red onion, plus citrus juice to give the spread a fresh zip of taste.

The other ingredients? You really don’t need any, but I always have horseradish or mustard in the house and frequently have dill or parsley in the fridge, so I add some for extra flavor. Or use freshly ground black pepper or a chili pepper.

It all works so well. You taste a little, add an ingredient, taste again and you make the spread the way you want it.

You don’t actually need fish. Deli items will do too: olives, marinated artichoke hearts, sun dried tomatoes, capers, pickles, and so on.

Same process: place the cream cheese plus deli item(s) in the food processor, add something oniony plus citrus juice and whirl away.

And there you have it.

Make entertaining easy on yourself with these recipes for Smoked Salmon and Dill Spread and Herbed Cheese Spread. You can use either spread as is or stuff into hollowed out vegetables like cherry or grape tomatoes, cucumber rounds, zucchini and so on.

Matzolah Pear Crisp

It doesn’t get easier than this dessert, especially during Passover when we are looking for something really delicious but there are so many restrictions to what we can eat.
This is pear crisp — which you could make with apples, peaches,…

It doesn’t get easier than this dessert, especially during Passover when we are looking for something really delicious but there are so many restrictions to what we can eat.

This is pear crisp — which you could make with apples, peaches, blueberries and every other fruit that you usually bake into a crisp. But the top crust is made with Matzolah.

Yep, Matzolah! It’s a kind of granola made with matzo. I tasted it at the Kosherfest food festival — where it won Best New “Kosher for Passover” product — and thought it was really yummy. Crunchy. Not overly sweet.

Foodman’s, the company that manufactures it using Streit’s matzos, bills this as a breakfast cereal or nosh (like trail mix). Which is, of course, just fine.

But you know me. One taste and I was thinking about the possibilities. So I asked the person who was giving out samples if she thought it would work for baking and she said “try it!” And she sent me a carton of the stuff.

Which I used for a couple of recipes and which, indeed, is terrific for baking.

Like for a crisp or cobbler or whatever you wish to call it. This is a dish that you can serve for breakfast or dessert. Or snack.

The crust is sweet (one of Matzolah’s ingredients is maple syrup) — but not overly so and not cloying. But I don’t add any extra sugar or other sweetener to the fruit; just a bit of orange juice. Then it’s just a matter of mixing the Matzolah with spices and a bit of butter, crumbling it over the fruit and putting it in the oven. 

How easy is that?!

Matzolah Pear Crisp

 4 large pears

1/4 cup apple or orange juice

1 cup Matzolah

1/2 teaspoon cinnamon

1/4 teaspoon freshly grated nutmeg

pinch or two of salt

1/4 cup butter or margarine


Preheat the oven to 375 degrees. Peel, core and slice the pears and place them in a casserole dish. Sprinkle with the juice and set aside. Toss the Matzolah, cinnamon, nutmeg and salt together in a bowl. Add the butter in chunks and work into the Matzolah mixture. Sprinkle the mixture on top of the pears. Bake for 35-40 minutes or until the top is golden brown. Makes 4 servings


Roasted Turkey

This is Gillian, my daughter and our family’s master carver.We are not that traditional family who always gives the task to the man of the house.Gillian is so good at this that no one else ever offers anymore, although my son-in-law Greg does a good…

Roasted Turkey carved by Gillian

This is Gillian, my daughter and our family’s master carver.

We are not that traditional family who always gives the task to the man of the house.

Gillian is so good at this that no one else ever offers anymore, although my son-in-law Greg does a good job on other meats.

We are a turkey-loving family, so Gillian gets lots of practice. 

It’s turkey for Passover, that’s for sure. It’s the family tradition, dating as far back as my grandmother, then my mother and now me. (though I would guess that my grandmother’s mother, who lived in the “old country” (Iasi, Romania) probably didn’t make a turkey on Passover.

I make turkey parts (breasts, thighs and so on) when it’s just a few of us for dinner. But when the whole family gets together, I prefer a whole, roasted bird. Fortunately some of us like dark meat, some white. We even eat the neck and giblets (that I roast right along with the bird).

Although I season the turkey lots of different ways, depending on the occasion, for Passover I use the family standard: a few sprinkles of salt, pepper, garlic and paprika; baste with orange juice (or mango, apple, pineapple juice).

It’s simple and easy. The juices make wonderful gravy too.

I never put a foil tent over the bird when it’s roasting. It makes the meat too wet and steamy. I have found that by roasting the bird backside up for about half the time, then turning it over, the skin doesn’t scorch, so there’s no need for a tent.

Be sure to use a meat thermometer. It’s the best way to be sure that you don’t overcook the turkey. I don’t trust the “pop-up” devices. They are programmed for too high a temperature and by the time they pop up the turkey is overcooked and dry.

Another tip: let the turkey rest for at least 15 minutes before you carve it. This lets the juices stay inside to keep the meat moist. Also, it’s easier to carve. The temperature will go up a couple of degrees during this resting period.

Roasted Turkey

  • 1 turkey, 12-15 pounds

  • 2 tablespoons olive oil or vegetable oil

  • salt, freshly ground black pepper, garlic powder and paprika

  • 1 cup orange juice, apple juice, white wine or chicken stock

Preheat the oven to 350 degrees. Remove the plastic bag of giblets from inside the turkey. Wash the giblets and set them aside. Wash the inside of the turkey thoroughly. Wash the skin and remove any obvious hairs and pinfeathers. Wipe the surface of the turkey with paper towels and brush the skin with the olive oil. Place the turkey breast-side up on a rack in a roasting pan. Sprinkle with salt, pepper, garlic powder and paprika (you don’t need to measure these spices, just dust the surface with them). Turn over the turkey and sprinkle the back with the seasonings. Keep the turkey breast-side down. Roast the turkey for 45-50 minutes. Baste with pan juices and pour the orange juice (or other liquid) over the bird. Roast for another 45-50 minutes. Baste the turkey and turn it breast-side up. Roast the turkey until a meat thermometer inserted into the thickest part of the thigh registers 165 degrees (or a meat thermometer in the breast reads 160 degrees), or when the juices run clear when the thigh (or breast) is pricked with the tip of a sharp knife (12-15 pound turkey should take 3-3-1/2 hours). After you turn the turkey breast-side up, baste it every 15-20 minutes, stopping about 1/2 hour before you expect the turkey to be done.

Yield: general rule is one pound of whole turkey weight per person (a 12-15-pound turkey will feed 12-15 people, for example)

Broiled Salmon with Horseradish Crust

Several years ago Ed and I traveled to Ireland, a most wonderful and almost magical place with interesting things to see, friendly people and the most gorgeous green countryside that makes it truly the emerald isle. It rains practically every day, b…

Several years ago Ed and I traveled to Ireland, a most wonderful and almost magical place with interesting things to see, friendly people and the most gorgeous green countryside that makes it truly the emerald isle. It rains practically every day, but only for an hour or so and then the sun comes out and everything is beautiful.

I’ve heard people complain about Irish food. My friends who are Jewish and Italian and Polish are always talking about their grandmother’s this and their mother’s that recipe. There’s always more than a tinge of pride as they mention the matzo balls or marinara sauce or pierogies. But when I mentioned the delicious food in Ireland to an Irish friend she said “Impossible. There’s no such thing as Irish cuisine.”

I beg to differ.

In Ireland we had the most wonderful, fresh-from-the-water salmon. It was so good we ate it practically every day. And the potato dishes are awesome. Also the breads, the salads and desserts.

So, in honor of St. Patrick’s Day coming up in a few days, here’s a really simple recipe for Broiled Salmon. To paraphrase an old Levy’s Jewish Rye Bread ad, you don’t have to be Irish to love it. In fact, this recipe, with its matzo meal crust, is perfect for Passover.

Broiled Salmon with Horseradish Crust

6 salmon filets, 5-6 ounces each

2 tablespoons vegetable oil

2 tablespoons finely grated fresh horseradish (or use bottled white horseradish, press out the juice)

3-4 chopped scallions (or 3 tablespoons chopped chives)

2 tablespoons matzo meal (or bread crumbs)

salt and freshly ground black pepper to taste

Preheat the oven broiler. Lightly grease a cookie sheet and put the filets on top. Mix the vegetable oil, horseradish and scallions and brush the salmon with this mixture. Sprinkle with the matzo meal. Broil the salmon for about 8 minutes or until the fish is nearly cooked through and the crust is lightly golden brown. NOTE: If you prefer, you can roast the salmon in a preheated 475 degree oven for about 18 minutes. Makes 6 servings

Lemon-Parmesan Roasted Cauliflower

The cauliflowers have been so beautiful lately that …
Oh wait. Am I really raving over how a vegetable looks?
It sounds funny, even as I am writing this, to talk about cauliflower and beauty in the same sentence. But there it is. When a caulif…

The cauliflowers have been so beautiful lately that …

Oh wait. Am I really raving over how a vegetable looks?

It sounds funny, even as I am writing this, to talk about cauliflower and beauty in the same sentence. But there it is. When a cauliflower is fresh and the head is creamy white (unless it’s a green or purple cauliflower and then of course I would be saying green or purple) and the florets are compact and tight and the green leaves are crisp and moist looking, then yes. A cauliflower is beautiful.

I’ve bought a few in recent days.

They are as delicious as they are tasty. There is something wonderful about food that’s fresh, isn’t there? And fresh cauliflower is so easy to cook.

So I’ve been cooking with it. 

My kids have been roasting vegetables at their house, so I roasted some cauliflower in mine. This dish was especially tasty because of the extra cheese added near the end; the cheese gives the vegetable a nice tang and some extra crispiness. But of course you can skip the cheese and just leave the lemony-roasted part and that’s good too.

Lemon-Parmesan Roasted Cauliflower

1 small head cauliflower

2 tablespoons olive oil

2 tablespoons lemon juice

2 teaspoons chopped fresh rosemary

1 teaspoon grated fresh lemon peel

1/4 cup grated Parmesan cheese

salt to taste

Preheat the oven to 400 degrees. Line a cookie sheet with parchment paper. Remove the green leaves at the bottom of the cauliflower and trim most of the fibrous stem attached to the head. Slice the head into 1/2-inch slices; rinse and dry the slices on paper towels. Combine the olive oil, lemon juice, rosemary and lemon peel in a large bowl. Add the cauliflower slices and toss to coat them completely. Place the cauliflower slices in a single layer on the parchment. Roast for 10 minutes. Sprinkle with the Parmesan cheese and salt to taste. Roast for another 20 minutes or until tender and crispy. Makes 4 servings

Nutmeg Whiskey Cake

Yesterday, when I wrote about spice blends and gave a recipe for Baharat, a specialty from the Middle East, I said that I usually buy pre-ground spices and mix them, rather than grind my own.

Well, I realized that’s not quite the case. There are certain spices that I never buy pre-ground because as soon as you grind them they start to deteriorate and lose flavor.

Like nutmeg.

I never buy ground nutmeg. By the time you get it in the tin it is a mere shadow of itself and never gives you that rich, heady, mysterious quality that you get from freshly grated nutmeg. Neither the fragrance or the flavor is right.

Take this tip: buy a nutmeg grater and grate your own nutmeg. There are cheap, old fashioned ones (see the first photo) and fancier ones that work more or less like peppermills (second photo).

I buy nutmegs by the bag. The whole ones last forever I think. Every time I need nutmeg for a recipe I grate it just when it’s called for in the instructions. Most of the time you just need a little bit of it to bring out the flavor of a dish, so it’s not as if you will have to spend oodles of time grinding. It’s worth doing and even a tiny grating or two makes an enormous difference to foods as different as macaroni and cheese, gingerbread and squash soup.

Although most of the time you only use a grating or two of nutmeg, there are recipes where it plays a prominent role. This Whiskey Cake, for example. It’s a nice snack, tea bread type of cake that you’re supposed to eat plain, but you could certainly dress it up with fresh berries and whipped cream or a scoop of ice cream or Creme Anglaise sauce.

Nutmeg Whiskey Cake

2 cups all-purpose flour

1 teaspoon baking soda

1 teaspoon grated fresh nutmeg

1/2 teaspoon ground cinnamon

1/8 teaspoon ground allspice or cloves

1/2 teaspoon salt

1/2 cup Earth Balance buttery spread (or butter)

3/4 cup packed brown sugar

3 large eggs, separated

1/2 cup whiskey

1/3 cup coconut milk (or regular milk)

1 cup finely chopped nuts

1/4 cup sugar

Preheat the oven to 350 degrees. Lightly grease a 9”x5”x3” loaf pan. Sift the flour, baking soda, nutmeg, cinnamon, allspice and salt into a bowl. Set aside. Place the spread or butter and brown sugar in the bowl of an electric mixer and mix at medium speed for 2-3 minutes or until creamy and well blended. Add the egg yolks, one at a time, beating after each addition. Combine 1/3 cup of the whiskey with the milk and add this liquid to the brown sugar mixture alternating with the flour mixture and continue to blend the ingredients at medium speed until the batter is smooth, creamy and well blended. Stir in the nuts. In another bowl, beat the egg whites at medium speed until they are foamy. While still beating, gradually add the sugar and continue to beat until the mixture is glossy and stands in stiff peaks. Fold the beaten whites into the batter. Pour the batter into the prepared pan. Bake for 50-55 minutes or until a cake tester inserted into the center comes out clean. Remove the cake from the oven and brush the top with the remaining whiskey. Let the cake cool in the pan for 10 minutes, then invert onto a cake rack to cool completely. Makes one loaf