dairy

Classic Strawberry Shortcake

I know it was Julia Child’s 100th birthday this week and she was an important person in my life. Although it was my Mom who taught me the basics, Julia taught me to take giant leaps beyond. I didn’t cook every recipe in her first volume of Mastering…

I know it was Julia Child’s 100th birthday this week and she was an important person in my life. Although it was my Mom who taught me the basics, Julia taught me to take giant leaps beyond. I didn’t cook every recipe in her first volume of Mastering the Art of French Cooking, but I did make many of them. A boyfriend had given me that book — a treasured first edition — which is now gravy stained and coverless and signed by Julia herself on one of my favorite recipes (I met her when I took a cooking course along with several hundred other people like in some College 101 class).

So, Happy Birthday Julia.

But this week was also a friend’s birthday. A what you call “round number” birthday, so I invited her to my house, along with another friend, who recently celebrated that same round number birthday. We had a few hors d’oeuvre with a nice few glasses of wine, then grilled fish with Grilled Pineapple Salsa (and a few vegetables) for dinner.

SO healthy. We are all at that nice round number watch-what-you-eat age.

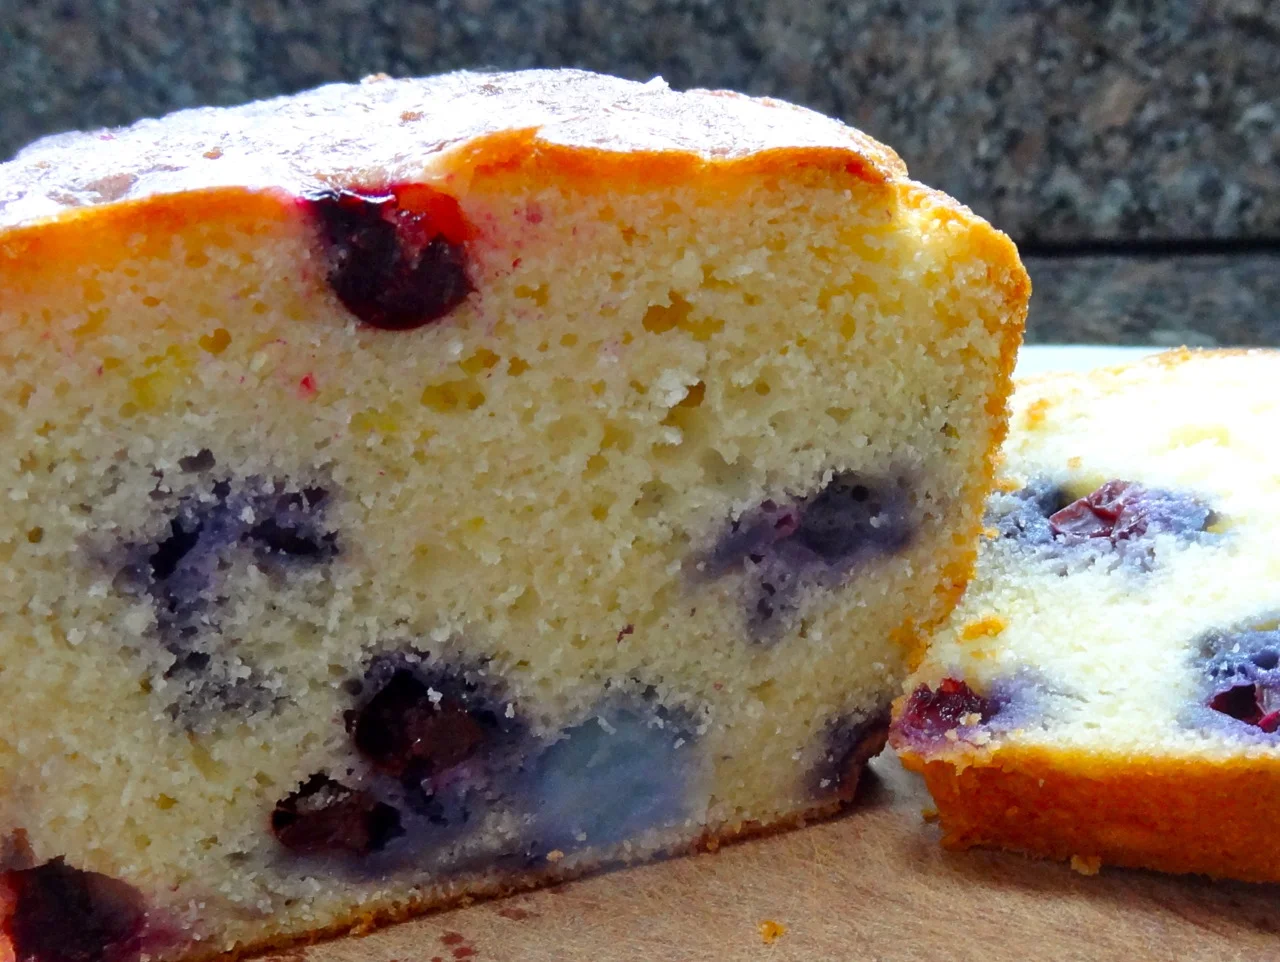
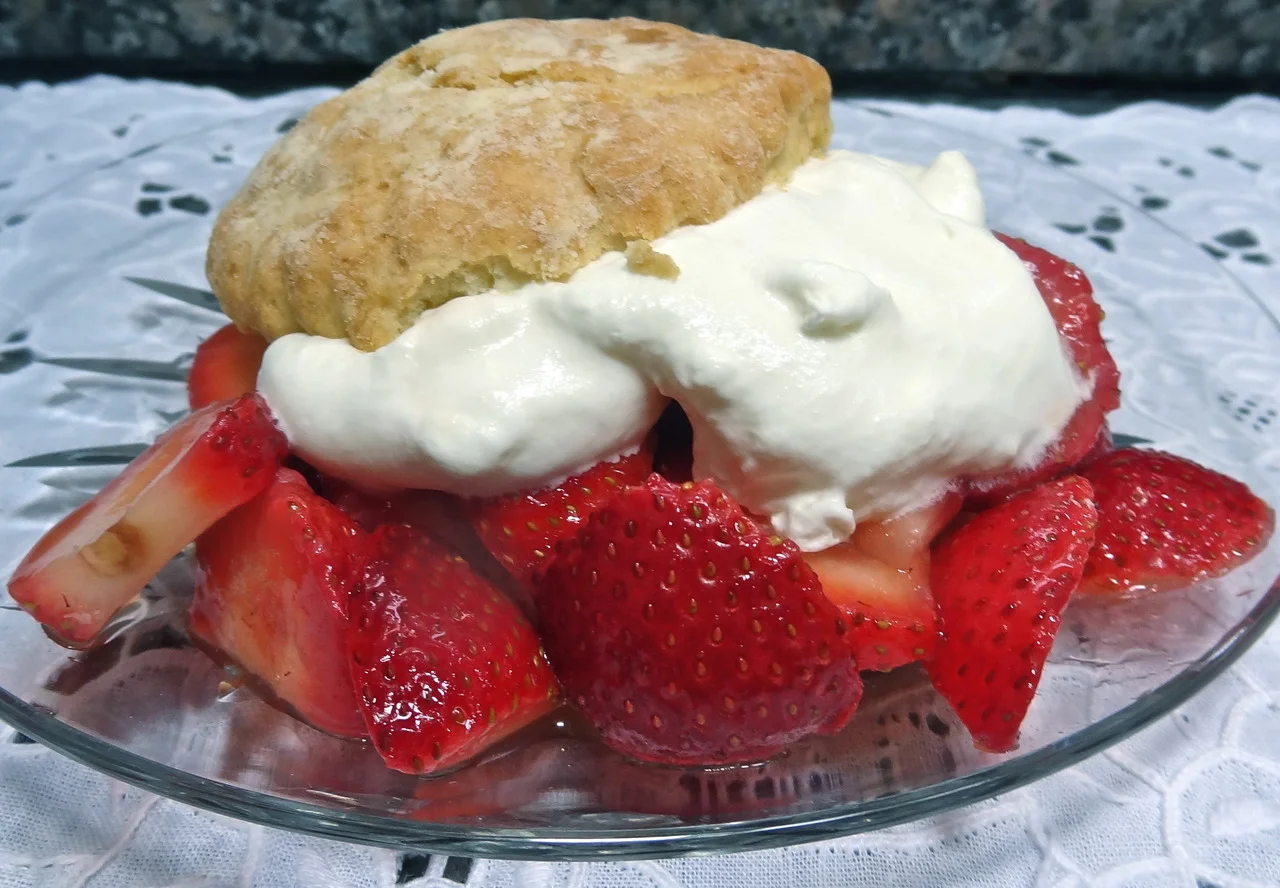
But dessert? Oh well. Why count calories when summer strawberries are out and you can eat Strawberry Shortcake?

Which is what I made instead of baking or buying a birthday cake.

Not a morsel was left on our plates.


Classic Strawberry Shortcake

2 pounds fresh strawberries
3 tablespoons plus 1 teaspoon sugar
orange, mango or papaya juice
2 cups all-purpose flour
3/4 teaspoon salt
2-1/2 teaspoons baking powder
1-1/2 teaspoons finely grated fresh lemon peel
6 tablespoons unsalted butter, cut into small pieces
1 large egg
1/2 cup milk
1 cup whipping cream

Preheat the oven to 450°F. Wash the berries and slice them into a bowl, sprinkle them with 2 tablespoons sugar and a few tablespoons of juice and set aside. In another bowl, mix the flour, 1 tablespoon sugar, salt, baking powder and lemon peel. Add the butter and work into the dry ingredients until the mixture resembles coarse meal. In a small bowl, beat the egg and milk together until well combined. Add the liquids to the flour mixture and mix until a soft dough forms. Roll or press the dough to 1/2-inch thick circle on a lightly floured surface. Cut out 8 circles with a cookie cutter. Place the circles on an ungreased cookie sheet. Bake for 12–15 minutes or until puffed and lightly brown. Remove from the oven and let cool. Whip the cream with the remaining teaspoon sugar until the mixture stands in soft peaks. Cut the biscuits in half and place each bottom half on a serving dish. Place the berries and any accumulated juices on top. Pour some of the cream on top. Top with the remaining biscuit halves. Makes 8 servings.

Milk and Honey White Bread

95954099_2581425922125465_2398630099697008640_n.jpg
Milk and Honey Bread

Milk and Honey Bread

Sometimes I’m just bored with all food. It frequently happens after a summer’s worth of grilling and when roasting a turkey or making a hearty stew doesn’t seem right yet.

Also, the tomatoes are coming in now. Real tomatoes. Red, red ones. Aromatic, juicy, sweet, oozing seeds tomatoes. Late August tomatoes.

Then, for dinner, at least one night, I can make tomato sandwiches. Nothing special. I have no need for $40 olive oil or rare, aged Balsamic vinegar. No chili pepper additions. No teriyaki or hummus. No fusion version.

Just white bread, mayo and sliced tomatoes.

Nothing more. Life is sweet.

Packaged (not soft white) or bakery white bread will do. But if you like to bake and have a few moments, here’s a recipe for a spectacular bread that measures up to a good tomato.

Milk and Honey White Bread

  • 1 package active dry yeast

  • 1/4 cup warm water (105-110 degrees)

  • 1/4 teaspoon sugar

  • 4 cups all purpose flour, approximately

  • 1-1/2 teaspoons salt

  • 2 large eggs

  • 2 tablespoons softened butter or vegetable oil

  • 3/4 cup warm milk

  • 2 tablespoons honey

In a small bowl, mix the yeast, water, sugar and 1/2 teaspoon flour. Stir, set aside and let rest for 5 minutes or until the mixture is bubbly. In a bowl of an electric mixer, combine the remaining flour and salt. Add the eggs, butter, milk and honey. Add the yeast mixture. Blend ingredients thoroughly, then knead using the kneading hook, for 4-5 minutes or until the dough is smooth and elastic (or knead by hand for about 10 minutes). Add more flour as necessary to keep the dough from being sticky. (Dough may be made in a food processor). Cover the bowl of dough and put it in a warm place to rise for about 1-1/2 hours or until doubled in bulk. Punch down the dough, cover the bowl and let rise again for about 30 minutes or until doubled. Lightly oil a 9” loaf pan. Place the dough in the pan. Let rise in a warm place for 30 minutes. Preheat the oven to 350 degrees. Bake for about 25 minutes or until firm and golden brown.

Makes one

Herb and Cheese Gougeres (Choux Puffs)

Gougeres are the easiest and also the hardest hors d’oeuvre to cook.I say that because they are easy to make once you get the knack. But I admit, they’re a little tricky for first-timers, so you need a few pointers. Which I am going to give you here…

Gougeres are the easiest and also the hardest hors d’oeuvre to cook.

I say that because they are easy to make once you get the knack. But I admit, they’re a little tricky for first-timers, so you need a few pointers. Which I am going to give you here.

Then once you make them a couple of times you can practically do it in your sleep.

Also, gougeres are extremely useful. I serve them plain, heated to a crisp. But sometimes I serve them at room temperature, cut open and stuffed with all sorts of fillings from plain old egg salad to toasted nuts with cheese or smoked salmon tartare.

And sometimes I fill them with things like mushroom ragout or ratatouille and serve them hot.

Of course, if you make the gougere dough without the herbs and cheese they are …. profiteroles. Which you can fill with ice cream!

Or you can make bigger ones and fill them with ice cream, whipped cream or custard, the way my mother did, and call them Cream Puffs.

It’s all the same dough. The method is the same, so once you get the knack you have this extraordinarily versatile recipe.

I always have gougeres in my freezer. Just in case company comes. Like my daughter Meredith, who loves them and always heats up a few for herself when she’s here.

Or for dinner company or weekend guests, which I am having this weekend.

Or to celebrate Bastille Day, tomorrow, because, well, this is a French recipe. Called choux.


Herb and Cheese Gougeres (Choux Puffs)

1 cup minus 2 tablespoons water

1/4 pound unsalted butter, cut into chunks

1 cup all purpose flour, sifted

3/4 teaspoon salt

4 large eggs

1-1/2 tablespoons chopped fresh mixed herbs, or 1-1/2 teaspoons dried

1/2 cup grated Parmesan or Gruyere cheese

pinch cayenne pepper

egg glaze: 1 large egg mixed with 2 teaspoons water, optional

Preheat the oven to 425 degrees. Cook the water and butter in a saucepan over medium heat. When the butter has melted, add the flour and salt all at once. Stir vigorously with a wooden spoon until the mixture is well blended and begins to come away from the sides of the pan. Remove pan from the heat and let the mixture cool for 2-3 minutes. Beat in the eggs one at a time, blending well after each addition.* Add the herbs, cheese and cayenne pepper and blend them in thoroughly. 

Butter and flour a baking sheet. Drop 3/4 to 1-inch mounds of dough from a teaspoon onto the sheet. Leave space between the mounds for the puffs to rise. For a shiny surface on the puffs, lightly brush the tops of the mounds with some of the egg wash. Bake for 18-20 minutes or until the puffs are lightly brown and crispy. Lower the heat to 300 degrees and bake for another 5-6 minutes. Turn off the heat but leave the puffs in the oven for 3-4 minutes. Serve hot or at room temperature. Or cut them open and fill them. Makes about 60

*Incorporating the eggs is what most people find difficult. Be sure to add them one at a time. Use a sturdy wooden spoon to help you. The mixture will be sticky and at first you think it will never come together, but keep mixing and you’ll see that it does come together. After each egg is incorporated the mixture becomes softer and pastier and stickier. That’s the way it’s supposed to be.

Milk and Honey White Bread

IMG_4602.jpeg

Would you believe — there’s a book entirely devoted to white bread. It’s called, (of course), “White Bread” and has a cover reminiscent of a loaf of packaged Wonder Bread.

I thought the scorn for white bread was something new. But according to the author, Aaron Bobrow-Sprain, apparently there’s been a lot of controversy about this stuff on and off for centuries. Some of it had to do with food safety issues. But some of it had to do with racism (one health advocate apparently thought white bread was “threatening white racial superiority”).

Who knew?

When I was growing up my Mom would buy bakery rye bread and something called “corn bread” which isn’t that yellow, cakey Southern style stuff but more like sour-dough rye bread and was known in Jewish neighborhoods as “Jewish corn bread.” Those were for having with dinner. Or toasting for breakfast. Or for deli sandwiches.

But she bought packaged white bread too. It was the modern thing. The help-the-little-lady convenience food. It was too convenient not to buy. And there weren’t very many choices in packaged bread anyway. Maybe whole wheat, but I didn’t know anyone whose mother bought packaged whole wheat bread.

My mother bought packaged white bread for this reason (which Bobrow-Sprain also acknowledges), and that is, there are certain kinds of sandwiches that just don’t work with rye, corn bread or any kind of fancy artisinal loaves.

Like peanut butter and jelly and mostly, my mother’s fried-to-a-crisp kosher salami with yellow mustard. That salami was hot and sizzling, right out of the pan when she put it on the mustard-slathered slices and when you held the sandwich to take a bite, your fingers would make such deep indentations in the soft bread that sometimes it made a hole in the sandwich. Never mind. That’s the way it was supposed to be with packaged white bread.

I could actually have one of those sandwiches now. It’s been years.

No, decades.

Generations.

I don’t remember when I last bought packaged white bread. 

I do bake white bread though. With one of my help-the-little-lady convenience machines like my KitchenAid mixer and my Cuisinart food processor. With either of those it’s not that difficult to make a good loaf of bread.

I don’t agree with those who say white bread is bland. Sometimes it’s the ingredients on the bread that you want to give a starring role, not the bread itself. Like that fried salami.

So, for any of you who would like to have a good white bread, try this recipe.

Milk and Honey White Bread

  • 1 package active dry yeast

  • 1/4 cup warm water

  • 4 cups all-purpose flour, approximately

  • 1/4 teaspoon sugar

  • 1-1/2 teaspoons salt

  • 2 large eggs

  • 2 tablespoons softened butter

  • 3/4 cup warm milk

  • 2 tablespoons honey

  • 1 egg beaten with 1 teaspoon water

Place the yeast and 1/4 cup water in a small bowl. Add 1 teaspoon flour and the sugar. Mix well and set aside for about 5 minutes. In the bowl of an electric mixer, combine the remaining flour and salt. Add the 2 eggs, butter, milk, honey and the yeast mixture. Blend ingredients thoroughly. Knead until the dough is smooth and elastic, adding more flour if the dough seems too sticky. Dough should be soft but not sticky. Place the dough in a bowl, cover and let rise in a warm place for about 1-1/2 hours or until doubled in bulk. Punch down the dough, knead briefly and let rise again for 20 minutes.

Preheat the oven to 350 degrees. 

Lightly grease a 9” loaf pan. Place the dough inside the pan. Let rise for another 30 minutes. Brush the surface of the bread with the beaten egg. Bake for about 30 minutes or until golden brown and well risen.

Makes one loaf

Macaroni and Cheese

What do I cook when the grandkids come for a visit? Well, lots of things depending on which one, but I know I am safe if I have some Macaroni and Cheese on hand. Just in case.

All of my grandchildren like Macaroni and Cheese.

Doesn’t everybody?

If I have time, I make the recipe ahead and freeze portions in one-serving casserole dishes, then thaw and bake them until they’re hot enough.

Macaroni and Cheese is easy enough to make. And yet people ask me questions about it all the time. Mostly about the sauce separating or feeling grainy or gritty. So, here’s some tips for would-be Macaroni and Cheese makers out there. Followed by my standard recipe.

1. You can use a variety of cheeses, even blue-type cheeses, which give the dish a tangy taste. Although most people use cheddar by itself, that can make the texture grainy.

2. Use young cheeses such as asiago, non-aged cheddar, havarti, muenster, non-aged gouda, and so on. These have more water content than aged, older, drier cheeses and melt more easily, keeping the mixture stable.

3. Include American cheese; adding a bit of American cheese to the mix can stabilize the sauce too.

4. Use whole milk rather than skim because fat serves as a stabilizer.

5: Shred, chop or grate the cheese so that it melts more easily when you add it to the hot white sauce. Only add a little at a time and mix it in thoroughly before adding more. If you add cheese all at once there’s more of a tendency for the sauce to separate.

Macaroni and Cheese

  • 8 ounces elbow macaroni

  • 3 tablespoons butter

  • 3 tablespoons all-purpose flour

  • 2 cups whole milk

  • 1/2 teaspoon salt or to taste

  • pinch or two of freshly grated nutmeg

  • 4 ounces American cheese, shredded or chopped

  • 2 ounces Muenster, Gouda or a blue-veined cheese, shredded, chopped or crumbled

  • 2 ounces sharp cheddar cheese, shredded or chopped

  • 1/2 cup grated cheddar cheese

Preheat the oven to 350 degrees. Cook the macaroni until it is al dente, drain and set aside. In a saucepan melt the butter over low-medium heat. When it looks foamy, add the flour and cook, stirring constantly, for 2 minutes, without letting the mixture become brown. Gradually add the milk and stir constantly using a whisk until the sauce is smooth and thickened. Stir in the salt, nutmeg, American cheese, Muenster (or other) cheese and 2 ounces of cheddar cheese and whisk the sauce until the cheese has melted and the sauce is smooth. Stir the sauce into the cooked macaroni. Spoon into a baking dish and top with grated cheddar cheese. Bake for a few minutes until the grated cheese is hot and melty or the bread crumbs are golden brown.

Makes 4 servings

Eggless Lemon-Blueberry Tea Bread

Even the most experienced home cooks make mistakes.Like the one I made yesterday. I decided to bake a Lemon-Blueberry Tea Bread and as soon as I put the pan in the oven I realized I had left the eggs out of the batter.Wow! That’s a biggie.I did that…

Eggless Lemon Blueberry Bread

Even the most experienced home cooks make mistakes.

Like the one I made yesterday. I decided to bake a Lemon-Blueberry Tea Bread and as soon as I put the pan in the oven I realized I had left the eggs out of the batter.

Wow! That’s a biggie.

I did that once before, many years ago and made the big mistake of retrieving the loaf pan, scooping the batter back into a bowl, mixing in the eggs and then baking the bread as if nothing had happened.

Unfortunately, after the bread baked and cooled down, biting into a slice was like chewing day-old used bubble gum.

This time I just let the bread bake with a “let’s see what happens” kind of attitude.

The results were astonishingly surprising. What a boon for people who can’t eat eggs! This Lemon-Blueberry Tea Bread is delicious. Firmer, denser than one made with eggs, but tasty and tender without them.

So, here’s the recipe, including the eggs, but for egg-free diets — just leave the eggs out.

Lemon-Blueberry Tea Bread

  • 4 tablespoons butter

  • 3/4 cup sugar

  • 2 large eggs (optional)

  • 2 cups all-purpose flour

  • 2-1/2 teaspoons baking powder

  • 3/4 teaspoon salt

  • 1 tablespoon finely grated fresh lemon zest

  • 1 cup milk

  • 1 cup blueberries

  • 1/4 cup fresh lemon juice

  • 1-1/2 tablespoons sugar

Preheat the oven to 350 degrees. Grease a 9”x5”x3” loaf pan. In the bowl of an electric mixer, beat the butter and 3/4 cup sugar at medium speed for 1-2 minutes or until well combined. (Add the eggs and beat them in). Mix the flour, baking powder, salt and lemon zest in a small bowl. Add the dry ingredients to the creamed mixture in thirds, alternating with the milk. Beat to blend the ingredients to a smooth, even batter. Fold in the berries. Spoon the batter into the prepared pan. Bake for about 55 minutes or until a cake tester inserted into the center comes out clean. While the bread is baking, combine the lemon juice and 1-1/2 tablespoons sugar in a small saucepan and cook over medium heat for 1-2 minutes or until the sugar has dissolved. When the bread comes out of the oven, pour the lemon juice mixture on top. Cool the bread in the pan for 10 minutes. Invert onto a cake rack to cool completely.

Makes one bread

Chocolate Truffles

DSC09699.jpg

Chocolate instead of broccoli to stay healthy?

No, not really. But in a recent study the results indicated that eating chocolate might cut a woman’s risk for stroke. Read about it here.

This is not the first time I’ve heard that chocolate is healthy (it has flavanoids, which have anti-oxidant properties, which in turn help lower LDL (bad) cholesterol).

But this is the one of the only times I’ve heard someone caution women not to over-interpret the results. Like, do not substitute chocolate for broccoli. And a cardiologist who was interviewed said that although chocolate may be good for you, maybe the study results would have been similar if they used apple skins or grapes.

I’ve always wondered about some of these studies. I wonder whether you can prove whatever you want depending on how you go about the study.

Well, I am no scientist, so I don’t know.

But I do remember, many years ago, when the information regarding dietary fat was still in its infancy and Nabisco came out with SnackWells, the so-called “healthy” cookies because they were lower fat. And people started eating SnackWells because they thought it was okay. And judging from the number of people I met (and watched at the supermarket) who ate boxes and boxes of those cookies, most didn’t seem to realize that it’s way too many calories and that it might be more harmful than if you ate a butter cookie or two.

So the broccoli warning makes sense.

But if you want to eat something delicious and chocolate-y — for your health — try these truffles. They are amazingly easy to make and you can give them away as gifts so they’re good for the upcoming holiday season.

But don’t eat the whole batch at once.

Chocolate Truffles

  • 1/2 pound semisweet or bittersweet chocolate
  • 3/4 cup heavy cream
  • 4 teaspoons brandy or rum or 1 teaspoon vanilla extract
  • 5 tablespoons butter at room temperature
  • 1/2 cup unsweetened cocoa powder, sprinkles, toasted coconut, ground nuts, etc. (approximately)

Chop the chocolate in a food processor into small bits. Heat the cream over medium heat until it is hot and bubbles form around the edges of the pan. With the processor on, pour in the cream through the feed tube and process  until well blended (you may have to scrape the sides of the bowl once or twice). Refrigerate the mixture for 30 minutes. Add the brandy or rum and the softened butter and blend them in thoroughly. Spoon the mixture into a bowl and refrigerate for at least one hour or until the mixture has firmed enough to form a soft “dough.” Take small pieces of the dough and shape into small balls. Place the balls on waxed paper or aluminum foil on cookie sheets. Refrigerate until firm, at least 30 minutes. Roll the balls in cocoa, sprinkles, etc.

Makes about 3 dozen. 

Buttermilk Herb Slaw

I am constantly amazed at how creative people can be with food.

Take cole slaw. As a kid I remember cole slaw as that deli stuff with shredded cabbage and carrots in a thin white liquid that you bought when you were going to eat hot dogs or hamburgers or some sort of deli sandwich, like corned beef on rye.

My grandmother made her own cole slaw, which she referred to as “cull sloy.”

But now, in specialized food stores, supermarkets and bodegas everywhere, you can find a variety of “slaws,” which after all, just means “salad.” My local store offers “Asian Slaw” and “Health Slaw” in addition to plain old Cole Slaw.

But I like to make my own because that way I can get creative too. Like with this recipe — I like the tangy taste of buttermilk and it lets you cut down on the fatty mayonnaise of a standard recipe. The shredded snow peas add a rich, green color and a crispiness. Adding lots of fresh herbs gives it the refreshing taste of summer.

Btw, if you think it’s silly to buy buttermilk because you’re never going to use it for anything else, read this.

Buttermilk Herb Slaw

  • 6 cups shredded cabbage
  • 1 cup shredded snow peas
  • 1-1/3 cups buttermilk
  • 1/4 cup mayonnaise
  • 2 tablespoons cider vinegar
  • 2 tablespoons sugar
  • 1/4 cup chopped chives or scallion
  • 1/4 cup chopped fresh parsley
  • 2 tablespoons chopped fresh dill (or use a mixture of herbs)
  • 1 teaspoon salt or to taste
  • pinch or two of cayenne pepper

Place the cabbage and snow peas in a large bowl an toss to distribute them evenly. In another bowl, combine the buttermilk, mayonnaise, vinegar, sugar, chives, parsley and herb, whisk the ingredients and pour over the vegetables. Toss the ingredients and let rest for at least 15 minutes. Before serving, taste for seasoning and add salt and cayenne pepper to taste.

Makes 8 servings

Vanilla Ice Cream

Anyone who thinks vanilla is boring, should read this column that appeared in the Guardian (U.K.) last week (I heard about this article from Sprinklefingers). 

http://www.guardian.co.uk/lifeandstyle/wordofmouth/2011/mar/01/consider-vanilla

The author, Oliver Thring rightly concludes that if you say that vanilla is boring, you probably haven’t tasted the real thing.

The real thing is a long, slender, pliable brown pod filled with teeny seeds. It has a bright, distinctive taste, but it never tramples your taste buds. Split the pod and plop it, or part of it, into custard and taste how it transforms the flavor into something sweet and floral but subtle. Use it for ice cream or to flavor a canister full of sugar. Use real vanilla in cake batter. Or to infuse vinegar, rum or vodka. 

I could go on and on. I’ve always loved vanilla, even back in the old days when my cousin Leslie told me that the little specks in the ice cream I was eating were dirt.

She always chose chocolate.

But as any vanilla aficionado knows, anything made with chocolate is nowhere unless it contains some vanilla to give it a boost. Hot chocolate, for example — make it without a bit of vanilla and you’ll notice it’s missing. Ditto brownies and chocolate cake.

For those who know the truth — and those who want to understand what the vanilla thing is all about — try this recipe for Vanilla Ice Cream.

Vanilla Ice Cream

  • 2 cups whole milk

  • 2 cups heavy or whipping cream

  • one vanilla bean, split open

  • 2 1-inch strips lemon peel

  • 3 large eggs

  • 3 large egg yolks

  • 2/3 cup sugar

Place the milk, cream, vanilla bean and lemon peel in a small saucepan and cook over medium heat until the liquid is hot and bubbles have formed around the sides of the pan. Set aside to cool. Beat the eggs, egg yolks and sugar together with an electric mixer set at medium speed until the mixture is thick and pale (4-5 minutes). Gradually add the milk mixture to the egg mixture, stirring to blend ingredients to a uniform color. Remove the vanilla bean (you can wipe it off and use it to flavor sugar, vinegar, rum or vodka). Heat the mixture, stirring frequently, until it has thickened, but do not let the mixture come to a boil. Let the mixture cool, then freeze in an ice cream maker according to manufacturer’s instructions. Makes 1-quart+

Soggy Cheesecake Crust

static1.squarespace-1.jpg

Hi Leslie - sorry that your cheesecake crust comes out soggy. It may be that water leaks into the seams of the springform pan. You can line the bottom with tin foil (overhang it), then attach the side, then take the overhanging part and crumple it to try to seal all the edges. That may help.

On the other hand — it may be the recipe. It’s important to bake the crust for at least 10 minutes in a preheated 350 degree oven. Then let it cool. Then fill it.

Another trick you can try — add some ground nuts to the crumbs. Nuts always crisp up nicely and stay crispy better than crumbs do.

Another tip: bake the crust for 10 minutes, brush it with an egg wash (beat an egg with a small amount of water) and bake for another 3-4 minutes.

And another: let the crust cool, then layer on a thin layer of melted chocolate, jam, lemon curd or the like. This adds a flavor dimension of course, but it also helps keep the crust crispy.

After sitting in the fridge, even after all that, eventually cheesecake crust will become soggy just from the moisture in the cheese. But the tips above will help get you a better crust at least at the beginning.