Turanicum (Kamut) and Vegetable Salad

I’m always excited when I discover a new whole grain. By new I actually mean one of those ancient grains that were known centuries ago but are new to the market.Like kamut. I posted a recipe using kamut in a salad when I announced that my new cookbo…

I’m always excited when I discover a new whole grain. By new I actually mean one of those ancient grains that were known centuries ago but are new to the market.

Like kamut. I posted a recipe using kamut in a salad when I announced that my new cookbook is now available.

Kamut is the brand name for khorasan wheat. According to Andrew Weil, it was “rediscovered” in Egypt in 1949, which is why it is sometimes called “King Tut’s Wheat.” And some people believe that it was the "Prophet’s wheat" that Noah took into the ark.

It has another name too: turanicum, the name that attracted me because I’d never heard of it and it was a new featured product at my local supermarket. I wanted to know what it was and whether I would like it for the ways I use other grains — in salads, soup, casseroles, pilafs and stuffings.

I bought the turanicum not knowing it was kamut, but that’s okay. A rose by any other name ….

Turanicum, kamut, Prophet’s wheat, King Tut’s wheat, khorasan wheat —- call it what you will — this is good stuff. The grains are a nutritional powerhouse, packed with iron and other essential minerals and fatty acids, and has a higher protein value than other forms of wheat. They contain gluten and are not appropriate for those on a gluten free diet.

Turanicum grains are large and have a sweeter flavor than other grains (such as standard wheat, farro, bulgur and so on).

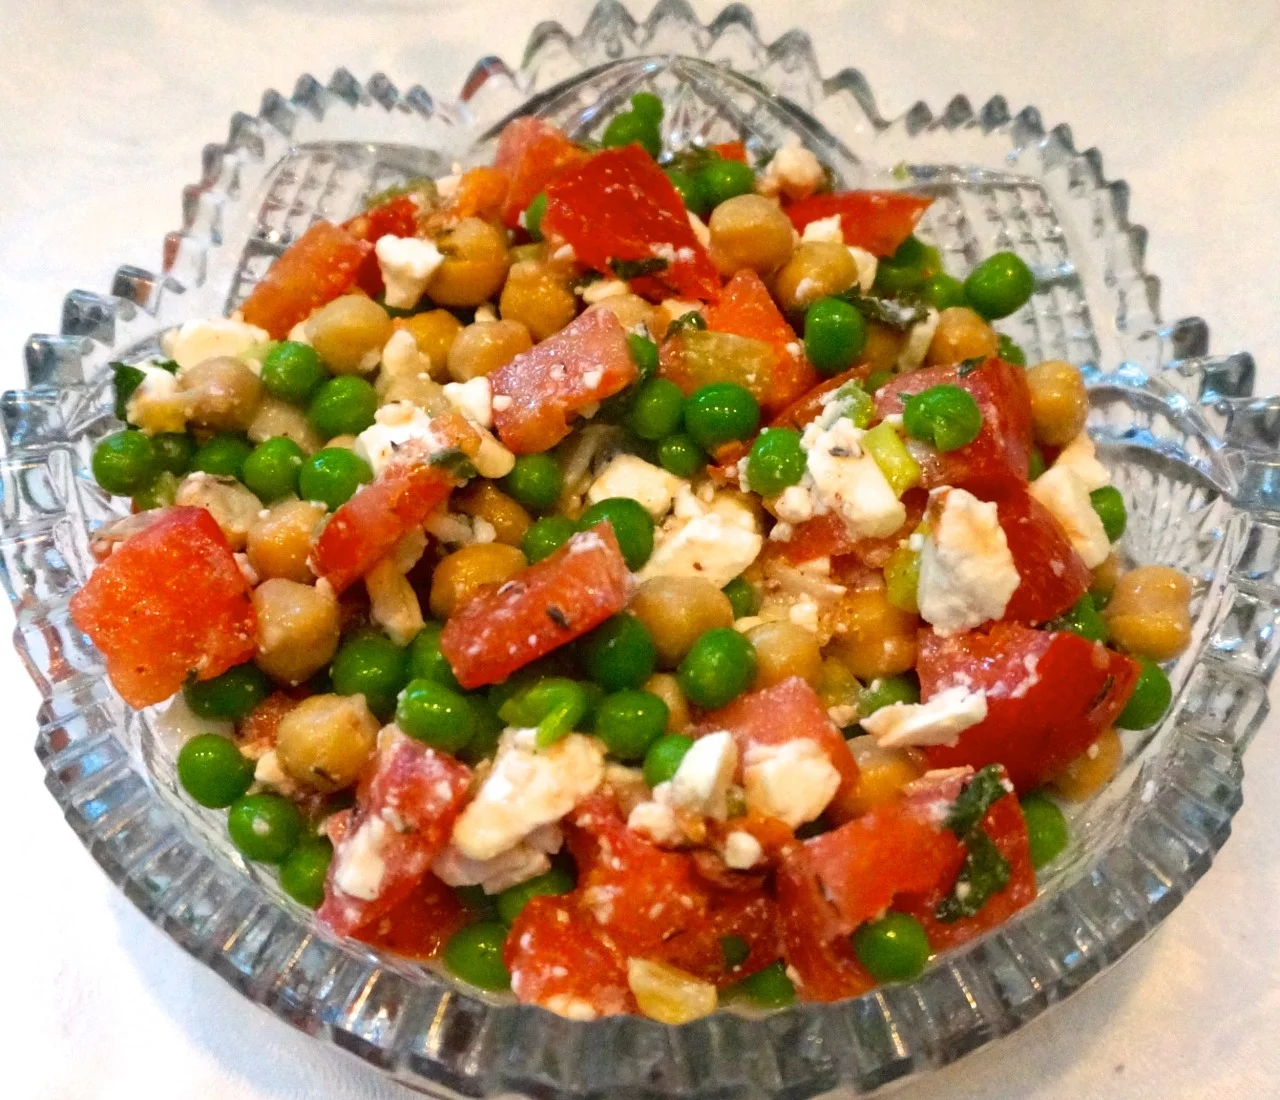
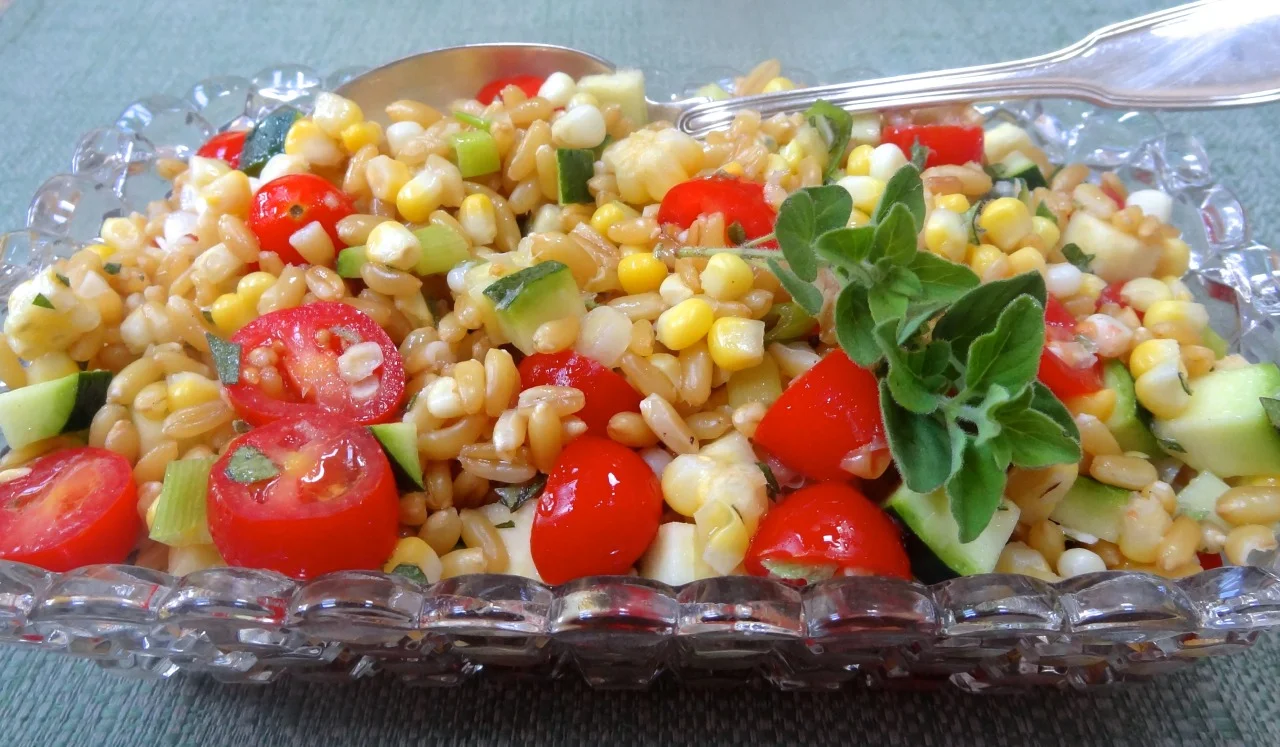
At summer’s end turanicum/kamut/whatever is lovely in a salad: cook it, add some raw or cooked vegetables, fresh herbs and homemade vinaigrette — the possibilities are endless. 

Here’s one version:

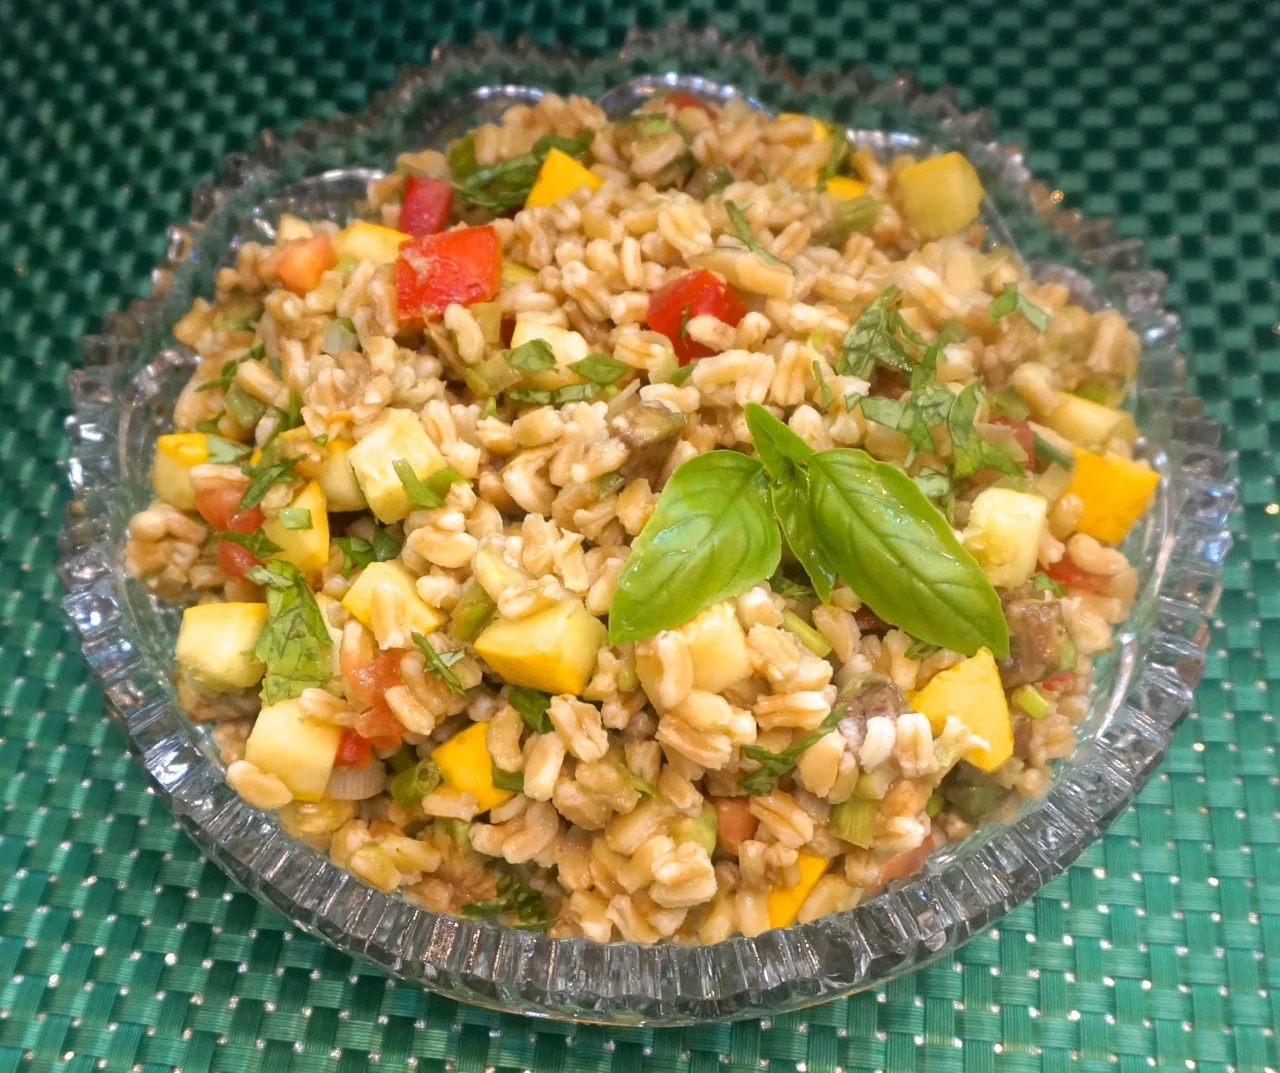
Turanicum and Vegetable Salad


1 cup turanicum

2 cups water

4 tablespoons olive oil

3 scallions, chopped

1 cup diced yellow squash

8 medium mushrooms cut into bite size pieces

1 cup chopped tomato

1 small, ripe avocado, cut into bite size pieces

2 tablespoons lemon juice

2 tablespoons chopped fresh basil

salt and freshly ground black pepper to taste


Place the turanicum in a bowl, cover with water and soak for one hour. Drain and place the turanicum in a saucepan. Add the 2 cups water. Bring to a boil over high heat. Lower the heat, cover the pan and cook for about 45 minutes or until they grains are tender, but still slightly chewy. If there is any liquid remaining, discard it and place the turanicum in a bowl. While the turanicum is cooking, heat 2 tablespoons of the olive oil in a saute pan over medium heat. Add the scallions, squash and mushrooms and cook for 3-4 minutes to soften them. Add the vegetables to the bowl with the turanicum. Add the tomato and avocado. Toss the ingredients to distribute them evenly. In a small bowl, whisk the remaining 2 tablespoons olive oil, lemon juice and basil together until well blended. Pour over the salad and toss. Let rest for at least 15 minutes before serving. Taste for seasoning and add salt and pepper to taste.


Makes 6 servings

Shakshuka Frittata

A few weeks ago some food-blogger colleagues at MayIHaveThatRecipe.com posted a recipe for montadito - a kind of tapa with crunchy bread as a base (and almost anything on top). The tops on theirs were small, cut up chunks of eggplant frittata. You c…

A few weeks ago some food-blogger colleagues at MayIHaveThatRecipe.com posted a recipe for montadito - a kind of tapa with crunchy bread as a base (and almost anything on top). The tops on theirs were small, cut up chunks of eggplant frittata. You can find the recipe here.

I thought the idea was such a good one that I decided to embark on my own versions. My favorite was this one, a version of a version. That is, classic Shakshuka is made with braised tomatoes and peppers, a toss of feta cheese and poached egg on top. But I thought the vegetables and cheese could be cooked right along with the eggs, into a frittata.

You can eat the Shakshuka frittata by itself, of course. It’s a terrific brunch dish and way easier to cook than the traditional version.

But I cut it up to imitate my friends’ montadito and it became hors d’ouevre.

Nice thing about Shakshuka in frittata form — you can make it ahead and serve it at room temperature or reheat it.

Shakshuka Frittata


2 tablespoons extra virgin olive oil

1 medium onion, chopped

1 small red bell pepper, deseeded and chopped

1 Serrano chili pepper, deseeded and chopped

2 cloves garlic, chopped

1 cup halved cherry tomatoes

8 large eggs, beaten

2 tablespoons milk

2 tablespoons chopped fresh basil

1/2 teaspoon zatar

1-1/2 tablespoons butter

1 cup crumbed feta cheese

Freshly ground black pepper, to taste

30 1/4-inch slices baguette bread

2-3 tablespoons olive oil or mayonnaisparsley or basil leaves, optional


Preheat the oven broiler with the rack about 6 inches from the heat. Heat the olive oil in a sauté pan over medium heat. Add the onion and cook for one minute. Add the bell pepper, chili pepper, garlic and tomatoes and cook, stirring often, for about 3 minutes or until the vegetables have softened. Dish out the vegetables and set them aside. Mix the eggs, milk, basil and zatar together in a bowl. Heat the butter in the sauté pan over medium heat. When the butter has melted and looks foamy, return the cooked vegetables to the pan. Scatter the feta cheese on top. Pour in the egg mixture and turn the heat to low. Stir once or twice, then cook undisturbed for 6-8 minutes or until the bottom has set. Place the pan under the broiler for up to a minute or until the frittata is puffed, golden and crispy on top. Season to taste with freshly ground black pepper. While the frittata is cooking, brush the bread slices on one side with a film of olive oil and toast for a minute or so or until lightly browned OR, toast plain, let cool and spread with a small amount of mayonnaise. Cut the frittata into small squares just large enough to fit on top of the baguette toasts. Garnish with parsley or chopped basil if desired.


Makes about 30 hors d’oeuvre

Tomato Salad with Chick Peas, Feta and Peas

You know all those people whose gardens are loaded with so many tomatoes that they can’t possibly use them all and so give them away?I’m not one of them. Gardening is not one of my strong points. I get tomatoes from handouts from friends and at Farm…

You know all those people whose gardens are loaded with so many tomatoes that they can’t possibly use them all and so give them away?

I’m not one of them. Gardening is not one of my strong points. I get tomatoes from handouts from friends and at Farmer’s Markets.

Still, whether you grow them or buy them, end-of-summer tomatoes are sensational. Sweet, juicy, tasting of earth and sun. Like a real tomato.

I used some of my friends’ tomatoes in salads over the past week. We liked this one in particular.                                                                                                              

Tomato Salad with Chick Peas, Feta and Peas

  • 3 large tomatoes, chopped

  • 1 cup cooked chick peas (canned is fine)

  • 1 cup thawed, frozen peas

  • 1 cup crumbled feta cheese

  • 3 thick scallions, chopped

  • 1 tablespoon chopped fresh mint

  • 1/2 teaspoon zatar

  • salt and freshly ground black pepper to taste

  • 2 tablespoons olive oil

  • 2 tablespoons white wine vinegar

Place the tomatoes, chick peas, peas, cheese, scallions, mint and zatar in a bowl. Toss the ingredients to distribute them evenly. Season to taste with salt and pepper. Pour in the olive oil and toss the ingredients again. Pour in the wine vinegar, toss and place the salad in a serving bowl. Let rest for about 10 minutes before serving.

Makes 6 servings

La La Lunchbox Mozzarella Sandwich Kebabs

I don’t usually pack school lunch. My children are grown ups now, with children of their own. So the only time I have to even think about this is if one of my grandchildren sleeps over and the next day is school and then, because it is not a task I am familiar with, I have to ask a lot of questions.

When I need advice like this I call on an expert:

My daughter Gillian, mother of three, healthy food person and entrepreneur who developed an app for exactly this: lunch.

Her mealplanning app is called lalalunchbox. She blogs about it at www.lalalunchbox.com. The app, which helps parents and children plan and pack healthy lunches together, empowers kids to select a week’s worth of lunches in advance (and then generates a handy grocery list for parents) has been critically reviewed and has become a best seller. You can check it out here.

 And by the way, the app is free for the entire back-to-school season.

I asked Gillian about lunch recently, to do this particular post and my question was timed perfectly because she was just getting her daughter Lila’s camp lunch ready. She and Lila, using the LaLa Lunchbox app, had picked a mozzarella cheese sandwich and grapes. 

Beyond involving kids in meal planning, Gillian believes that children are more likely to be excited about what they eat when those meals are visually appealing. One of her favorite tricks is to cut sandwiches into smaller cubes and skewer them on to lollypop sticks (such as Wilton’s) which you can buy at craft stores. 

You can see the final result in the first photo. The others give you a step by step on how to make this fast, easy, simple, pretty and tasty sandwich for when you need to pack a lunchbox.

La La Lunchbox Mozzarella Sandwich Kebabs

2 slices whole wheat bread

1 tablespoon olive oil, approximately

several slices (about 1/4-inch thick) fresh mozzarella cheese

several fresh, whole basil leaves

skewer sticks

whole red seedless grapes

Place one piece of bread on  cutting board. drizzle the olive oil on top. Place mozzarella slices on top. Layer some basil leaves over the cheese. Place the second slice of bread on top. Cut the sandwich into 9 pieces. Skewer the smaller sandwich pieces on the skewers, alternating with the grapes. Makes one serving

Lemonade Cookies

I read that in some places the local  government has either banned or regulated lemonade stands.
They say it has to do with the stands (run by kids of course) being next to or too near commercial vendors who by law had to pay some sort of fee. In so…

I read that in some places the local  government has either banned or regulated lemonade stands.

They say it has to do with the stands (run by kids of course) being next to or too near commercial vendors who by law had to pay some sort of fee. In some cases they say it’s about health issues.

Because this is a food blog I’m not going to touch the political issues. But I have to say I love the idea of entrepreneurial kids — and lemonade stands are sort of tradition in this country, right?

On the other hand, lemonade at lemonade stands isn’t what it used to be back in the day. I’ve seen way too many where they sell what I think of as fake lemonade made by mixing water with some awful chemical tasting crystals from a cardboard container. Call me fussy, but it’s not a beverage I would drink, so for me, it’s not a government thing and although I love the kids’ grit and spirit, I ban fake lemonade as a matter of taste.

C’mon kiddos! Fresh lemonade from homemade lemon syrup is so easy to make. You can make pitchers-ful and stock it in the fridge for a week. All you have to do is add water or seltzer to some of the syrup and you’ve got some pretty tasty stuff to drink. Or sell.

And if you have any extra syrup leftover you can can use it for splendiferous things like these cookies. In fact, why not sell the cookies too?

Lemonade Cookies


1 cup butter

1 cup sugar

2 large eggs

3 cups all-purpose flour

1 teaspoon baking soda

1/2 teaspoon salt

10 tablespoons lemon syrup

2 teaspoons finely grated lemon peel

1/4 cup lemon syrup

granulated sugar


Preheat the oven to 400 degrees. Cream the butter and sugar at medium speed for 2-3 minutes or until thoroughly blended. Add the eggs, one at a time, beating after each addition. Mix the flour, baking soda and salt and add to the butter mixture, alternating with 10 tablespoons lemon syrup. Mix in the lemon peel. Drop the batter by the heaping tablespoonful onto ungreased baking sheets. Bake for about 9-10 minutes or until the edges are lightly browned. While the cookies are still warm, brush them with the remaining 1/4 cup lemon syrup. Sprinkle with sugar. Let the cookies cool.

 Makes about 60 cookies

To make Lemon Syrup: 


1-1/2 cups water

1-1/2 cups sugar

1-1/2 cups lemon juice (6-7 lemons)

1 tablespoon finely grated lemon peel


Combine the water and sugar in a saucepan and bring the mixture to a boil over high heat. Stir until the sugar dissolves. Boil the liquid for 5-8 minutes or until thicker and syrupy. Remove the pan from the heat and stir in the lemon juice and peel. Refrigerate for at least one hour or until very cold. Strain the mixture into a storage container.

Makes just under 3 cups


Spinach Vichyssoise

I had a fancy dinner planned for Saturday evening, meaning drinks and hors d’oeuvres and a few courses, mostly experiment recipes, for our good friends Susan and Richard. They are among my “regular” tasters and every once in a whil…

I had a fancy dinner planned for Saturday evening, meaning drinks and hors d’oeuvres and a few courses, mostly experiment recipes, for our good friends Susan and Richard. They are among my “regular” tasters and every once in a while I invite them to “review” some of the latest creations.

They are good sports.

I cooked a couple of the do-ahead items, including Spinach Vichyssoise intended to be served as “shots” with our cocktails, and was ready to get in my car to shop for the other ingredients when, unfortunately, I realized I had done something to my knee and it felt weird and I had trouble walking. When I looked down at it, it was three times its usual size and my leg looked like there was a boulder attached.

So much for working out.

After a half day on the couch, ice-on, ice-off it wasn’t any better so Ed took me to the ER, where an orthopedist told me to stay on the couch, ice-on, ice-off for a few more days.

Dinner was cancelled, naturally. 

But Susan and Richard told us to come on over for dinner, which we did, me hobbling into the car with my ice pack wrapped in a towel and with my father’s cane, which Ed and I bought for him once, a long time ago in London, and has a cobra head for a handle.

Susan and Richard are good people. I am grateful to have them as friends.

I’ll do that dinner some other time, with different recipes. As for the food I prepared, my daughter Gillian, son-in-law Jesse and their three kids came for a visit Sunday and became the tasters. They ate the frittata that I was going to cut up and serve on baguette slices — more on that in a few days. They ate some carrot soup and also the Spinach Vichyssoise, not in aperitif glasses, but in bowls, like regular soup, because it’s good that way too.

It’s a good make-ahead dish and equally wonderful whether you serve it cold or hot.

Spinach Vichyssoise

2 tablespoons olive oil

3 large all-purpose potatoes, peeled and chopped

1 large yellow onion, chopped

2 large leeks, cleaned and chopped

2 carrots, chopped

1 small Serrano pepper, deseeded and chopped (or other chili pepper)

5 cups vegetable stock

1 medium bunch spinach, wash, drained and coarsely chopped

salt and freshly ground black pepper to taste

1 cup coconut milk

Heat the olive oil in a soup pot. Add the potatoes, onion, leeks, carrots and Serrano pepper and cook them over medium heat for 5-6 minutes, stirring often, until the vegetables have softened. Add the stock. Bring the soup to a boil. Lower the heat, cover the pan and cook for about 15 minutes. Add the spinach, season to taste with salt and pepper, cover the pan and cook for another 10 minutes or until the potatoes are tender. Puree the soup in a blender or food processor and return the soup to the pan. Stir in the coconut milk and heat through. OR, refrigerate and serve chilled.

Makes 8 servings

My New Book's Cover!

This is the cover of my new cookbook. I’m so excited!
And that dish, the one that’s on the cover, is one of my favorites. It’s a version of shakshuka, which is usually a veggie-and-egg dish, but this one has crispy little pieces of…

This is the cover of my new cookbook. I’m so excited!

And that dish, the one that’s on the cover, is one of my favorites. It’s a version of shakshuka, which is usually a veggie-and-egg dish, but this one has crispy little pieces of Mergeuz sausage. Quite the fabulous dinner, brunch or weekend lunch dish.

The book will hit the shelves in November but you can preorder it here (lowest price I’ve seen), herehere and here, and find an indie store to order here.

As I mentioned in my first post about the book, Don’t let the title stop you if you aren’t kosher or aren’t Jewish. This is a book of modern American recipes, not traditional Jewish recipes. But so many kosher home cooks buy cookbooks and then have to think about changes and substitutes to non-kosher recipes that I figured I would do exactly that in this book (as I did with my first kosher cookbook, Hip Kosher).

So if you happen to keep kosher, you can prepare every single one of these recipes in your kitchen.

The book includes the usual categories: soup, salad, meat, dessert and so on. And special ones that have been requested by readers: Breakfast/brunch/sandwiches, Budget oriented recipes, Vegetarian recipes and Hors D’oeuvres/Appetizers. Also a chapter on Passover.

Don’t forget to send receipts to modernkosherkitchen@gmail.com. 

The first hundred receipts we get at that address for pre-order copies will get a bookplate signed by yours truly. I know there have been pre-orders but not 100 receipts to that email address — so SEND THEM IN!

Eggs: Size Matters; Classic Genoise

Before I buy eggs, I open the carton to see if any are broken or otherwise unacceptable (an occasional egg will not look clean, for example). If the eggs are okay, I close the box and take it.
I almost always buy large eggs because they are the most…

Before I buy eggs, I open the carton to see if any are broken or otherwise unacceptable (an occasional egg will not look clean, for example). If the eggs are okay, I close the box and take it.

I almost always buy large eggs because they are the most useful. I’m sure you already know this, but just in case you don’t, recipes that have been developed by food writers, chefs and so on, assume you will be using large size eggs, especially for baked goods and custards. It should be noted in the list of ingredients, but if not, large eggs are what they mean.

Why is this important? Because if a recipe has been developed using size large and you use a different size, the texture and flavor of the cake (cookies, quickbread, etc.) or custard you are making will be affected and sometimes the recipe may fail completely. 

Of course you can substitute — if a recipe calls for 4 large eggs, you can use 3 jumbo or 5 medium — but most home cooks don’t and may wonder why a recipe didn’t work.

Egg size must meet USDA standards and is measured by weight per dozen, not actual dimensions. Large eggs are 24 ounces per dozen.

That could mean the eggs in a carton all look about the same size. OR, they could look like the two eggs in the photo. One looks much larger than the other.

I would not normally have bought the particular carton with these eggs because of this differential, but I wanted to take a photo just so I could write this post. Besides, egg size does not matter when it comes to scrambled eggs or French toast or egg salad, so I can use these for that kind of dish.

But size does matter for recipes such as genoise, the delicate, classic sponge cake used in so many European style cakes and confections. Genoise has no leavening other than the eggs. They must be the right ones, the right size.

Genoise is a building block kind of recipe. For an easy summer dessert, slice it in half and stuff the middle with whipped cream and fresh berries. You can frost it if you like. Or make it into Baked Alaska. And dozens of other recipes (I’ll be posting throughout the next few months).

But to begin, here’s Classic Genoise using LARGE eggs

Classic Genoise

6 tablespoons unsalted butter

1 cup cake flour

1/4 teaspoon salt

6 large eggs at room temperature

1 cup sugar

1 teaspoon vanilla extract

Preheat the oven to 350 degrees. Grease a 9-inch or 10-inch cake pan, place a parchment paper circle on the bottom and lightly grease the paper. Melt the butter and set it aside to cool. Sift the flour and salt together three times. Set aside. Crack the eggs into the mixing bowl of an electric mixer (or a large bowl to use with a hand mixer). Beat the eggs until thoroughly combined. Add the sugar and vanilla extract to the eggs. Beat at medium speed for 8-10 minutes or until the mixture is very thick and pale-cream color and falls ribbon-like back into the bowl when the beater is lifted. Gently fold 1/4 of the flour into the egg mixture with a large rubber spatula, folding just until the flour has been incorporated. Repeat with the remaining flour three more times, adding the melted butter with the last addition. Pour the batter into the prepared cake pan. Bake for about 25 minutes or until the sides of the cake have begun to separate from the edges of the pan and a cake tester inserted into the middle comes out clean. Let cool in the pan for 5-10 minutes, then invert it on to a cake rack to cool completely.

Makes one cake

My Book is Done!

My book is done, done, done!

The Modern Kosher Kitchen is ready for pre-sales.

Which means you can order one now, even though you won’t get a copy until November 1st. But the deal is: it’s cheaper now. Anywhere from $17.55 (at Indigo) to $18.49 at Barnes&Noble and AmazonIndie Bound hasn’t listed its price. The list price is $24.99.

The title? Don’t let that stop you if you aren’t kosher. This is a book stuffed with modern American recipes and, in addition, if you happen to keep kosher, you can prepare every single one of these in your kitchen.

In addition to the usual stuff, like chapters for salad and poultry, soups and desserts, I’ve included some for recipes my readers have asked for since the publication of my first kosher cookbook, Hip Kosher. These chapters include: Vegetarian, Breakfast/Brunch/SandwichesAppetizers, Budget-Minded and Passover.

Check it out.

As a bonus, if you are among the first hundred people to order, I’ll sign it for you on a personalized bookplate.

Below is one of the recipes from the book: Kamut, Corn and Tomato Salad. Perfect for summer. Healthy. Easy to cook. Colorful. Perfect for the kosher kitchen and non-kosher kitchen.

I’ve also included some of the fabulous photos of three of the other recipes you’ll find in the book: Seared Tuna Sticks with Wasabi-Sesame Dip; Black Bean Cakes with Peppers and Cheese; and Hi-Hat Lemon Yogurt Cupcakes.

To pre-order the book:

1. go to any of the sites mentioned above (or to  bookstore) and SAVE YOUR RECEIPT. 

2. SEND YOUR RECEIPT TO ME at modernkosherkitchen@gmail.com. 

3. THE FIRST 100 PEOPLE TO EMAIL ME HIS/HER PROOF OF PURCHASE WILL RECEIVE A PERSONALLY INSCRIBED BOOK PLATE to place inside the book (a label that I will sign for you).

4. Don’t forget to tell me the the address to which you want the book plate sent.

Here’s one of the recipes:

Kamut, Corn and Tomato Salad (P)


1 cup kamut

2 cups water

2 ears cooked corn (about 1-1/2 cups kernels)

1 cup cut up grape tomatoes

1 cup diced zucchini

3-4 scallions, chopped

1 tablespoon chopped fresh oregano

2 tablespoons olive oil

1 tablespoon white wine vinegar

1 tablespoon lime juice

1 teaspoon Dijon mustard

salt and freshly ground black pepper to taste


Place the kamut in a bowl, cover with water and soak for one hour. Drain and place the kamut in a saucepan. Add the 2 cups water. Bring to a boil over high heat. Lower the heat, cover the pan and cook for about 45 minutes or until they grains are tender, but still slightly chewy. Drain any water that has not been absorbed. Place the kamut in a bowl. Add the corn, tomatoes, zucchini, scallions, and oregano and toss the ingredients to distribute them evenly. In a small bowl, combine the olive oil, wine vinegar, lime juice, and mustard and whisk the ingredients to blend them thoroughly. Pour over the salad and toss. Let rest for at least 15 minutes before serving. Taste for seasoning and add salt and pepper to taste.

Makes 6 servings        

Tomato Salad with Spices and Herbs

I’m almost there. My first home grown tomatoes in years and years. I used to plant them, but then the deer and rabbits and other wild creatures in the neighborhood would decide to have a feast of the stuff, tomatoes, leaves, flowers and all. S…

I’m almost there. My first home grown tomatoes in years and years. I used to plant them, but then the deer and rabbits and other wild creatures in the neighborhood would decide to have a feast of the stuff, tomatoes, leaves, flowers and all. So I stopped planting.

I decided to give it another try. A small garden only: tomatoes, basil and mint.

This year a cute brown rabbit did get to the basil, but so far the tomatoes are intact.

I moved the basil to the top of my grill where the rabbit couldn’t get to it, and that’s a pain in the neck when I want to grill something for dinner, which is often during the summer. But the basil does seem to be coming back, although not yet thriving.

If you ever have the chance to eat a fresh-picked tomatoes, do not pass it up. The fruit is sweet, juicy, natural.

It makes you feel better about the earth. 

Fresh garden tomatoes are best plain. But if you have enough, you can cut them into a summer salad:                                                                                                                                                                                                                             

Tomato Salad with Spices and Herbs

3 cups halved cherry tomatoes

1 tablespoon chopped chives

1 tablespoon chopped fresh basil

1 tablespoon chopped fresh mint

3 tablespoons olive oil

2 tablespoons red wine vinegar

salt and freshly ground black pepper to taste

Cut up the tomatoes and place them in a bowl. Add the chives, basil and mint and toss ingredients to distribute them evenly. Pour in the olive oil and wine vinegar and toss ingredients. Season to taste with salt and pepper. Toss ingredients. Let rest for about 15 minutes before serving.

Makes 4-6 servings