Red Wine Braised Short Ribs

Yesterday, when I was in New York City having a treat with my grand daughter Lila, we met a young couple from Sydney, Australia, who were visiting the United States. They’d already been to Los Angeles and Chicago and now New York, where they were ta…

Yesterday, when I was in New York City having a treat with my grand daughter Lila, we met a young couple from Sydney, Australia, who were visiting the United States. They’d already been to Los Angeles and Chicago and now New York, where they were taking in the museums and shows and having a great time.

Except, they said, they never anticipated how cold it would be here.

In Australia it’s summer. And even though they loved being here, they sort of missed the wonderful weather there.

I can’t blame them!

I wish I was there. 

But I’m not. And I’m not going to any other sunny, balmy place either.

So I’m making food that makes me feel warm. That warms up the kitchen and makes everyone feel safe and comfy.

Like these short ribs:


Braised Short Ribs

1/4 cup all-purpose flour

salt and freshly ground black pepper to taste

5-6 pounds short ribs (4 pounds boneless)

4 tablespoons olive oil

2 medium onions, sliced

2 cloves garlic, chopped

4 carrots, sliced into 1/2-inch pieces

2 stalks celery, sliced into 1/2-inch pieces

3 cups beef stock

2 cups red wine

15 ounce can tomato sauce

2-3 sprigs fresh thyme

2 sprigs fresh rosemary

Mix the flour, salt and pepper in a dish. Dredge the meat, coating all sides, and set the ribs aside. Heat 2 tablespoons of the olive oil in a large sauté pan over medium heat. Cook the flour-coated ribs for 3-4 minutes per side or until lightly browned. Remove the meat to a dish. Add the remaining olive oil to the pan. Add the onions, garlic, carrots and celery and cook, stirring often, for 3-4 minutes. Return the meat to the pan. Pour in the stock and wine. Add the tomato sauce and stir it in. Add the thyme and rosemary sprigs. Cover the pan. Cook at a bare simmer for about 4 hours, or until the meat is tender. Remove the meat and vegetables to a dish. Discard the herb sprigs. Bring the liquid to a boil over high heat for about 6-8 minutes or until thickened. Pour the sauce over the meat to serve. Makes 6 servings

Baked Apples with Dates, Cranberries and Nuts

It is colder in Connecticut today than it was when I was in Antarctica a few years ago. So I decided that before I venture out today, I would put on the silk long johns and tee shirts I bought when Ed and I took an adventure trip to that place at th…

It is colder in Connecticut today than it was when I was in Antarctica a few years ago. So I decided that before I venture out today, I would put on the silk long johns and tee shirts I bought when Ed and I took an adventure trip to that place at the cold, cold bottom of the world.

And think warm thoughts.

Like reading about Tu B’Shevat, a little known Jewish holiday that celebrates the budding of the first trees in Israel. The emergence of signs of spring.

What a lovely thought. 

On Tu B’Shevat (this year on January 26th) it is customary to eat fruit, an acknowledgment of earth’s bounty.

Like Baked Apples. Not just good to eat. They also warm up the kitchen and make your house smell divine.


Baked Apples

6 baking apples

half a lemon

3 tablespoons raisins or chopped dates

3 tablespoons dried cranberries or cherries

2 tablespoons finely chopped almonds or hazelnuts

1/4 teaspoon cinnamon

1/4 teaspoon ground ginger

1/4 cup honey

1 cup orange or apple juice

1 tablespoon butter or coconut oil

Preheat the oven to 375 degrees. Wash the apples and remove the core with an apple corer or small knife, leaving about 1/2” on the bottom. Peel the apples halfway down from the top and rub the peeled surfaces with the cut side of the lemon. Put the apples in a baking dish. Mix the raisins, cranberries, nuts, cinnamon, ginger and honey. Stuff this mixture into the apple hollows. Pour the juice over the apples. Dot the tops with butter or coconut oil. Bake for 45 minutes, basting occasionally with the pan juices, or until the apples are tender. Serve warm or at room temperature. Makes 6 servings

Challah Rolls

If you think smoked salmon with a shmear of cream cheese tastes pretty good on a bagel, then you really ought to try some on a challah roll. 

That’s the way I learned to eat smoked salmon, or, “lox” as we called it back in the day. Of course we had bagels too. But nothing beat those challah rolls. There isn’t a bread on earth as delicious as challah. And so, anything as awesome as lox or smoked salmon or whatever you call it that’s good on a bagel is equally good and probably better if you eat it on challah, or challah rolls, which are, after all, nothing more than mini challahs. They are unlike any other kind of roll except perhaps for brioche. Challah rolls are dense and thick and really there aren’t enough wonderful words for them.

As I said, I learned to eat lox and cream cheese on challah rolls when I was a youngster and my parents and our extended family spent many a Christmas vacation at Helferd’s Hotel in Lakewood, New Jersey. That’s how Helferd’s served smoked fish at breakfast. My cousin Leslie and I still talk about it and marvel about how delicious those rolls were.

So I made some the other day using my challah recipe, which, I have to say, is so, so delicious. My grandmother once won a prize for the recipe.

I actually made a double recipe of these and froze most of them. 

If you want to make challah rolls, check out the photos. Here are the basic shaping instructions:

First: cut the dough into 12 equal strands about 10-inches long.

Second: working with one strand at a time, make a medium-size loop with two long strand lengths remaining at the bottom.

Third: take the strand length on the left and tuck it under the loop; then bring it up slightly through the loop.

Fourth: take the strand length on the right and bring it over the loop, tucking it into the center.

Fifth: brush the rolls with egg wash (see the recipe) and bake. You’ll have 12 rolls that look like the one in the last photo.

Challah Rolls

  • 1 package active dry yeast
  • 1/4 cup warm water (about 105 degrees; feels slightly warm to touch)
  • 1/4 cup sugar
  • 4 cups all-purpose flour, approximately
  • 1-1/2 teaspoons salt
  • 3 large eggs
  • 2 tablespoons vegetable oil
  • 3/4 cup warm water (about 105 degrees)
     

In a small bowl, mix the yeast, 1/4 cup water, 1/2 teaspoon sugar and a pinch of flour. Stir and set aside for about 5 minutes or until the mixture is bubbly. While the yeast is resting, place 3-1/2 cups flour with the remaining sugar and salt in the bowl of an electric mixer with a dough hook. Add 2 of the eggs, the vegetable oil and the 3/4 cup water. Mix, using the dough hook until well combined. Add the yeast mixture and blend in thoroughly. Knead for about 3-4 minutes or until the dough is smooth and elastic. Add more flour as needed to make the dough smooth and soft, but not overly sticky.

Cover the bowl and let the dough rise in a warm place for about 1-1/2 hours or until doubled in bulk. Punch the dough down, cover the bowl and let rise again for about 45 minutes or until doubled in bulk. Remove the dough to a floured surface.

Cut the dough into 12 pieces. Make 10-inch long strands out of each piece. Working with one strand at a time, make a loop at the top, leaving 2 stand lengths on the bottom left and right. Take the strand length on left and the bring it under the loop, then lift it through the loop slightly. Take the strand length on the right and bring it on top of the loop and tuck it in. Repeat with all the strands. Place the rolls on the cookie sheet. Beat the last egg. Brush the surface of each roll with some of the egg. Let rise in a warm place for 30 minutes.

While the dough is in the last rise, preheat the oven to 350 degrees. Bake the rolls for about 20 minutes or until firm and golden brown.

Makes 12

Buttermilk Biscuits

Years ago I tested appliances for Consumer’s Digest Magazine and once had the good fortune to try out about eight different bread-making machines (that was back in the day when these machines were the rage).
If you have a bread-making machine,…

Years ago I tested appliances for Consumer’s Digest Magazine and once had the good fortune to try out about eight different bread-making machines (that was back in the day when these machines were the rage).

If you have a bread-making machine, do you remember which closet you stuck it in? (The one I eventually bought is in my basement.)

One of the most interesting models was a Toastmaster. Not only could it be used to make a loaf of bread, I could also make butter in it.

Which I did.

I remember buying heavy sweet cream and pouring it into the machine, pressing a few buttons and in a few minutes, voila! there was the freshest, sweetest, creamiest butter I EVER tasted. I smeared it on the bread I had baked in the machine. That was a delicious day.

Of course, at the bottom of the container was a big bonus: real, fresh buttermilk, the liquid left over when you churn cream into butter. After I finished my work I poured it into a glass and drank it, with its teeny butter spots and all, down in a couple of gulps.

If you’ve never tasted fresh buttermilk, you’ve missed a goodie. It’s thin, tangy and extraordinarily thirst quenching. Different. Special.

I haven’t made butter (or buttermilk since then). I buy buttermilk the way most folks do, in the supermarket. It’s not really made the way I made mine. Commercial buttermilk is made by combining skim or low-fat milk with specific cultures and thickeners. It doesn’t have that “just-churned” taste, but it’s still quite delicious to drink or poured over cold cereal.

Although buttermilk has become a bit more popular in recent years because it contains probiotics, most people I know shiver at the thought of drinking it. But I say: give it a try. If not as a beverage by itself, then perhaps in a smoothie. 

At the very least, use it to make muffins, pancakes, cornbread, banana bread and stuff like that. Buttermilk makes all these baked items incredibly crumbly/tender. Or make it into Ranch Dressing. Or use it for cream soups.

Sometimes people tell me that they don’t want to buy buttermilk because they’re only going to use it for one recipe and it’s not worth getting a whole quart. But really, once you have it in the house, and you try it, you’re going to use it again. I promise.

Like for these biscuits:

Buttermilk Biscuits

1-1/2 cups all-purpose flour

1/2 cup cake flour

2 teaspoons baking powder

3/4 teaspoon salt

1/2 teaspoon baking soda

2 teaspoons grated fresh lemon peel, optional

8 tablespoons cold butter

2/3 cup buttermilk


Preheat the oven to 400 degrees. Lightly grease a cookie sheet. Sift the flour, cake flour, baking powder, salt and baking soda into a bowl. Stir in the lemon peel, if used. Cut the butter into chunks and add it to the bowl. Work the butter into the flour mixture with your fingers or a pastry blender until the mixture resembles coarse crumbs. Pour in the buttermilk and mix until you can form a soft ball of dough. Try not to pound or overwork the dough (this makes the biscuits tough). Place the dough on a lightly floured surface and knead a couple of times. Roll or press the dough gently to 1/2-inch thickness. Cut out circles with a doughnut cutter or the bottom of a glass. Place the circles one inch apart (for darker biscuits) or close together (for fluffier biscuits) on the cookie sheet. Bake for about 20 minutes or until they have risen and are lightly browned. Makes about 10


Ale Braised Short Ribs

I had to throw out a lot of food after Hurricane Sandy hit last year. We lost power for 6 days and although we were able to eat lots of the stuff I had stored and brought some things to my sister-in-law and brother’s house, we couldn’t save everythi…

I had to throw out a lot of food after Hurricane Sandy hit last year. We lost power for 6 days and although we were able to eat lots of the stuff I had stored and brought some things to my sister-in-law and brother’s house, we couldn’t save everything and after all, there was just so much room in Eileen and Jeff’s freezer.

Much of what we discarded were the make-ahead meals that I freeze for when I will be coming home after a busy day and I’m too tired to cook or it’s too late. I plan ahead by taking out one of those packaged dinners. And all I have to do is put it in an ovenproof dish and pop it into the oven for cooking.

Or I call ahead and hope Ed is home to do that for me so that in addition to not having to cook, dinner is ready. Hot and ready!

I have a whole list of these make-ahead foods. I try to cook on Sundays, spending a quiet day at home doing what I love, making delicious things to eat and smelling all those wonderful, homey cooking perfumes you get from dishes like stew and Osso Buco and pot roast.

And this wonderful recipe for Ale-Braised Short Ribs. I made a fresh batch recently (along with some other good make-ahead meals) so I’m all set for a while.


Ale Braised Short Ribs


1/2 cup all-purpose flour

salt and freshly ground black pepper, to taste

4 pounds boneless beef short ribs

3 tablespoons olive oil

6 carrots, peeled and sliced

3 onions, sliced

2 stalks celery, sliced

5-6 garlic cloves, sliced

1 bottle ale

28-ounce can tomatoes, chopped, liquid included

1 cup veal or beef stock

2-3 sprigs thyme

2 sprigs rosemary

salt and freshly ground black pepper to taste


Mix the flour, salt and pepper in a large dish. Press the meat into the flour to coat all sides. Set aside. Heat the olive oil in a large sauté pan over medium heat. Working in batches, cook the meat, turning the pieces occasionally, for 4-5 minutes, or until lightly browned. Remove the meat and set it aside. Add the carrots, onions, celery and garlic to the pan and cook for 4-5 minutes. Add the ale, tomatoes and stock. Stir the ingredients. Place the thyme and rosemary on top. Bring the liquid to a boil. Return the meat to the pan and bring the liquid to a boil. Lower the heat, cover the pan and cook at low heat for 3-1/2 to 4 hours (or in the oven at 250 degrees) or until the meat is fork tender. Remove the meat and vegetables to a serving platter. Bring the liquid in the pan to a boil and cook on high for 4-5 minutes or until the juices have thickened. Pour over the meat and vegetables and serve. (Alternately, separate the meat, vegetables and pan juices; refrigerate. Skim fat from juices when cold and proceed as above.) Makes 6-8 servings

Vegetable Pot Pie

This is the time of year when lots of people go on diets or at least make resolutions to lose weight. It’s a January, post-holiday-binge thing. Some people are successful at it and some aren’t. Some go on crazy fad diets and some take themselves to …

This is the time of year when lots of people go on diets or at least make resolutions to lose weight. It’s a January, post-holiday-binge thing. Some people are successful at it and some aren’t. Some go on crazy fad diets and some take themselves to nutritionists or weight-loss specialists.

I’m no expert about any of this. But I do know that Ed and I occasionally discuss whether either or both of us has to shed a couple of pounds and then we think about how we can do that and still stay happy and well fed.

We are carnivores who appreciate a meat-filled dinner. But recently I have been doing some meatless mondays because we both agreed that it might be one way to cut calories and fat and help us stay healthy and at the right bulk.

I know it can be tough for lifelong carnivores who, like us, grew up on a meat-starch-vegetable way of eating to think that a vegetarian meal can be filling and delicious. I’ve heard so many knee-jerk reactions against the suggestion, kind of like the reactions when the subject is gun control or voter ID requirements.

Okay. People should eat what they like. For food, any food, to be welcome, whether you’re on a diet or not, it has to taste good and look good. And vegetarian meals may not be for everyone. But all I can say is that Ed and I have eaten some wonderful meatless dinners recently. A few years ago I would never have guessed that when I served Vegetable Pot Pie for dinner that Ed would tell me to make it again, soon.

He gobbled this whole dinner up as enthusiastically as he has when I served braised Short Ribs and Moroccan Spiced Roasted Chicken Breasts.

This dish will be a go-to from now on.


Vegetable Pot Pie


2 medium all-purpose potatoes, peeled and cut into 1/2-inch pieces 

3 carrots, sliced 1/2-inch thick

1 cup cut up cauliflower florets

1 cup cut up broccoli florets

2 tablespoons olive oil

1 medium onion, chopped

1 clove garlic, chopped

1 cup frozen peas

2 tablespoons chopped fresh parsley

2 teaspoons fresh thyme leaves

salt and freshly ground black pepper, to taste 

2 heaping tablespoons flour

1-1/2 cups vegetable stock

1 sheet puff pastry 


Preheat the oven to 350 degrees. Bring a large pot of water to a boil. Add the potatoes and cook for 3 minutes. Add the carrots and cook for 3 minutes. Add the cauliflower and broccoli and cook for 2 minutes. Drain the vegetables and set them aside together. Heat the olive oil in a large sauté pan over medium heat. Add the onion and cook for 2-3 minutes. Add the garlic and cook for another minute. Add the potatoes, carrots, cauliflower, broccoli and peas, sprinkle with parsley, thyme, salt and pepper and mix the ingredients to distribute them evenly. Sprinkle the flour over the ingredients and mix gently. Cook for 2 minutes. Pour in the stock and mix the ingredients. Bring the liquid to a simmer and cook for about 5 minutes or until the liquid is slightly thickened. Spoon the ingredients into a 6-cup casserole dish (or use individual ovenproof dishes). Roll the puff pastry sheet to fit the top of the casserole. Bake for about 20 minutes or until the tops are golden brown and puffed. Makes 4 servings

Frozen Dough Foldover Cookies

I don’t usually talk so much about desserts, at least not as a daily matter, but I looked back at my posts this week and noticed they were all sugar-loaded.Is my body telling me something?I did just call my dentist for an appointment …Somehow it was…

I don’t usually talk so much about desserts, at least not as a daily matter, but I looked back at my posts this week and noticed they were all sugar-loaded.

Is my body telling me something?

I did just call my dentist for an appointment …

Somehow it was dessert week at any rate, starting with Tangerine Tart and then Spice Cake. Yesterday I mentioned that it would have been my mom’s 100th birthday and I had a triumphant breakthrough with a cookie-cake recipe of hers (Nut Roll) I could never get right until now. And during the week, thinking I might not do the Nut Roll well enough to blog about it, I made some of my mom’s foldover frozen dough cookies. The ones I would have written about if not the Nut Roll.

I haven’t made these cookies in a while. All I can say is that the recipe yielded 84 cookies. I gave 4 away. There are 6 left.

So guess how many cookies Ed and I ate, just the two of us?

They are quite delicious is all I can say.

Frozen Dough Foldover Cookies

1-1/3 cups all-purpose flour, approximately

1/2 teaspoon salt

1/2 pound unsalted butter

1 cup dairy sour cream

1 large egg white

lekvar (prune and apricot), apple or pumpkin butter or jam

Place the flour and salt in the bowl of an electric mixer and mix briefly to add the salt. Add the butter in chunks and mix on low-medium for a minute or so until the mixture is crumbly. Add the sour cream. Mix until a smooth dough has formed. It might be slightly sticky. If very sticky add a tablespoon more of flour. Knead the dough on a well-floured surface and shape into a cylinder. Wrap in plastic and refrigerate for at least 8 hours. Preheat the oven to 350 degrees. Using small chunks of dough at a time, roll the dough thin (about 1/16th-inch) and cut into 2-inch squares. Place some lekvar in the middle. Bring up opposite sides corner points of the dough to the middle and press to seal the dough. Place the cookies on a lightly greased cookie sheet. Refrigerate for at least 30 minutes. Brush the tops of the cookies with some egg white. Bake for 25-30 minutes or until lightly browned.

Makes about 7 dozen

My Mom's Famous and Fabulous Nut Roll

Today would have been my mother’s 100th birthday and although she and my Dad died many years ago, I think about them a lot. You can’t possibly realize how much you’re going to miss people when they’re in your life. You only understand when they aren’t. And what happens from time to time is that something comes up during the day that reminds you of them. A smell. Or a magazine picture of a scarf in your mother’s favorite color. Or a song you hear on your car radio.

The memories can be sad or poignant or funny or thrillingly happy.

Today my memories are happy. I am celebrating with my brother and toasting our Mom, who was was funny and sometimes controversial and more than occasionally provocative, which would make us furious, but also make us think.

She was smart and interesting too. A feminist before the word feminist existed. I am sure that had she been born at an even earlier time, she would have been a Suffragette.

My mother was also a good cook. She mostly stuck to what she knew and wasn’t much for experimenting. She’d say “why change a good recipe?”

There is some wisdom to that, although I don’t follow it. My family never gets to eat the same thing too many times, except maybe for holiday dinners.

But for Mom, a winner was a winner, and she had so many it’s difficult to choose among her recipes to make one special thing for her birthday celebration.

I considered my Mom’s fried chicken (which was better than anyone’s, even Colonel Sanders) together with a dozen or so of the crispy-edged corn fritters she served with it.

For dessert? Her apple pie of course. It was legendary. We still talk about it every autumn, when I make a batch of my own.

Then again, speaking of apples, I remember how often she made that most wonderful apple crisp that was my Dad’s favorite and I would come in to their house through the garage and the perfume from the baking apples and the crunchy cereal crust would greet me before even they did.

Maybe I should choose that?

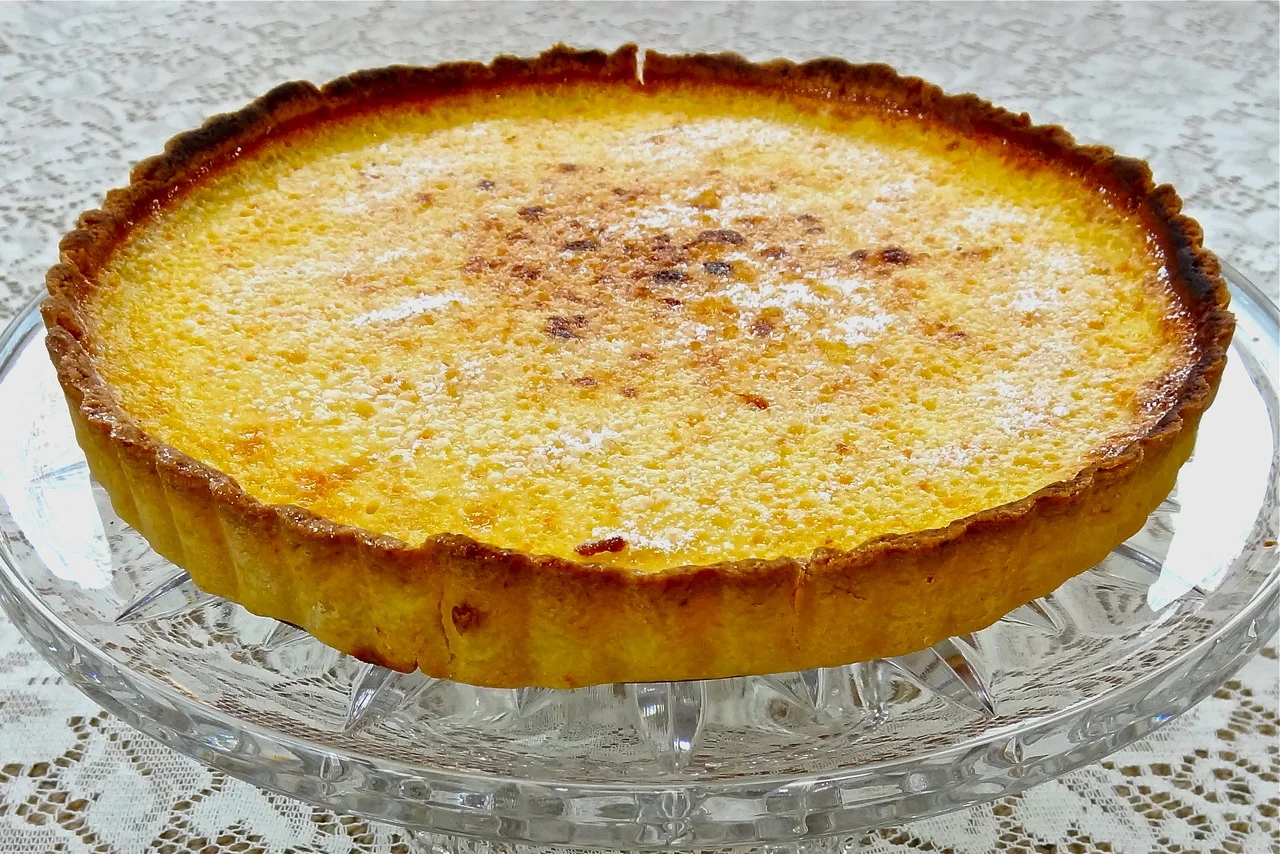
Or her rice pudding? It was baked custard actually, with a smooth inside and crispy top. I haven’t cooked it in a while.

I could go on and on. About her most comforting and wonderful chicken soup. Or her family-famous cookies that we all called Fannies, but are actually plain old butter thumbprint cookies. Or her most welcome roast beef hash which she made out of leftover meat and mashed potatoes and more sauteed onions than you can imagine.

She said she hated to use leftovers, a consequence of having struggled through the Great Depression and never wanting the memories.

And yet she used leftovers. Cleverly and creatively but for simple, uncomplicated, unsophisticated dishes that became our favorites. Like her Macaroni and Cheese, put together with scraps and bits from the fridge.

There was only one dish she ever made that I didn’t like (potato salad).

And one dish — Nut Roll — I could never get the hang of, even though she told me how and showed me how to make it many many times. Mine just never tasted as good.

That’s the one.

That’s the one I decided it had to be. I’d give this one another try.

Which I did this morning (I made the dough yesterday because it has to sit in the fridge for a few hours).

It’s almost as good as hers. Maybe it is as good but the memories of hers are too good to let me think it is.

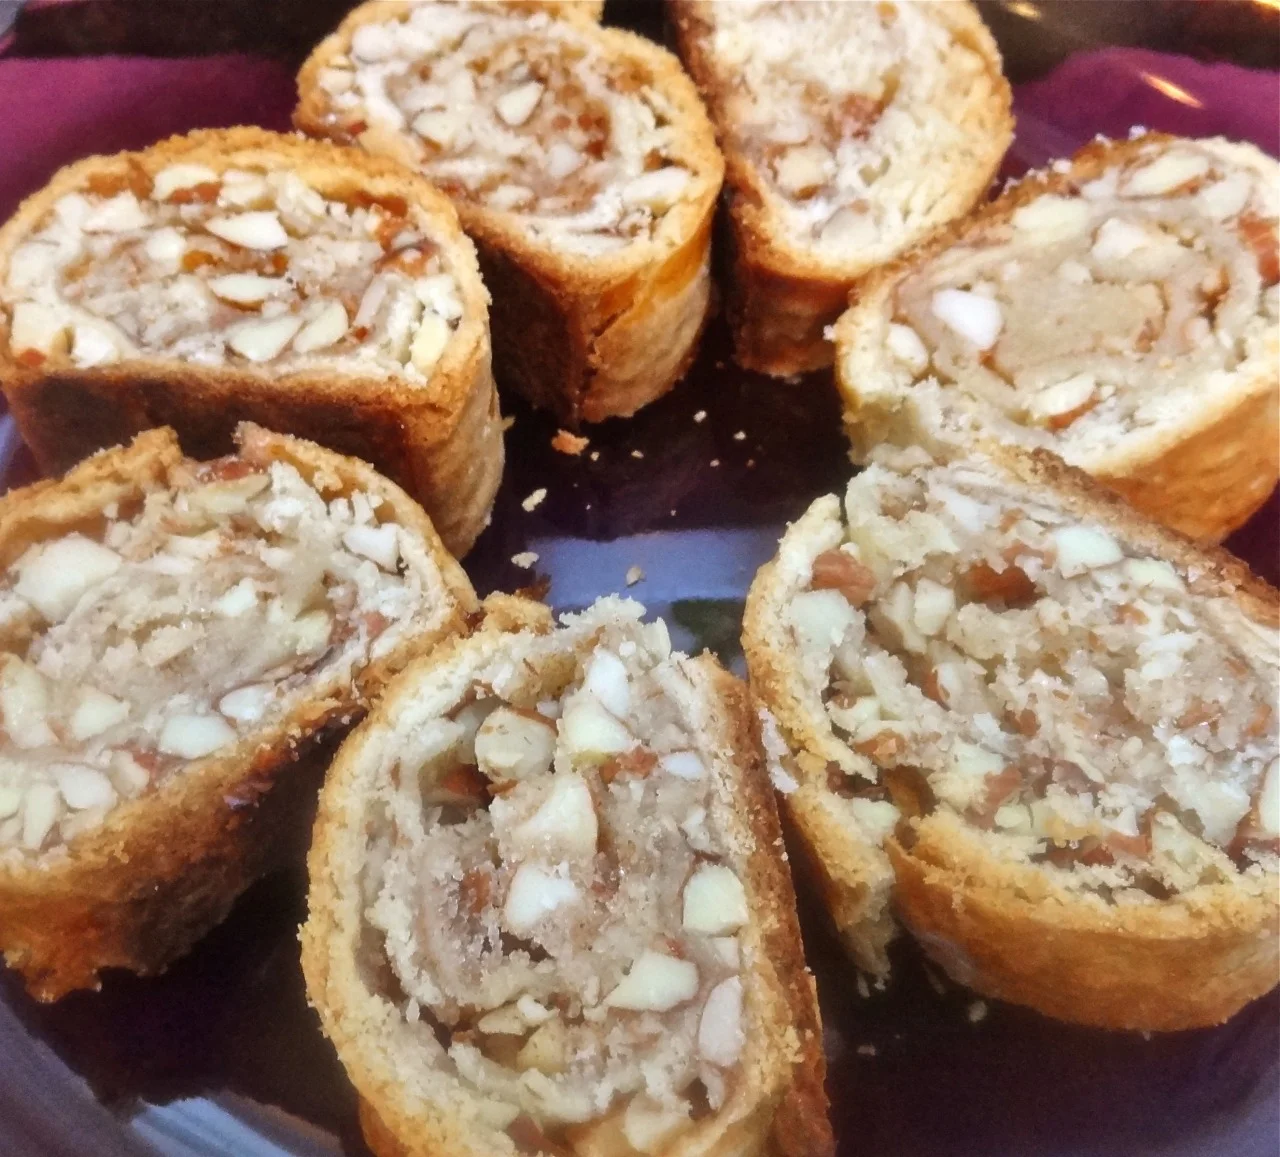
But my Nut Roll is enough like it, anyway, to celebrate with. Superb with coffee or maybe a glass of dessert wine.

My Mom used walnuts in her Nut Roll; because of allergies in my family I never cook with walnuts, so I used almonds. 

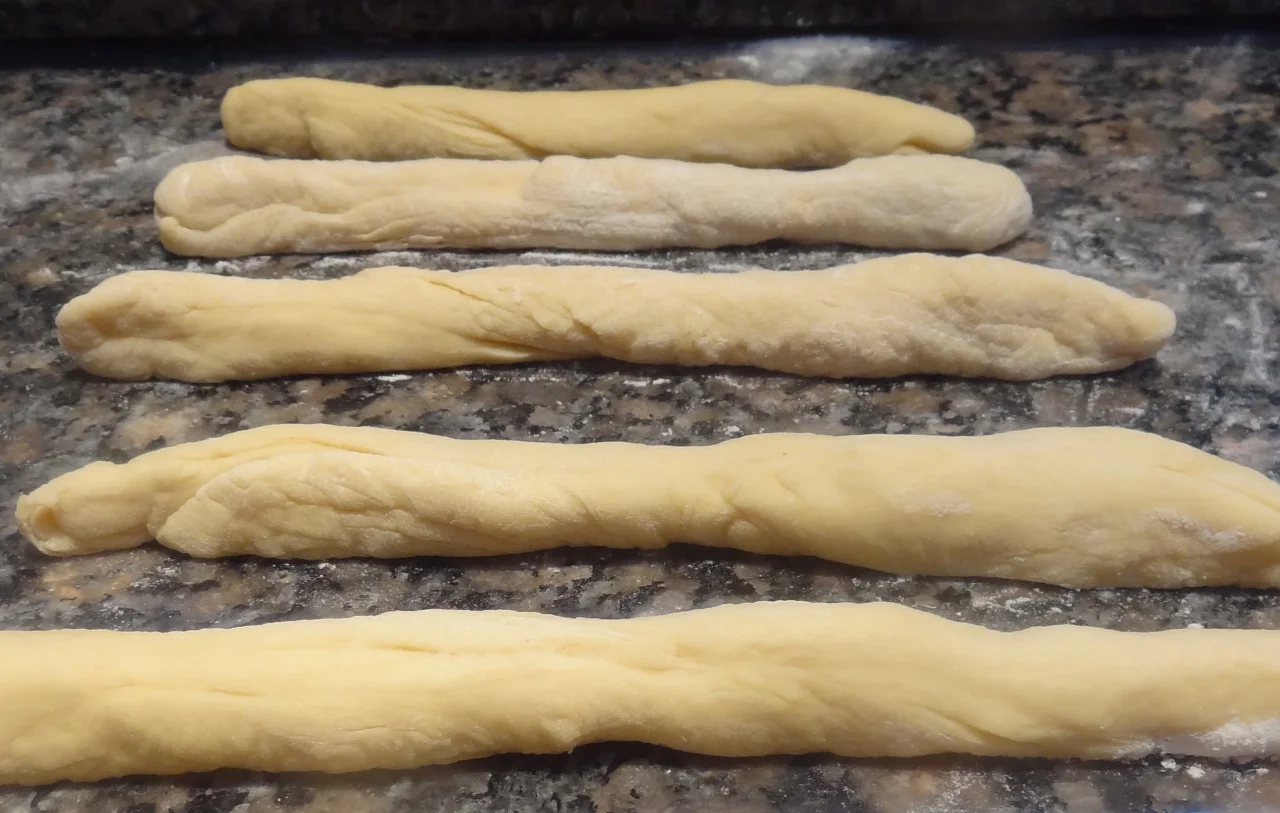
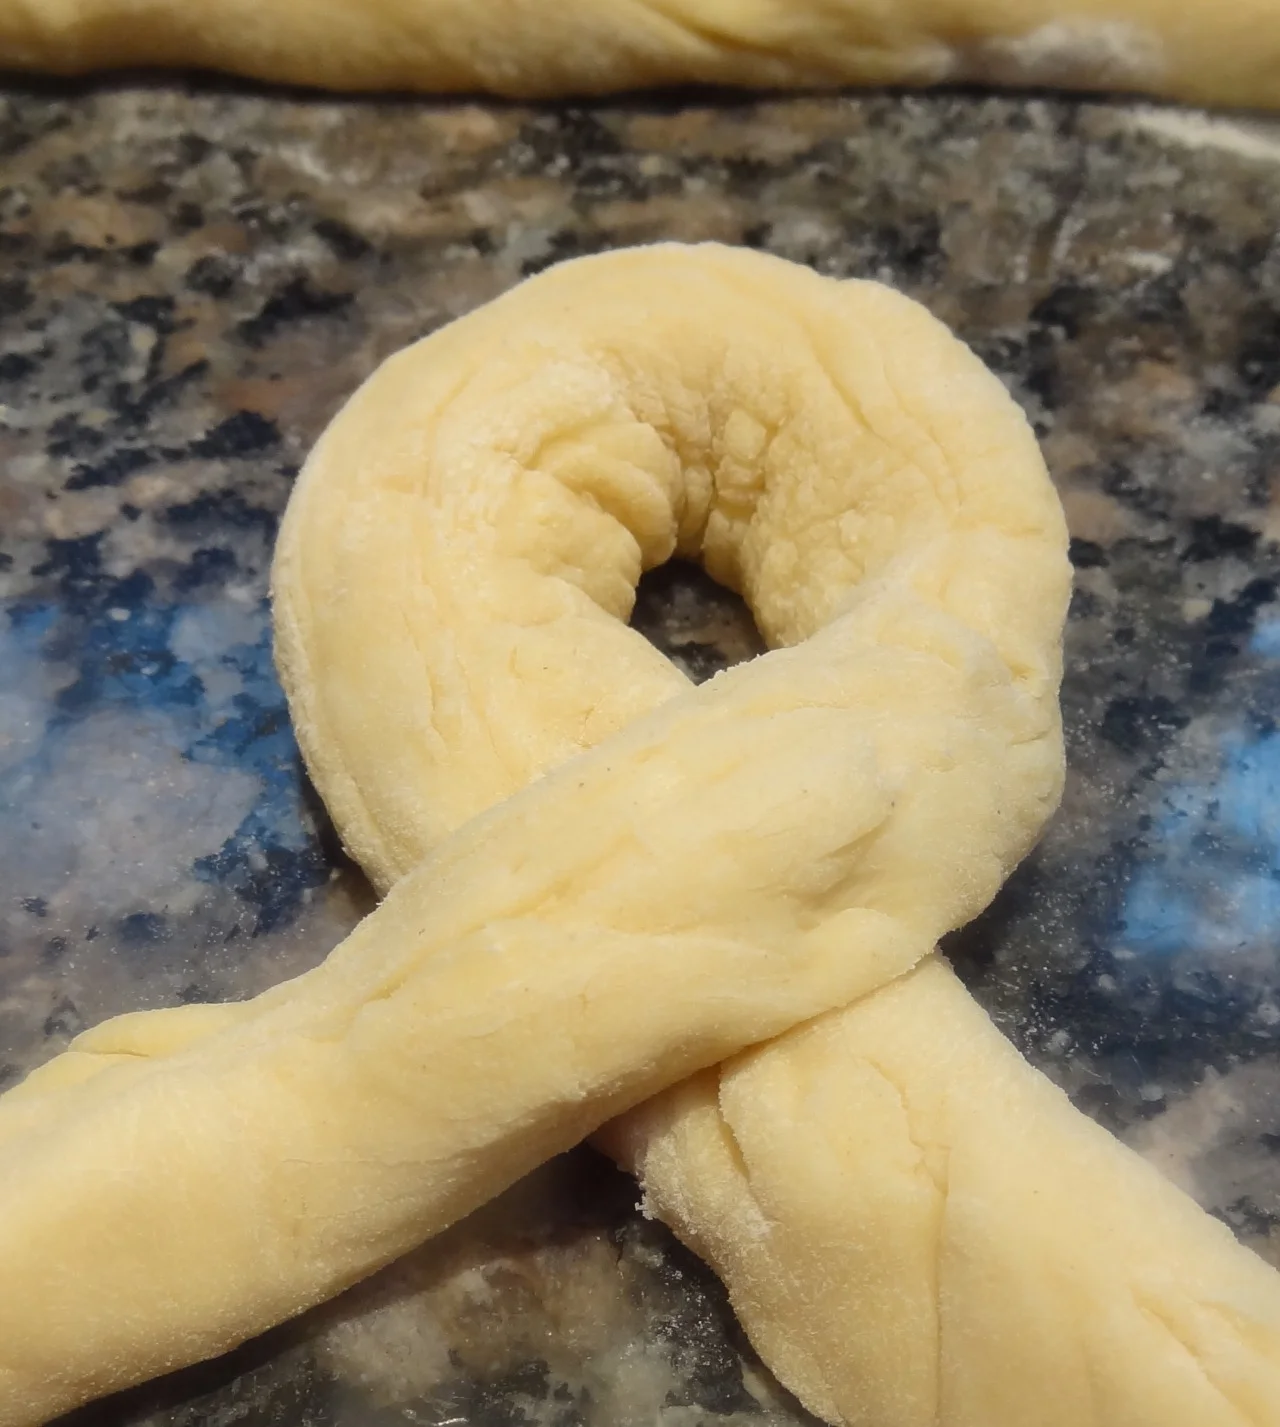
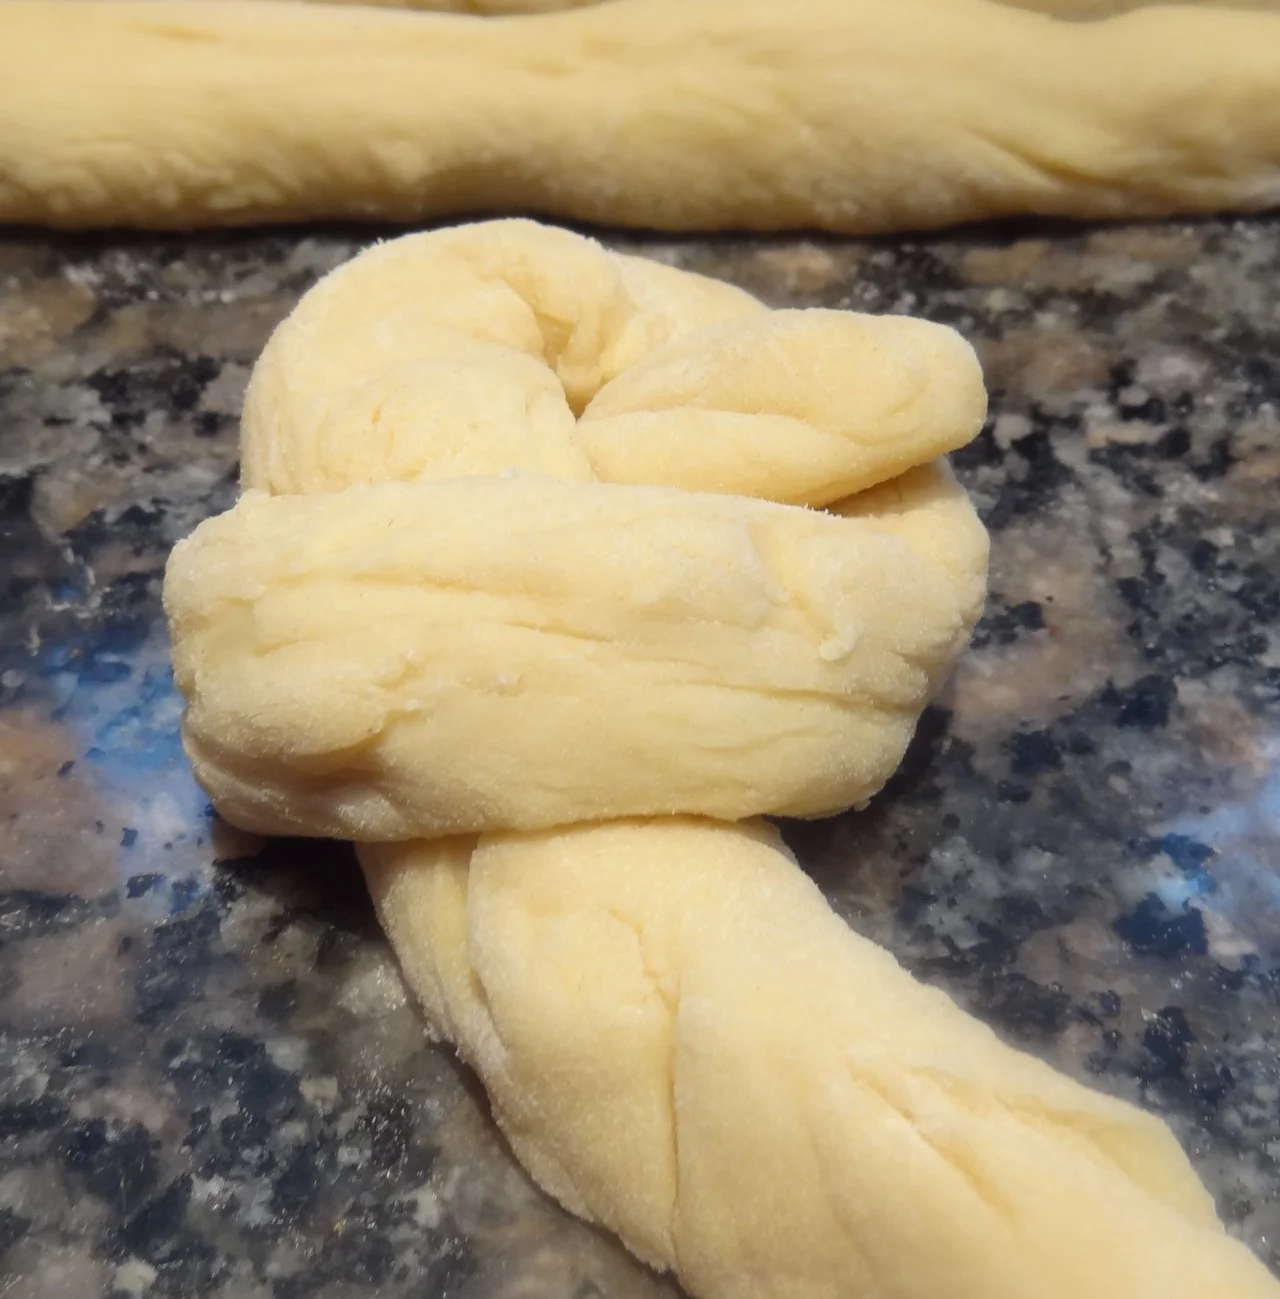
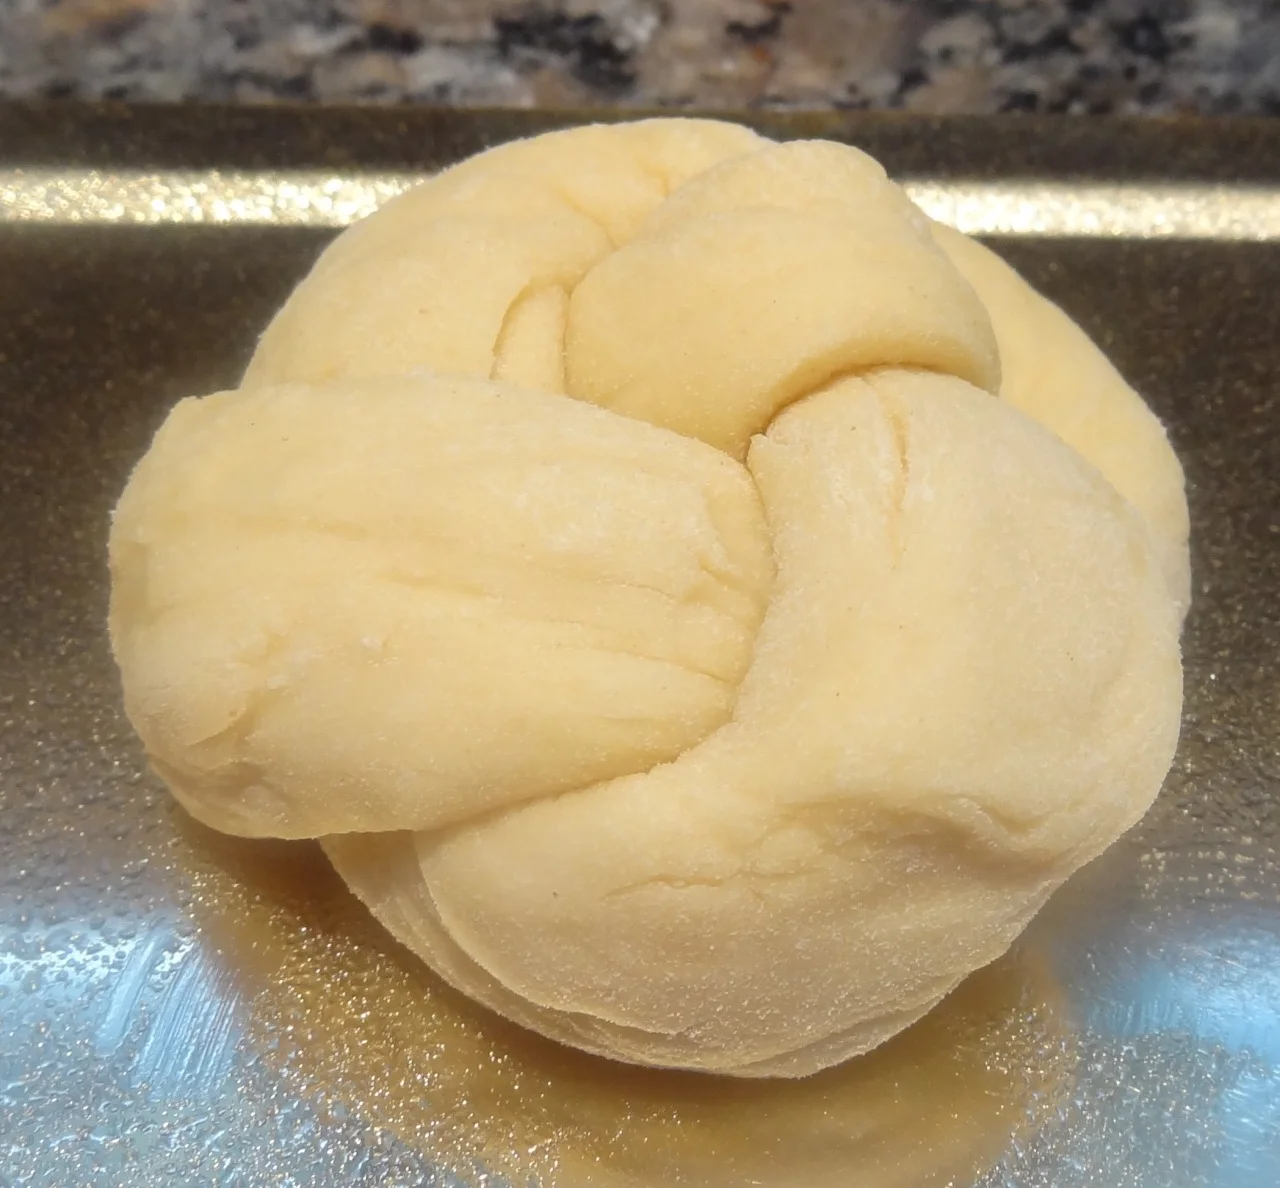
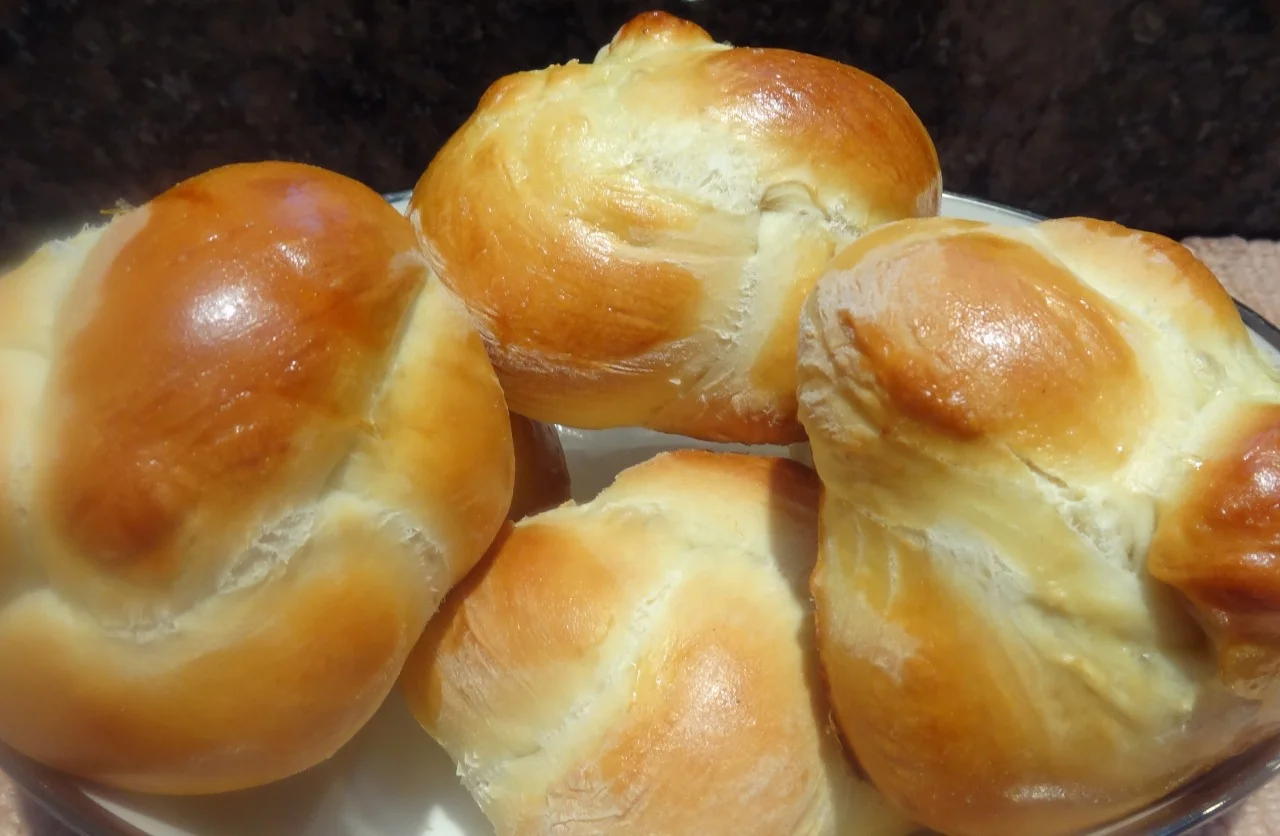
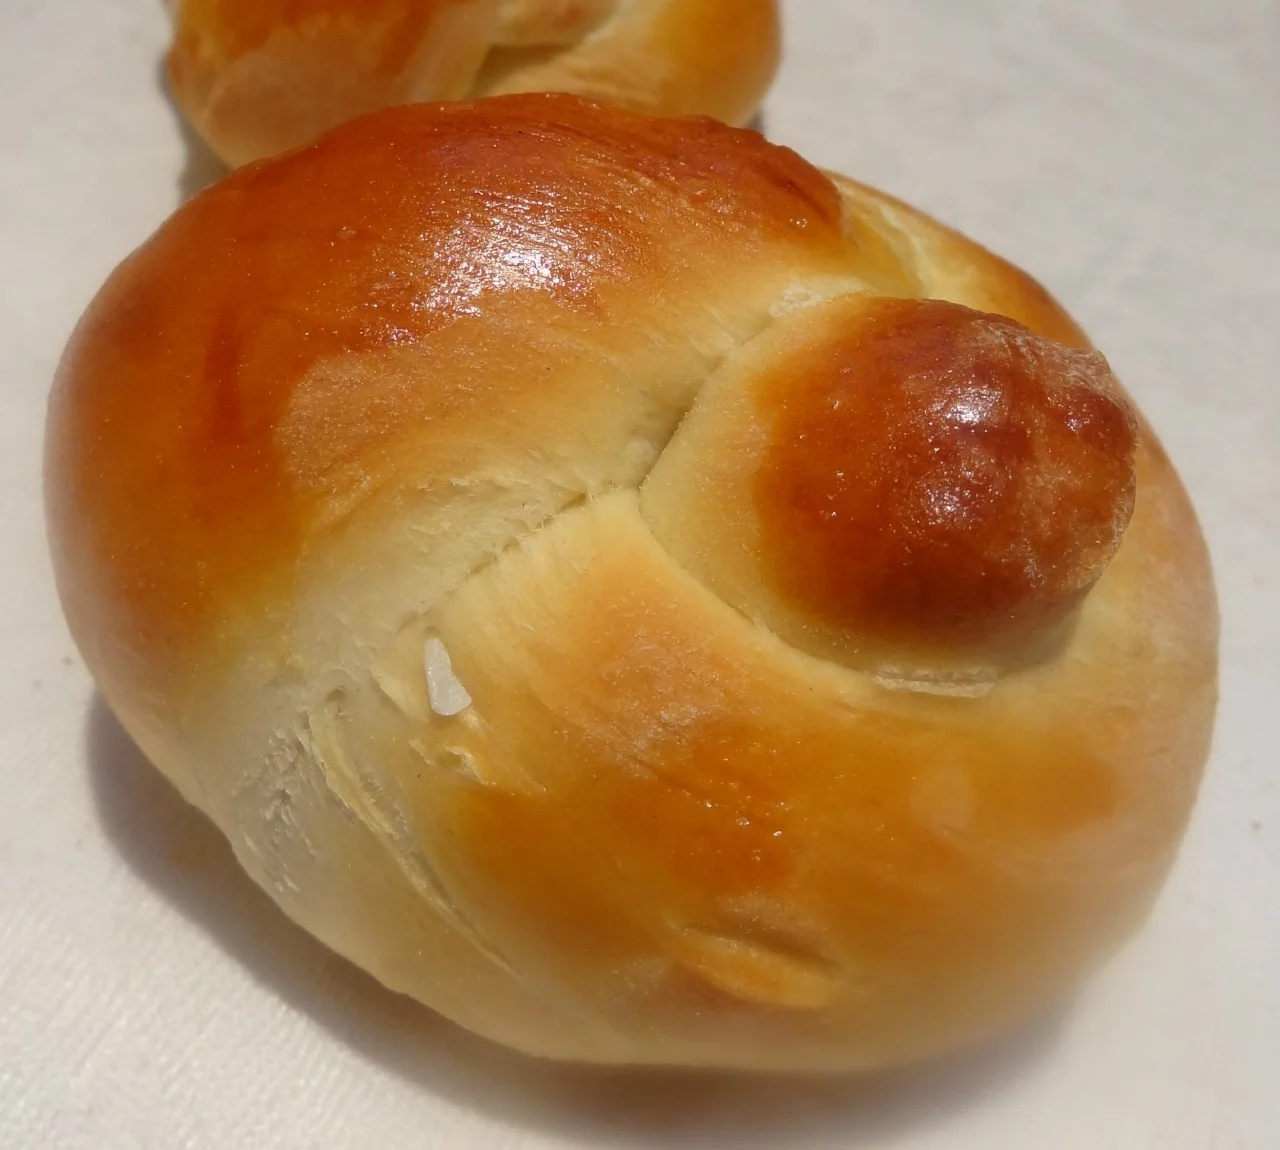
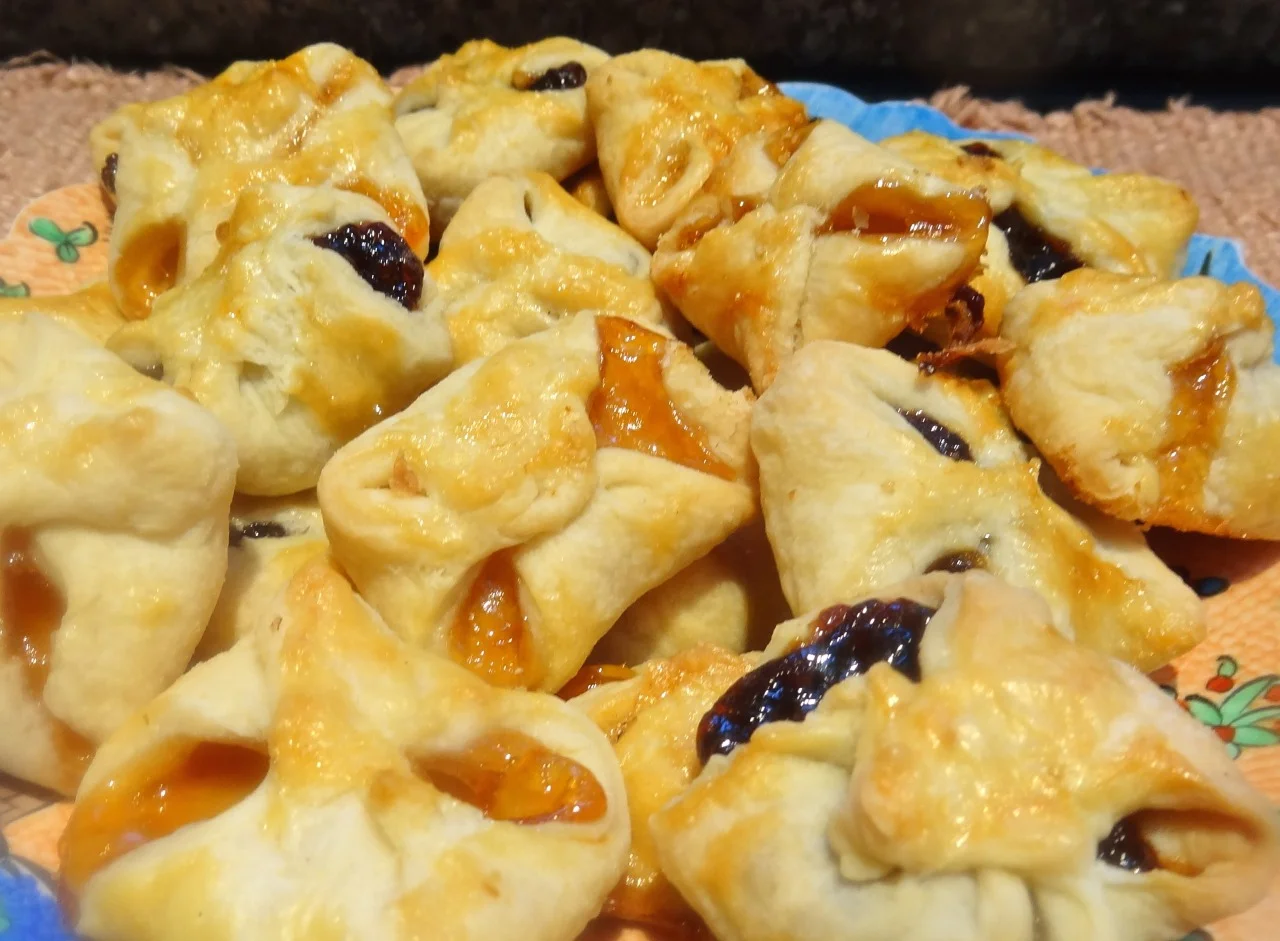
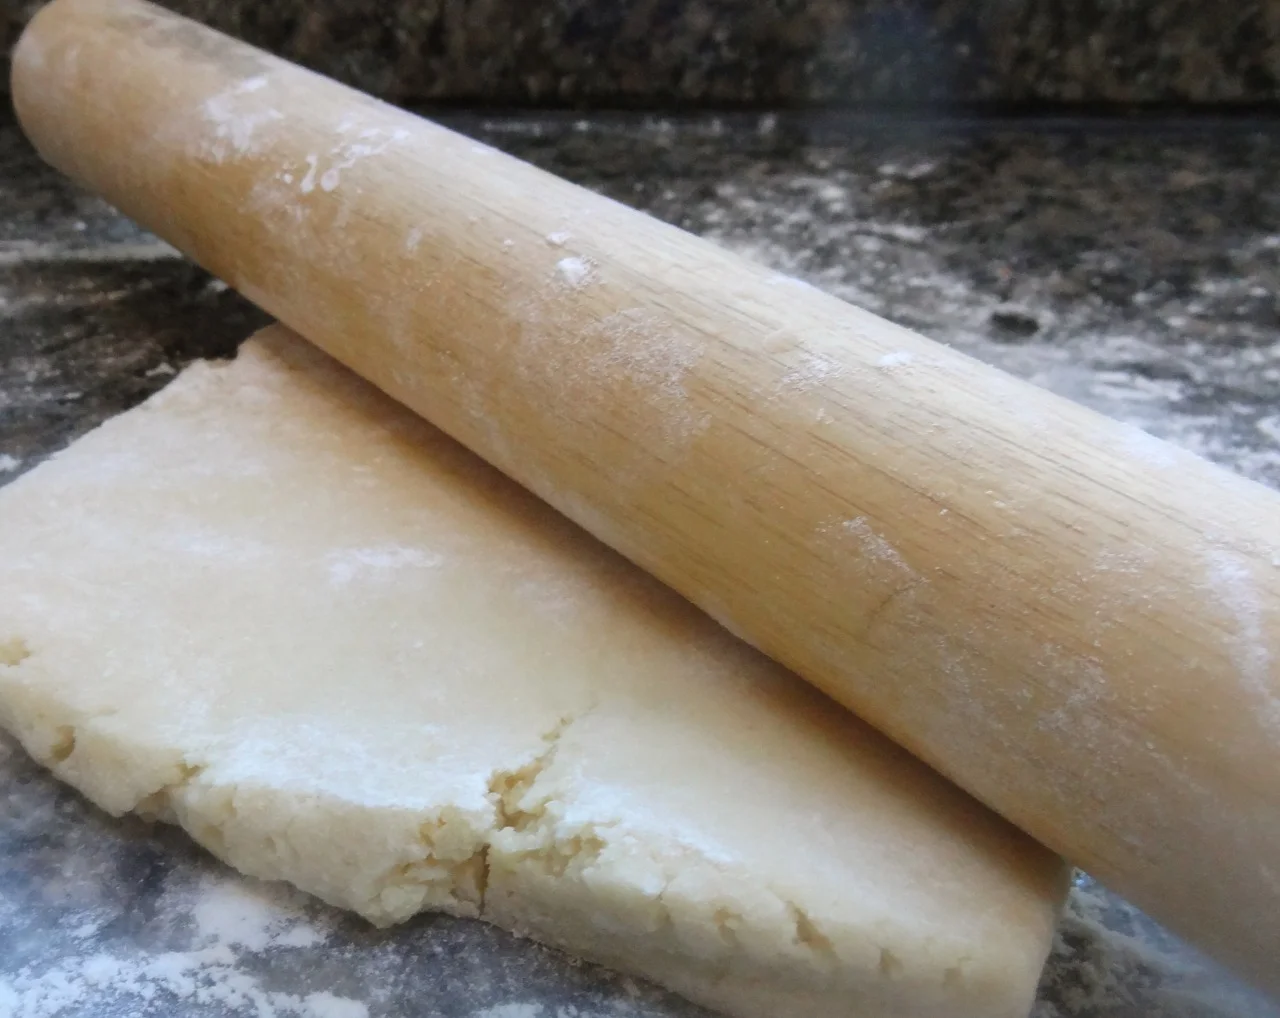
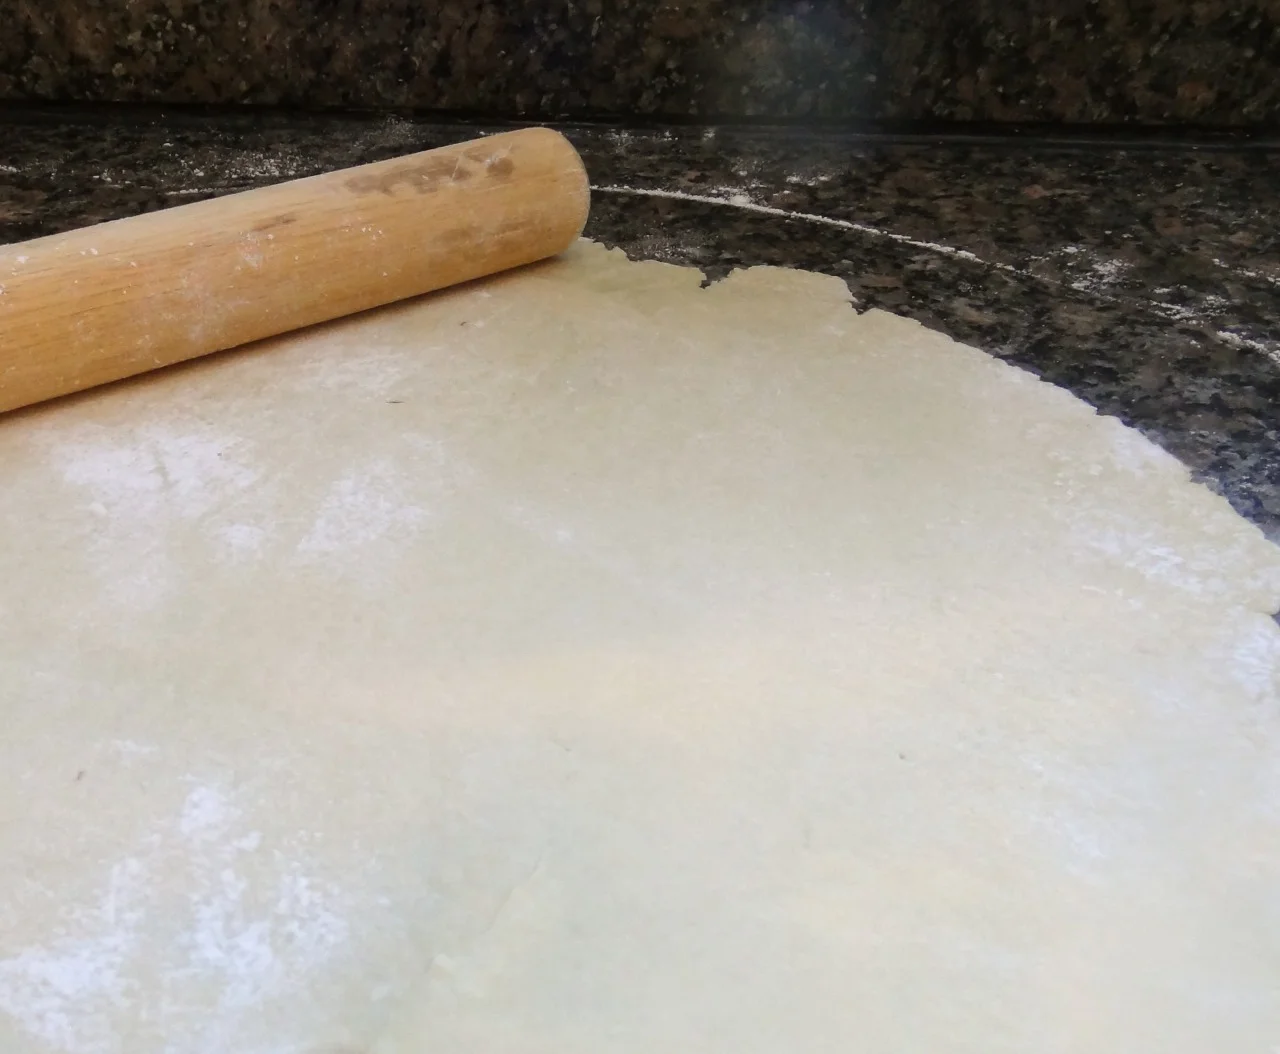
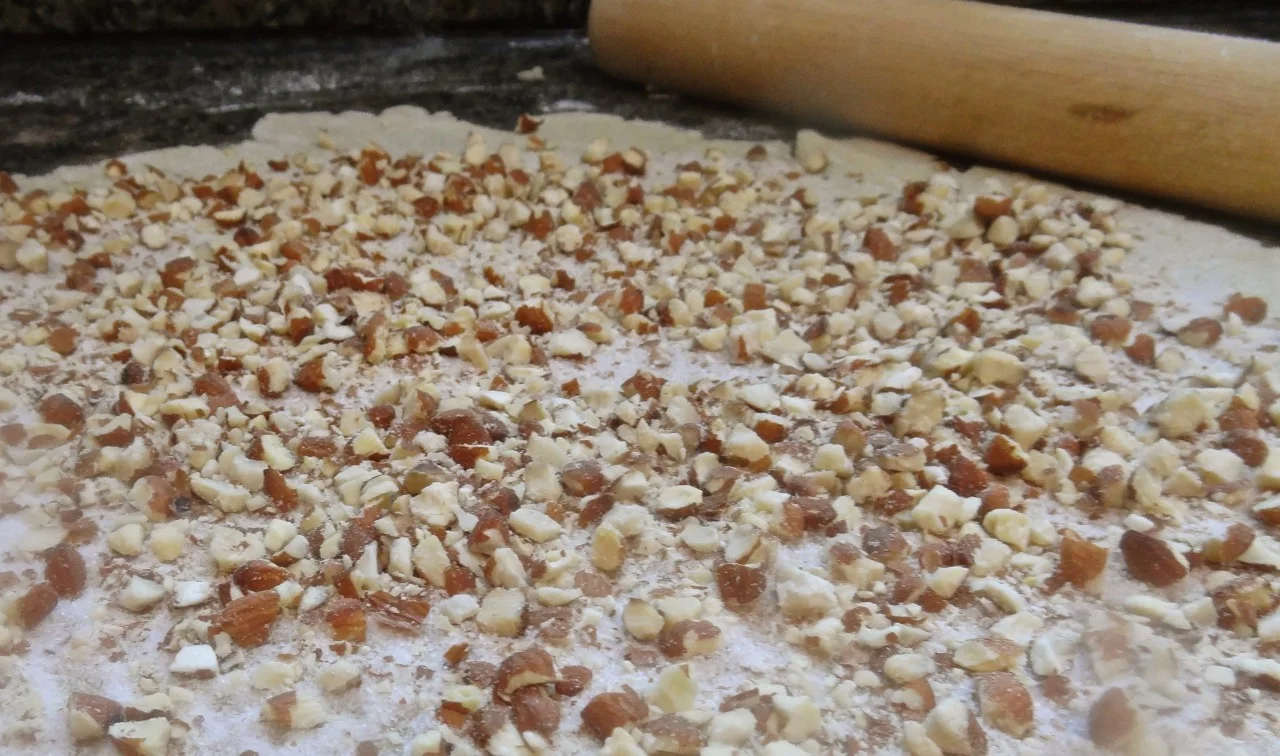
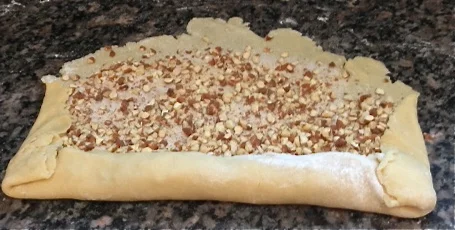
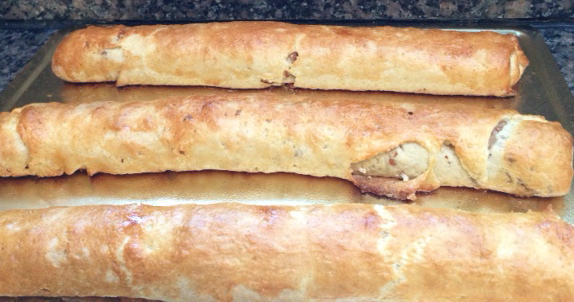
In the photos you can see the lump of one section of dough that I started with, then, in the second photo, rolled it thin. The third photo shows how to scatter the sugar and nuts over the dough and the fourth photo, how to roll the Nut Roll. The fifth photo shows what the rolls look like when it comes out of the oven. The last photo is a plate of slices — let the rolls cool, then use a serrated knife to cut the pieces.

Enjoy. Btw, the rolls freeze beautifully.

Happy Birthday Mom!


Lily Vail’s Nut Roll

 dough:

  • 1/2 pound unsalted butter

  • 3-1/2 cups all-purpose flour

  • 1/2 cup sugar

  • 1 teaspoon baking powder

  • 1/2 teaspoon salt

  • 2 large eggs, separated

  • 1/2 cup dairy sour cream

  • 2 tablespoons milk

filling:

  • 1 cup sugar

  • 1 teaspoon ground cinnamon

  • 12 ounces chopped nuts (about 3 cups)

Cut the butter into chunks and place in the bowl of an electric mixer. Add the flour, sugar, baking powder and salt and mix (using the flat paddle if your machine has one) at slow speed until the ingredients are blended and crumbly looking. Make a well in the center and add the egg yolks, sour cream and milk. Mix the ingredients at medium speed until a smooth, uniform dough has formed. Knead the dough 3-4 times on a floured surface; shape into a cylinder, cover with plastic wrap and refrigerate for at least 8 hours.  Cut the cylinder into 3 parts. Mix the sugar and cinnamon together in a bowl. Working with one dough part at a time, roll out on a floured surface into a circle about 1/16-inch (very thin). Sprinkle each circle with 1/3 of the cinnamon-sugar and 1/3 of the chopped nuts. Roll up tightly into a compact roll, tucking in the sides. Preheat the oven to 375 degrees. Place the rolls in the refrigerator for about 20-30 minutes. Brush the rolls with some of the egg white. Bake the rolls for 40-45 minutes or until golden brown. Let cool and slice.

Makes 3 Nut Rolls 

Tangerine Tart

When winter comes and it’s cold out and your feet get wet because you didn’t feel like wearing boots and carrying your shoes and the slush slipped through that space between the upper part of the shoe and the sole, it’s nice to day…

When winter comes and it’s cold out and your feet get wet because you didn’t feel like wearing boots and carrying your shoes and the slush slipped through that space between the upper part of the shoe and the sole, it’s nice to daydream about sunnier places like Tangier, Morocco.

I thought of Tangier rather than Aruba or Cancun or some other well-known beach because I’m in the food business, not the travel business and I recently learned that tangerines were named after Tangier, the original place from which tangerines were shipped to the West back in the 19th century.

I guess that’s not so important, but I like to know things like that.

What is important is that tangerines are the bright orange sunny happiness that warms up the winter. 

Peel a tangerine while you’re sitting under a blanket watching TV in your easy chair. Eat a tangerine at 3:00 p.m. at your desk. Send a tangerine in your child’s lunchbox (tangerines are easy enough for even pre-schoolers to peel). This is a fruit with such a welcoming color and refreshing tart-and-sweet flavor that it can brighten anyone’s day.

Tangerines have a citrus taste similar to oranges but are sweeter and less acidic. To me, tangerines are richer tasting, more intense.

You can squeeze tangerines for juice to make this festive looking tart (or use already squeezed tangerine juice). The tart freezes nicely for a month or so.

Tangerine Tart

CRUST

1-1/2 cups all-purpose flour

1 tablespoon sugar

2 teaspoons grated fresh tangerine peel

1/2 teaspoon salt

6 tablespoons butter, cut into chunks

2 tablespoons vegetable shortening, cut into chunks

3 to 4 tablespoons tangerine juice

FILLING

4 large eggs

3/4 cup sugar

1/2 cup tangerine juice

2 teaspoons grated fresh tangerine peel

1-1/2 teaspoons vanilla extract

1/2 cup cream (any kind)

Confectioners’ sugar or whipped cream, optional

TO MAKE THE CRUST

Preheat the oven to 400 degrees. Combine the flour, sugar, tangerine peel and salt in a food processor. Process gently on pulse to blend the ingredients. Add the butter and shortening and pulse several times until the mixture looks like small crumbs. With the processor on, add the tangerine juice gradually, using only as much as is needed to form a soft ball of dough. Roll the dough out on a floured surface and place in a 9- or 10-inch tart pan. Prick the dough with the tines of a fork. Cover the dough with aluminum foil and add pie weights or dry beans on top of the foil. Bake for 12 minutes. Remove the pie weights and foil. Return the pan to the oven for 6 minutes or until the crust is lightly browned. Remove from oven.

Reduce the oven heat to 375 degrees.

TO MAKE THE FILLING

Beat the eggs and sugar until well blended. Stir in the tangerine juice, tangerine peel, vanilla extract and cream and blend ingredients thoroughly. Pour into the partially baked tart shell. If desired, to prevent over-browning, place aluminum foil over the crust edges. Bake for 25 minutes or until set. Let cool. Sprinkle with confectioners’ sugar or whipped cream. If you use confectioners’ sugar, use as is or broil the tart for several seconds to caramelize the surface. Makes 8 servings


Pumpkin Spice Cake

I accomplished “three birds with one stone” over the weekend (I say accomplished because I hate the expression killing two or three birds with one stone because I could never kill a bird with a stone or anything else).
But here’s w…

I accomplished “three birds with one stone” over the weekend (I say accomplished because I hate the expression killing two or three birds with one stone because I could never kill a bird with a stone or anything else).

But here’s what I accomplished: a tasty cake that satisfied three things I had to do. I needed to develop recipes that use coconut oil. I needed to bake a cake for our local Hadassah’s bi-monthly Tea for cancer patients and their caregivers at Stamford Hospital. And I wanted to use up canned food that I bought at the beginning of the fall (not that the cans of food couldn’t last longer, I just like to do a “winter” cleaning as well as a spring cleaning). 

The result was this tender, warm and spicy cake. It’s a nice nosh on a cold day. It’s good for dunking. It’s good plain, just as is, but you can dress it up with ice cream or some sort of sugary-caramel sauce (that’s way too sweet for me).

Remember this for next Thanksgiving. Or make it now. You can freeze it too, and have a piece now and then over the coming weeks. You can use canned pumpkin or squash or about 1-3/4 cups mashed fresh cooked squash.


Pumpkin Spice Cake


3-1/4 cups all-purpose flour

3/4 teaspoon salt


2 teaspoons baking powder


1/2 teaspoon baking soda


2 teaspoons ground cinnamon


1 teaspoon ground cloves


1 teaspoon ground ginger

1 teaspoon ground nutmeg


1/2 teaspoon ground allspice


2 cups granulated sugar


1/2 cup vegetable oil

1/2 cup coconut oil

4 large eggs


1 (15-ounce) can pumpkin purée (not pie filling)


Preheat the oven to 350 degrees. Lightly grease a 10-cup Bundt pan, sprinkle with flour and tap out any excess. Place the flour, salt, baking powder, baking soda, cinnamon, cloves, ginger, nutmeg and allspice in a large bowl and whisk to blend them completely; set aside. Place the sugar, vegetable oil and coconut oil in the bowl of an electric mixer and beat on medium speed for about one minute to blend ingredients thoroughly. Add the eggs one at a time, beating well after each addition. Stir in the pumpkin and blend thoroughly. Add the reserved flour mixture and beat the mixture at medium speed for 1-2 minutes or until the batter is smooth and even. Pour the batter into the prepared pan and bake for about 60-70 minutes or until a cake tester inserted into the center of the cake comes out clean. Remove the pan to a cake rack to cool for 15 minutes. Invert the cake onto the rack and cool completely. Makes one cake serving 12-16