Almond Cookie Cups with Ginger Ice Cream

I’m old fashioned. I like dinner parties where we eat in the dining room and I use my good china and utensils and cloth napkins. It’s feels so lavish, a really nice break from the every-day stuff, and all the more welcome because I don’t do it very …

I’m old fashioned. I like dinner parties where we eat in the dining room and I use my good china and utensils and cloth napkins. It’s feels so lavish, a really nice break from the every-day stuff, and all the more welcome because I don’t do it very often.

I don’t mind the work. And in fact, the food I cook is mostly easy stuff I can prepare in advance, so that when the guests come (never more than 6 people), I can spend the time with them rather than fuss in the kitchen and miss all the conversation.

So, next weekend, when 4 of my friends will be at my house for dinner, I plan on serving a vegetable cream soup — maybe with fresh summer tomatoes — that I’ll make on Thursday and the main course will be a cold, poached salmon served with cool vegetables vinaigrette (all cooked by Friday, late afternoon).

Desserts are usually simple too, but I wanted to be a bit whimsical this time, so I started early and already have some of it stored away in the freezer: almond cookies from an old recipe that I molded into muffin tins (it could have been brioche molds or mini-tart pans) until they held their shape. I also made ginger ice cream, to fit inside those cookie cups.

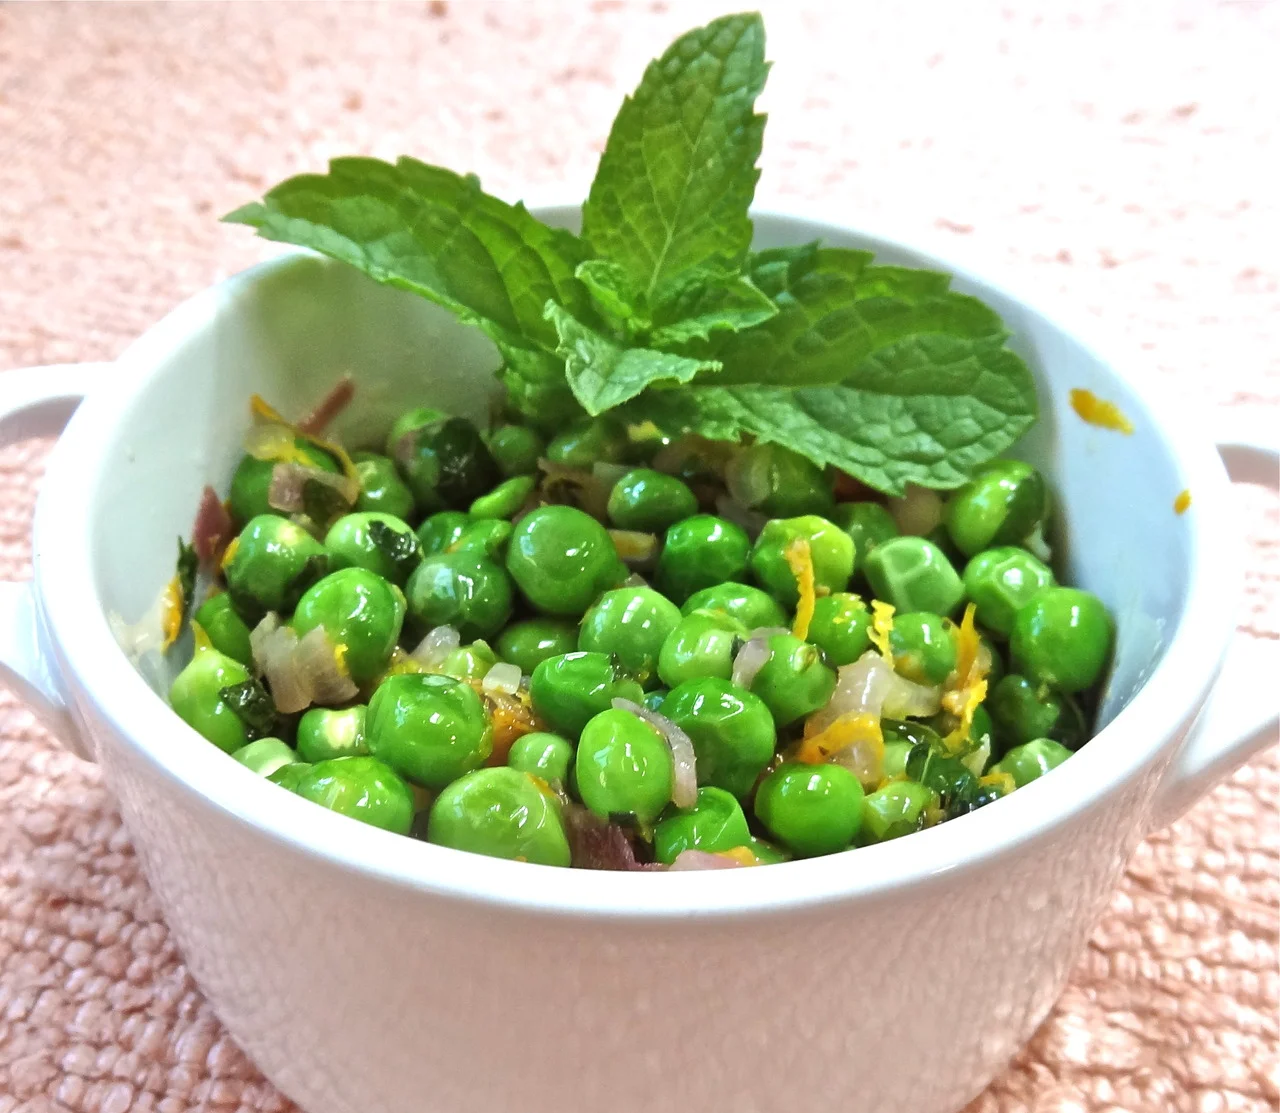
It’s all done but for the garnish: a few snips of fresh mint from my garden (but you could add a sauce or some whipped cream or mashed fresh berries).

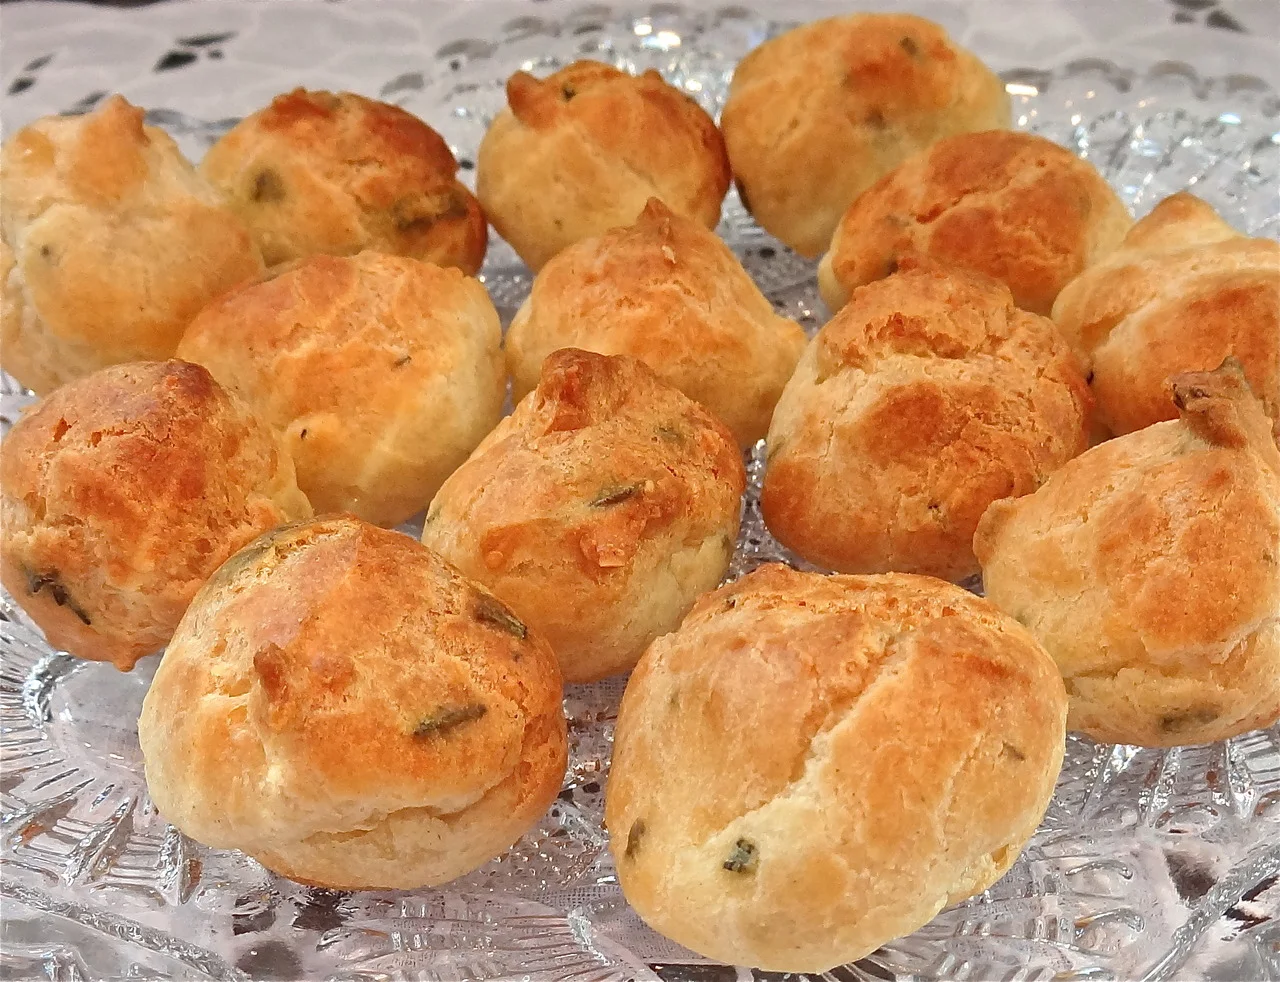
Just a few quick hors d’oeuvre and I’m done. All ahead of time.

Almond Cookie Cups with Ginger Ice Cream

the Cookie Cups:

4 ounces unsalted butter

6 tablespoons sugar

1/2 cup ground toasted almonds

1 teaspoon vanilla extract

2 egg whites at room temperature

1/3 cup all-purpose flour, sifted

Preheat the oven to 350 degrees. Lightly grease a cookie sheet. Place the butter and sugar in the bowl of an electric mixer and beat for 1-2 minutes at medium speed or until well blended. Add the almonds, vanilla extract, egg whites and flour and blend them in thoroughly. For each cookie, spoon some of the batter onto the cookie sheet and spread with the back of a spoon into a thin circle about 3-inches in diameter. Bake for 6-8 minutes or the edges have browned. Carefully and quickly remove each cookie and slip into a muffin tin or brioche mold. Let cool for 5 minutes, then place on a cake rack to cool completely. Fill with ice cream and serve. These may be frozen. NOTE: for best results and to make it easy, bake 2 cookies at a time. Makes 12

Ginger Ice Cream

4 cups half and half cream

1/2 cup sugar

4 large egg yolks

3/4 cup finely chopped crystallized ginger

1/4 cup ginger liqueur (or 2 tablespoons liquid from preserved ginger), optional

Heat 2 cups of the cream over medium heat until bubbles appear around the edges of the pan. In the bowl of an electric mixer, beat the sugar and egg yolks at medium speed for 3-5 minutes or until light and thick. Gradually add the heated cream and blend the ingredients for about one minute or until smooth. Return the mixture to the saucepan and cook over medium heat, stirring constantly, for 5-6 minutes or until thickened enough to coat the back of a spoon. Strain the mixture into a bowl, pour in the remaining cream and blend it in thoroughly. Refrigerate until cold. Stir in the vanilla extract and the ginger. Freeze in an ice cream freezer according to manufacturer’s directions. When the mixture is almost completely frozen, pour in the liqueur, if used, and freeze completely. Makes about 1-1/2 quarts

P.S. I am part of a group called The Kosher Connection, which includes kosher food bloggers throughout the world. This recipe is a first in a series of a monthly “recipe challenge.” You can follow all the recipes on Twitter with #kosherrecipes.

For other fabulous recipes from our team see:

Fudge Bars

Forbidden Black Rice with Cherries

Chocolate and Vanilla Twist Pops

Frozen Chocolate Crunch Cake

Bourbon Peach Milk Shake

Raspberry Avocado Sorbet

Cornflake Crunch Ice Cream

Iced Cappuccino Baked Alaska

Dairy Free Halvah Pistachio Ice Cream

BonBons

Black Forest Kulfis

Iced Mochaccino

Strawberry Float

Peppermint Brownie Ice Cream Sandwiches

Herb and Cheese Gougeres (Choux Puffs)

Gougeres are the easiest and also the hardest hors d’oeuvre to cook.I say that because they are easy to make once you get the knack. But I admit, they’re a little tricky for first-timers, so you need a few pointers. Which I am going to give you here…

Gougeres are the easiest and also the hardest hors d’oeuvre to cook.

I say that because they are easy to make once you get the knack. But I admit, they’re a little tricky for first-timers, so you need a few pointers. Which I am going to give you here.

Then once you make them a couple of times you can practically do it in your sleep.

Also, gougeres are extremely useful. I serve them plain, heated to a crisp. But sometimes I serve them at room temperature, cut open and stuffed with all sorts of fillings from plain old egg salad to toasted nuts with cheese or smoked salmon tartare.

And sometimes I fill them with things like mushroom ragout or ratatouille and serve them hot.

Of course, if you make the gougere dough without the herbs and cheese they are …. profiteroles. Which you can fill with ice cream!

Or you can make bigger ones and fill them with ice cream, whipped cream or custard, the way my mother did, and call them Cream Puffs.

It’s all the same dough. The method is the same, so once you get the knack you have this extraordinarily versatile recipe.

I always have gougeres in my freezer. Just in case company comes. Like my daughter Meredith, who loves them and always heats up a few for herself when she’s here.

Or for dinner company or weekend guests, which I am having this weekend.

Or to celebrate Bastille Day, tomorrow, because, well, this is a French recipe. Called choux.


Herb and Cheese Gougeres (Choux Puffs)

1 cup minus 2 tablespoons water

1/4 pound unsalted butter, cut into chunks

1 cup all purpose flour, sifted

3/4 teaspoon salt

4 large eggs

1-1/2 tablespoons chopped fresh mixed herbs, or 1-1/2 teaspoons dried

1/2 cup grated Parmesan or Gruyere cheese

pinch cayenne pepper

egg glaze: 1 large egg mixed with 2 teaspoons water, optional

Preheat the oven to 425 degrees. Cook the water and butter in a saucepan over medium heat. When the butter has melted, add the flour and salt all at once. Stir vigorously with a wooden spoon until the mixture is well blended and begins to come away from the sides of the pan. Remove pan from the heat and let the mixture cool for 2-3 minutes. Beat in the eggs one at a time, blending well after each addition.* Add the herbs, cheese and cayenne pepper and blend them in thoroughly. 

Butter and flour a baking sheet. Drop 3/4 to 1-inch mounds of dough from a teaspoon onto the sheet. Leave space between the mounds for the puffs to rise. For a shiny surface on the puffs, lightly brush the tops of the mounds with some of the egg wash. Bake for 18-20 minutes or until the puffs are lightly brown and crispy. Lower the heat to 300 degrees and bake for another 5-6 minutes. Turn off the heat but leave the puffs in the oven for 3-4 minutes. Serve hot or at room temperature. Or cut them open and fill them. Makes about 60

*Incorporating the eggs is what most people find difficult. Be sure to add them one at a time. Use a sturdy wooden spoon to help you. The mixture will be sticky and at first you think it will never come together, but keep mixing and you’ll see that it does come together. After each egg is incorporated the mixture becomes softer and pastier and stickier. That’s the way it’s supposed to be.

Pebre Sauce

Chili peppers weren’t always so popular. Before Szechuan cuisine came along in the late 1960s most of the food we ate in this country was really mild and bland.Okay, there was Tabasco, but that was just about it. Look in the supermarket now and you’…

Lamb Kebabs with Pebre Sauce

Chili peppers weren’t always so popular. Before Szechuan cuisine came along in the late 1960s most of the food we ate in this country was really mild and bland.

Okay, there was Tabasco, but that was just about it. Look in the supermarket now and you’ll see bottles and bottles and packages of Harissa, Schug, Thai chili pastes and Sriracha and all sorts of other “hot stuff.”

We’ve been in search of hotter and spicier everything for ages now.

A few years ago my brother, who lives in Argentina, told me about another hot condiment called Pebre, which is similar to Chimichurri, with lots of chopped up chili peppers plus cilantro, parsley and so on.

Pebre is Chilean but well known in other South American countries. Somehow not as well known here.

But it should be. I’ve made it many times. When I was writing Hip Kosher and wanted to bring in some new and different seasonings for the recipes, I decided to experiment with this particular sauce and in the book I paired it with beef kebabs.

But, Pebre goes with any grilled or roasted meat and it’s a good dip for grilled vegetables too. You can use it as a marinade and also a condiment/dipping sauce. Also, you can add a little to mayonnaise or vinaigrette dressing to use on salad, especially potato salad.

Pebre Sauce

  • 1 cup packed fresh flat-leaf parsley leaves

  • 1/4 cup fresh cilantro leaves

  • 2 large garlic cloves, quartered

  • 1 tablespoon fresh oregano leaves

  • 2 tablespoons lemon juice

  • 1 small habanero or serrano pepper, deseeded and chopped

  • 1/2 cup olive oil

Process the parsley, cilantro, garlic, oregano, lemon juice and pepper in a food processor until they are finely chopped. With the machine still on, gradually pour in the olive oil.

Makes about 1/2 cup

Corn fritters

Do you ever daydream about foods you haven’t had in a long time?Like the fried chicken you used to eat but you don’t now because it’s too fattening, too fatty and too messy to make?Or Mac n’ Cheese the way your Grandma made it, but it doesn’t taste …

Do you ever daydream about foods you haven’t had in a long time?

Like the fried chicken you used to eat but you don’t now because it’s too fattening, too fatty and too messy to make?

Or Mac n’ Cheese the way your Grandma made it, but it doesn’t taste the same since she’s gone?

Or the original Bonomo’s Turkish Taffy that doesn’t taste anything like it used to so you don’t bother?

One of the foods I think about more than occasionally is my Mom’s Corn Fritters. Crispy outside, soft and puffy within, and loaded with corn. Great for breakfast, lunch or dinner. With a little real maple syrup.

It’s an indulgence, to be sure, so I don’t make them too often. But I just had to have some yesterday. I had been thinking about them, mostly because I had some corn left over from a few extra cobs I cooked over the weekend.

So I made some. I changed one important ingredient though. I switched from dairy milk to coconut milk. UNSWEETENED refrigerator case coconut milk (not canned).

The fritters were vaguely sweeter, but every bit as wonderful, delicate, crispy-edged and perfect. I think Mom would approve.


CORN FRITTERS


2 tablespoons margarine or butter

1 large egg

1 cup coconut milk (or use regular, whole milk)

2 cups cooked corn kernels (about 4 ears of corn)

1-1/4 cups all-purpose flour

1 tablespoon baking powder

1 teaspoon sugar

1-1/4 teaspoons salt (or to taste)

margarine/butter/vegetable oil for frying

maple syrup, optional

Melt the butter and set it aside to cool. In a bowl, beat the egg and coconut milk together. Stir in the cooled melted butter and the corn kernels. In a second bowl, mix the flour, baking powder, sugar and salt; add this to the corn mixture and stir ingredients gently to blend them together. Heat enough margarine, butter and/or vegetable oil in a saute pan over medium heat. When the fat has melted and looks foamy (or the vegetable oil is hot), drop the corn batter by the 1/4-cupful. Cook for about 2 minutes or until the bottom has browned. Flip the pancakes and cook for another 2 minutes or until the second side is brown. Serve with maple syrup if desired.

Makes 6-8 servings

Chocolate Pudding

I have a problem with chocolate pudding. I like it warm with cold whipping cream poured on top. First I eat pudding with a little cream. Then some cream with a little pudding. I can’t decide which I like better. Warm, thick and smooth mixe…

I have a problem with chocolate pudding. I like it warm with cold whipping cream poured on top. First I eat pudding with a little cream. Then some cream with a little pudding. 

I can’t decide which I like better. 

Warm, thick and smooth mixed with cold, velvety and rich. This is the essence of culinary yin-yang. A perfect whole.

So I keep eating it spoonful by spoonful, until it’s finished. Always wondering which part makes the other part better.

Maybe I’ll figure this out someday.

Chocolate Pudding

1/3 cup cocoa powder

1/3 cup cornstarch

2/3 cup sugar

1/4 teaspoon salt

3 cups whole milk

1-1/2 teaspoons vanilla extract

Strain the cocoa powder, cornstarch, sugar and salt into a bowl. Heat 2-1/2 cups of the milk until it is hot. Pour the remaining 1/2 cup milk into the cocoa mixture and stir until well blended. Pour the chocolate mixture into the heated milk and stir to blend thoroughly. Cook over medium heat for 2-3 minutes, stirring with a whisk, or until the pudding bubbles and is thick. Remove the pan from the heat. Stir in the vanilla extract. Pour the pudding into a large bowl or into 6 dessert dishes. Refrigerate until cold OR serve warm. Makes 6 servings

Sauteed Peas with Orange

Sometimes I forget that there are seasons for fruits and vegetables because we can buy just about any produce, anytime. 

But there are certain items you can’t get, ever, unless they’re in season. 

Like fresh English peas.

So when I see them, I buy them and enjoy them for the short time they are available, sometimes late spring, but certainly during the summer.

When my Mom bought fresh peas she bought SEVERAL POUNDS of them because there were three of us kids plus her and my Dad and we all liked peas and you have to buy a lot of podded peas to get enough to feed five people.

Besides, we would eat quite a number of them before she even got to cook them for dinner. And, in fact, before we got to the peas inside we would crunch the entire pod with our teeth, and suck out the juice, which is so, so sweet. After that we would open up the pod to get the peas inside and throw them down our throats 4-5 at a time, however many were inside.

No one had to tell us to “eat your peas.” We ate them because they were so dee-lish.

Sauteed Peas with Orange

2 tablespoons butter

1 large shallot, chopped

2 cups peas (about 1-3/4 pounds podded peas)

2 tablespoons orange juice 

salt and freshly ground black pepper to taste

1 tablespoon chopped mint 

1 teaspoon grated orange rind

Heat the butter in a sauté pan over medium-high heat. When the butter has melted and looks foamy, add the shallot and cook for 1-2 minutes or until softened. Add the peas and juice, sprinkle with salt and pepper and cover the pan. Cook for 4 minutes. Remove the cover, sprinkle with mint and orange peel, toss ingredients to heat them through. Makes 4 servings

Chicken Salad with Quinoa and Oranges

What do you do with leftover chicken?
I was thinking about that the other day because I had some. The best kind too, the kind leftover from when you make chicken soup. Chicken soup chicken is tender and soft and generally mild, at least as compared …

What do you do with leftover chicken?

I was thinking about that the other day because I had some. The best kind too, the kind leftover from when you make chicken soup. Chicken soup chicken is tender and soft and generally mild, at least as compared to a roasted or rotisserie chicken, which are more highly seasoned. The mild flavor means you can do a little more with it.

I had the chicken soup chicken left over from the soup I made for myself as a cure for the awful cold I had. I know there may be no scientific evidence for this, but I think chicken soup really does help when you have a cold. Mine took over a week to go away, and finally did, right after the soup.

Anyway, I had this chicken left over and I remembered that my Mom always made salad with those leftovers and she mixed the meat with celery and sometimes hard-cooked egg, and mayonnaise. On occasion, she would make chicken salad with chopped tart apple and chopped almonds.

Both very good.

But I made the salad below, mostly because I didn’t have enough chicken left to make a traditional chicken salad. The quinoa bulks it up, gives it a healthy touch. I also got the chance to use the mint that is growing so abundantly in my garden, plus some dill leftover from the bunch I bought for the chicken soup.

I added cut up oranges because citrus is so refreshing in a summer salad, looks good too (plus it has all that vitamin C), and I used orange juice (plus some lemon juice) instead of wine vinegar, for the dressing.

No mayo.

I also added blanched fresh peas, but any vegetable would do: cooked carrot, broccoli, asparagus and so on. You could also add some chopped cashews or dried cranberries.

Chicken Salad with Quinoa and Oranges

3/4 cup quinoa

1-2 oranges

1 cup cut up cooked chicken

1 cup blanched fresh peas (or use thawed frozen peas)

2 scallions, chopped

2 tablespoons chopped fresh dill

1-1/2 tablespoons chopped fresh mint

2 tablespoons olive oil

3-4 tablespoons orange juice

1 tablespoon lemon juice

salt and freshly ground black pepper to taste


Place the quinoa in a strainer and rinse thoroughly with cold water. Let drain. Bring 1 cup of water to a boil, add the quinoa, stir, lower the heat and simmer, covered, for about 15 minutes, or until all the liquid has been absorbed and the grains are tender. Remove the pan from the heat and spoon the quinoa into a bowl to cool. Peel the orange(s) and remove as much of the white pith around the segments as possible. Cut the oranges into bites size pieces and add to the quinoa. Add the chicken, peas, scallions, dill and mint and toss ingredients to distribute them evenly. Pour the olive oil, orange juice and lemon juice into the salad and toss. Season to taste with salt and pepper. Let rest for at least 15 minutes before serving. Makes 4-6 servings

Grilled Zucchini with Lemon

I’m here today to say that just because produce comes from a Farmer’s Market and it’s local and just-picked doesn’t always mean that it tastes good.The other day I went to our local Farmer’s Market, which is open two days a week and which, last year…

I’m here today to say that just because produce comes from a Farmer’s Market and it’s local and just-picked doesn’t always mean that it tastes good.

The other day I went to our local Farmer’s Market, which is open two days a week and which, last year, was the source of such good corn and tomatoes, lettuces and so much other stuff. I admit, it’s early in the season, but I spent a fortune on “locally grown tomatoes” that looked so red, ripe and juicy I almost couldn’t wait until I got home to eat one.

They were lousy. Mealy and tasteless. A terrible disappointment.

The corn was starchy and chewy. What a waste.

The lettuce was limp, no crunch, no flavor.

But I have to say, I bought a round zucchini, and this at least, was very good indeed. I brushed it with olive oil and grilled it, sprinkled it with a bit of sea salt and gave it a drizzle of lemon juice.

I’d go back just for another one. And maybe next week the tomatoes and other vegetables will be better.

The recipe for grilled zucchini is incredibly versatile. You can serve it as is. Or sprinkle with some chopped fresh herbs (oregano is especially tasty here). Or sprinkle the finished zucchini with grated fresh Parmesan cheese or toasted pine nuts. Or a few drops of Balsamic vinegar instead of lemon juice.

Grilled Zucchini with Lemon

2 round zucchini (or 2 large regular zucchini)

3 tablespoons olive oil

salt and freshly ground black pepper to taste

juice of half a large lemon

Preheat an outdoor grill or oven broiler. Cut the zucchini into 1/2-inch slices. Brush surfaces with olive oil. Sprinkle with salt. Grill the zucchini for 3-4 minutes per side or until tender. Sprinkle with the lemon juice. Serve hot, warm or at room temperature.

Makes 4 servings

Strawberry-Rhubarb-Blackberry Pie

Is there any food more “American” than pie?Okay, maybe. Hot dogs, hamburgers and stuff. Cole Slaw. Potato salad. And lots of others.Actually, none of the ones I mentioned were “American” at the start. Hot dogs, burgers and potato salad are German fo…

Is there any food more “American” than pie?

Okay, maybe. Hot dogs, hamburgers and stuff. Cole Slaw. Potato salad. And lots of others.

Actually, none of the ones I mentioned were “American” at the start. Hot dogs, burgers and potato salad are German foods, Cole Slaw is Dutch and Pie began as British.

No matter. They’re American now, all terrific summer foods also. And all perfect for any Fourth of July celebration.

So, when our local Hadassah decided that our biweekly Tea (for cancer patients and their caregivers at Stamford Hospital) should have a Fourth of July theme, I decided to bake a pie to give. 

This one is red (sort of), white (beige crust/white sugar) and blue: a riff on Strawberry-Rhubarb Pie. It includes blackberries because I had some in the house and figured why not. You can leave out the blackberries and add more rhubarb and/or strawberries.

Also, I used orange peel as flavor, but you can switch to lemon peel. And I used orange juice for the crust. First because orange goes really well with berries and rhubarb and also, my mother, a consummate pie baker, always told me that the liquid you use to make pie dough can be just about anything. She frequently used juice for fruit pie (the juice depended on the pie). Juice not only gives the crust more flavor, it helps the dough bake into a lovely brown color crust too.

Strawberry-Rhubarb-Blackberry Pie

dough:

2-1/2 cups all-purpose flour

3/4 teaspoon salt

1 teaspoon grated orange peel

1/2 cup unsalted butter

1/3 cup chilled vegetable shortening

4-5 tablespoons orange juice

filling:

3 cups sliced (1/2-inch pieces) rhubarb, about one pound

2 cups strawberries cut in half

1 cup blackberries

2/3 cup sugar (or to taste)

1/4 teaspoon salt

5 tablespoons flour

1 teaspoon grated orange peel

1/4 teaspoon cinnamon

1 tablespoon butter


Combine the flour, salt and orange peel in a food processor. Add the butter and shortening in chunks and process on pulse about 24 times, until the mixture resembles coarse meal. Gradually add as much of the juice as is needed to make a soft, but not sticky dough. Cut the dough in half, flatten into disks and let the dough rest in the refrigerator for 30 minutes. Preheat oven to 375 degrees. Roll the dough into circles to fit a 9” pie pan. Place one circle inside the pie pan.

To make the filling, combine the rhubarb, strawberries, blackberries, sugar, salt, flour, orange peel and cinnamon. Add the filling to the pie pan. Cut the butter into chunks and place on top of the filling. Cut strips from the second dough circle and place them in a lattice design on top of the fruit. Seal the edges where the strips meet the bottom crust. Bake for 50-60 minutes or until golden brown.

Makes one 9-inch pie

Two Baby Birds and a Birdhouse

See those two tiny birds peeking out the window of their home? They are ready to fly the nest.
And I got to see the entire event as I was sitting in the backyard. My grand daughters, Lila and Nina, painted that birdhouse. It’s difficult to see…

See those two tiny birds peeking out the window of their home? They are ready to fly the nest.

And I got to see the entire event as I was sitting in the backyard. My grand daughters, Lila and Nina, painted that birdhouse. It’s difficult to see all the colors, which have been muted by rain, but this was a wooden birdhouse that I bought at Michael’s and the girls layered it with enough paint to resemble Joseph’s amazing technicolor dreamcoat. And then there was a final flourish of gold glitter.

They told me the birds would surely love that house because it was so colorful.

And they were right.

A finch mama and papa built a nest right inside that thing. I found it thrilling to watch them bring all sorts of stuff to put inside their new home to make it comfy.

And then some time after that I heard lots of low chirping, which of course was from the newly hatched finches inside the house.

Last weekend, as I was sitting outside I noticed one of the tiny birds stick its head out hesitantly. The parents were in trees nearby and I heard them chirping away words of encouragement. “Come on out. You can do it.” And the baby finch fluttered out of the house and hopped onto the short perch under the window, not yet ready to fly. Then it hopped onto the roof, then onto the brick and then, parents still chirping away at it, the baby flew up into the tree to join his folks.

Then these two pictured above looked out to see what the commotion was all about and they, too, one by one, followed the same pattern: perch, roof, brick and away.

The fourth bird took his time. Maybe another 10 minutes went by until it, too, flew the nest.

So, now I am an empty nester for the second time in my life.

My kids (and their families) come back to visit often. 

I do hope some birds come back next season too.