No-Cook Cooking; Mixed Bean, Vegetable and Fish/Chicken Salad

When there’s a blizzard in the winter and I am forced to be at home, I find delicious comfort in looking out the window and watching the slow, silent snowflakes fall. I can cook and bake while watching an old movie on TCM. I love those days.

Today is the opposite of that. It is too hot and muggy to go out. There’s nothing beautiful falling from the sky, in fact, when I look out the window I see parched lawn and brown clumps of leaves on the trees and there’s a couple of dead-as-doornail bushes out there.

Btw, did you know that the expression dead-as-a doornail came from Shakespeare (Henry VI, part 2)?

It’s too hot to cook, even indoors in the air conditioned house because, as most people know, even air conditioning can do so much.

So there goes dinner and the old movie. 

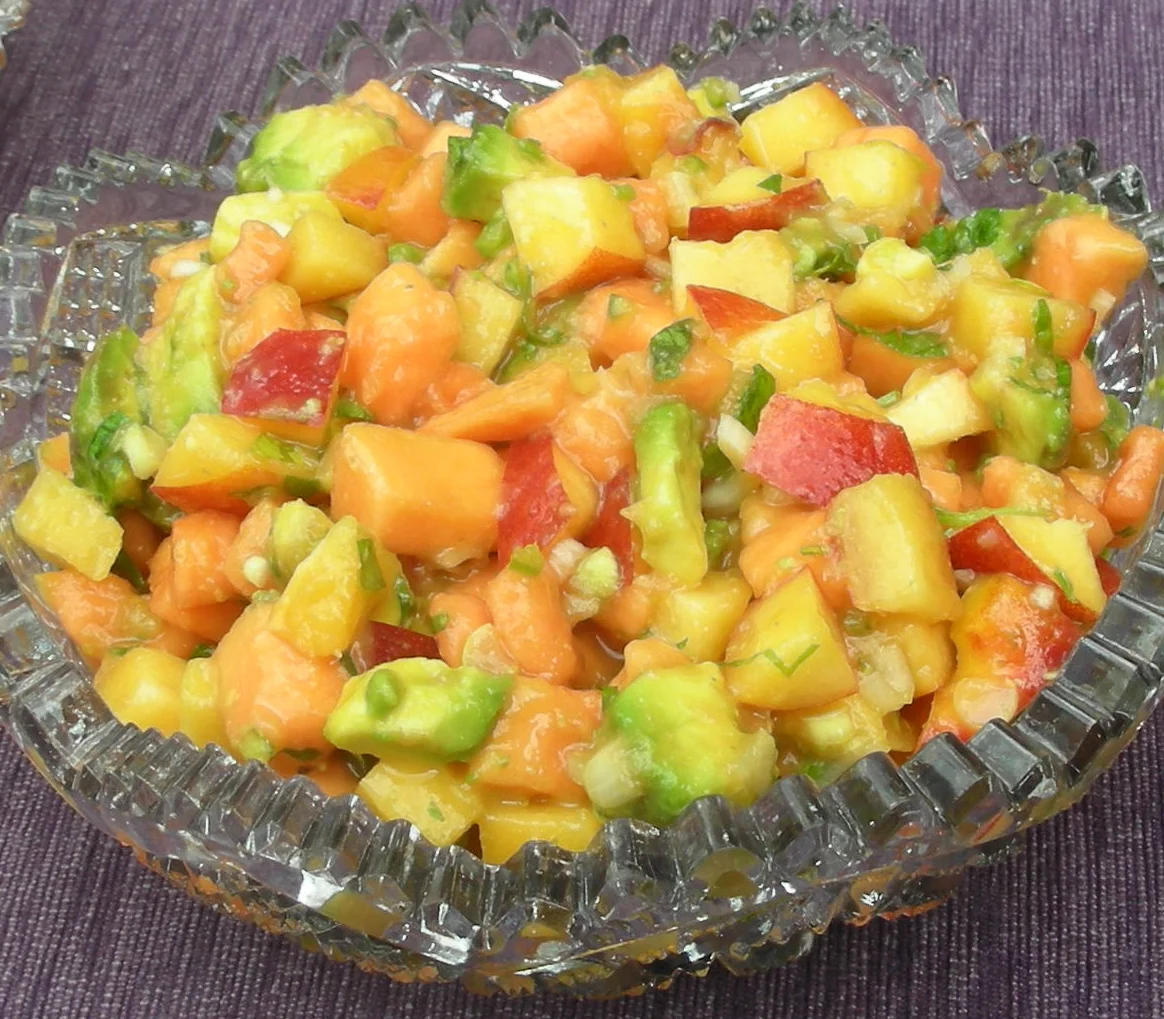
This is a day for a meal that doesn’t have to be cooked. Like this mixed bean salad. 

To make a vegetarian version of this, leave out the fish/chicken and add any of the following: avocado, olives, cooked macaroni, chopped carrots, cucumber, feta cheese, goat cheese or tomato.

Mixed Bean, Vegetable and Fish/Chicken Salad

  • 1 15-ounce can red kidney beans
  • 1 15-ounce can cannellini beans
  • 1 15-ounce can black beans
  • 1 cup thawed frozen peas
  • 1 cup thawed frozen corn
  • 1 pound cooked fish or chicken cut into bite-size pieces
  • 1 medium red onion, chopped
  • 1 large clove garlic, finely chopped
  • 1/4 cup chopped fresh parsley
  • 2 tablespoons chopped fresh basil
  • 1/2 cup olive oil
  • 1/4 cup red wine vinegar
  • salt and freshly ground black pepper to taste


Rinse all the beans and drain them. Place the beans in a bowl. Add the peas, corn, fish, onion, garlic, parsley and basil and toss ingredients to distribute them evenly. Pour in the olive oil and toss the ingredients. Pour in the wine vinegar and toss the ingredients. Season to taste with salt and pepper. Let stand for 15 minutes before serving. Makes 4-6 servings


Chicken Couscous Salad with Oranges, Dates and Pistachios

Store-bought rotisserie chicken can fill an immediate need. Like it did for me yesterday.

I had a crazy-busy day and there was no way I could cook dinner and I don’t like to eat out when it’s after 8 p.m. and I still have to go home to change clothes because I spilled coffee on my tee shirt and one of my grandchildren also wiped lentil casserole on me.

So I stopped off on my way home and bought a cooked chicken (and some cole slaw and green beans).

It was fine. Rotisserie chickens are usually too salty for my tastes, so I like to use leftovers in a way that will lessen the salt sting.

And I do have leftovers. So today, when I have another busy day, though not as filled as yesterday, I’m going to cut the chicken up into a salad. I’ll cut the ingredients up before I leave for the day, make the couscous and put it aside and also make the dressing ahead. About 30 minutes before I serve the salad I’ll mix it all together.

This is the salad I think I’ll make today:

Chicken Couscous Salad with Oranges, Dates and Pistachios

  • 1-1/4 cups chicken stock
  • 1 cup Israeli couscous
  • 2-3 cups diced cooked chicken
  • 1 cup chopped dates
  • 1/2 cup chopped dried apricots
  • 1/2 cup chopped red onion or chopped scallion
  • 1/4 cup finely chopped fresh parsley
  • 2 tablespoons chopped fresh mint
  • 3/4 cup shelled pistachio nuts
  • 2 navel oranges, peeled; cut flesh into bite-size chunks
  • 6 tablespoons olive oil
  • 1/4 cup orange juice
  • 1/4 cup lemon juice
  • 1/2 to 1 teaspoon harissa (or use Sriracha sauce to taste) or some cayenne pepper
  • salt and freshly ground black pepper to taste

Bring the stock to a boil over high heat, add the couscous, stir, lower the heat to a simmer, cover the pan and cook for 8-9 minutes or until the liquid has been absorbed. Place the couscous in a bowl. Add the chicken, dates, apricots, onion, parsley, mint, pistachios and orange sections. Toss to distribute ingredients. In a separate bowl or jar mix the olive oil, orange juice, lemon juice and harissa. About 15-30 minutes before serving, pour the dressing over the ingredients and toss. Season to taste with salt and pepper.

Makes 4-6 servings

The Family Dried Bean Soup

I always have emergency food in my freezer. It’s there in case I think I’m going to have time to cook when I get home, but it turns out I don’t. Or for when I have unexpected casual company — like my brother Jeff and sister-in-law Eileen come over for dinner on the spur of the moment and I don’t feel like cooking. Or in some medical emergency.

Like yesterday.

My daughter Gillian dislocated her shoulder, so I went to her house to help out with the kids. I figured they might need dinner, so I brought two of my frozen go-to meals: macaroni and cheese and what we call Green Soup, a family favorite.

Well, all of you know what macaroni and cheese is. But Green Soup is a family specialty. It was invented by my cousin Essie, so I always used to call it Essie’s Soup. 

Whatever.

Essie threw of few packages of soup mix and some beef bones together, added a few extras like dried and fresh vegetables and cooked it forever (many hours anyway) until it tasted good.

We all loved it and so everyone in my extended family made it. We all changed the recipe each time we made the soup. This recipe is very flexible. For example, sometimes I use yellow split peas. Add lentils. Leave out the dried mushrooms and use fresh shiitakes or portobellos. Sometimes I use one package of “Cholent mix” (which is simply a pound size bag of mixed dried beans) instead of the soup mixes. Like that.

The more you cook this soup the thicker it gets of course. I cook it so long that it is actually more like a stew (sometimes I cook it overnight).

When my son-in-law Jesse came into the family and tasted this he asked me how it differs from Cholent, the Jewish Shabbat stew.

It doesn’t really, except that Cholent usually has more actual meat, and the only meat in this recipe is the stuff on the bone.

You could call this Cholent if you like. I still want to pay tribute to my cousin, so I’ll continue to call it Essie’s Soup.

Try it. Spoon it into freezer containers and take it out/reheat as needed.

Essie’s Soup

1/2 cup dried mushrooms

6-8 meaty beef bones

2 packages soup mix (such as Streits or Manischewitz) (such as split pea, mushroom-barley or lima bean soup)

1 cup dried green split peas

1 cup dried white beans, lima beans or kidney beans

1 cup pearled barley (farro or wheatberries)

1 large onion, sliced

2-3 stalks celery, sliced

4 carrots, sliced

1-2 parsnips, sliced

salt and freshly ground black pepper to taste

fresh dill or thyme, optional

1 10-ounce package frozen lima beans

Place the mushrooms in a bowl, cover with hot water and soak for 10-15 minutes or until softened. Rinse clean, cut up and set aside. Place the beef bones in a large soup pot, cover with water by one-inch and bring to a boil over high heat. Lower the heat and simmer for about 5-8 minutes, skimming any foamy debris that floats to the top. Add the soup mix packages, including the seasoning packets, the peas, beans, barley, onion, celery, carrots and parsnip. Add about one tablespoon salt and a few grindings of black pepper. Add the dill or thyme if desired. Keep the soup at a simmer and cook for hours and hours, stirring occasionally, until the soup is very thick and the meat is falling off the bone. Add the lima beans and cook for another 30 minutes. Add water if too thick or cook longer if not thick enough. Makes at least 12 servings

Cold Summer Pea Soup

How to Eat Our PeasLast week President Obama told us that we have to “eat our peas.” Of course, he was speaking metaphorically about the need to reach a deal on the debt ceiling. And his reference to peas kind of made it seem as if peas weren’t such…

How to Eat Our Peas

Last week President Obama told us that we have to “eat our peas.” Of course, he was speaking metaphorically about the need to reach a deal on the debt ceiling. And his reference to peas kind of made it seem as if peas weren’t such a favorite and that eating them was more of a have-to than a want-to.

I always thought everyone liked peas. Growing up it was right up there with carrots, corn and green beans that we ate every week. And so did my friends. Most of the moms I knew, including my own bought boxes of frozen peas and carrots that were cut up into tiny dice, so we got a little of each at dinner and it was nice and colorful. 

But during the summer my mother bought fresh peas and my brothers and I helped shuck them because after we opened the pod and spilled the peas into a bowl we would chew on the pods, which were pleasantly crunchy and we loved when the grassy tasting juices spurted into our mouths.

Those fresh peas were awesome. Yes, even kids ate them. My mother would simmer them, drain them and then roll them in a little melted butter. If you ever want your kids to eat their peas, or try any vegetable, this is definitely one way that might work.

But if you don’t love peas straight out, maybe you’d like this recipe for Cold Summer Pea Soup. It’s a riff on the thick and steamy winter Dutch pea soup but uses fresh peas instead of dried. You can make it with pancetta or bacon and even vegetarian soy bacon if you’re kosher or vegetarian. The vague smoky flavor is reminiscent of the hot winter version. But you can also leave the bacon out and serve it garnished with chopped chives.

Cold Summer Pea Soup

4 ounces soy bacon

3 tablespoons olive oil

1 medium onion, chopped

1 large Yukon Gold or all-purpose potato, peeled and chopped

6 cups vegetable stock

6 cups shelled peas (or use 3 10-ounce packages thawed frozen peas)

3/4 cup plain yogurt or buttermilk

sat and freshly ground black pepper to taste

plain yogurt or dairy sour cream

Fry the soy bacon) in a soup pot for a few minutes over medium heat until crispy. Remove the pieces, crumble them and set them aside. Pour the olive oil into the pan. Add the onion and potato and cook, stirring occasionally, for 2-3 minutes. Add the stock, bring to a simmer, cover the pan and cook for 10-12 minutes or until the potatoes are tender. Add the peas and cook for 5 minutes. Remove the pan from the heat and remove the cover. Let the soup cool. Puree the soup in a blender or with a hand blender. Whisk in the yogurt or buttermilk. Taste for seasoning and add salt and pepper to taste. Serve with a blob of yogurt or sour cream. Garnish with the crumbled bacon. Makes 6 servings

Papaya and Peach Salsa

Soccer has become big time. It sure helps that the U.S. women’s team is in the final, which you can watch today, Sunday, on ESPN (2:00 p.m. ET). But even so, I think people are more interested in soccer these days is because the generation of …

Soccer has become big time. It sure helps that the U.S. women’s team is in the final, which you can watch today, Sunday, on ESPN (2:00 p.m. ET). But even so, I think people are more interested in soccer these days is because the generation of 20, 30 and 40 somethings grew up playing it at school. And after school.

My two daughters played soccer when they were kids. From what I can remember it was an activity that was always fun. The kids enjoyed it and so did the parents and the game never became the overly-competitive, frenzied thing that happened to Little League baseball.

So, watch the game. Root for the U.S. women to win. And enjoy a snack or two. Here’s a recipe for a refreshing fruit salsa that goes perfectly with chips. You can also use it as a side dish for grilled fish, chicken or meat. The instructions are for hand-made salsa, but you can use a food processor.

Papaya and Peach Salsa

1 papaya

2 medium peaches or nectarines

1 ripe avocado

3-4 scallions, chopped

1 serrano pepper, deseeded and finely chopped

1 teaspoon grated fresh lime peel

1/3 cup lime juice

1/4 cup chopped fresh cilantro or parsley

salt to taste

chips

Peel the papaya, cut it in half and scoop out the seeds. Cut the flesh into small dice and place in a bowl. Remove the peach pits and the avocado peel and pit, cut the flesh into small dice and add to the papaya. Add the scallions, serrano pepper, lime peel, lime juice and cilantro. Taste for seasoning and add salt to taste. Serve with chips. Makes about one quart

Popeye was wrong about spinach. Sort of.

It always seemed odd to me that Popeye tried so hard to get kids to eat spinach. I love spinach. Always did. And so did everyone else I knew.

Years later I realized that when Popeye flexed his tattooed biceps to down some spinach before going into the fray with a bunch of bad guys, it was canned spinach he ate. 

A gruesome prospect.

Fresh spinach is another thing entirely. It’s got everything going for it in terms of taste and nutrition. I prefer the flat leaf variety to the curly, but either will do. You just need to wash it carefully to make sure all the sand is off the leaves. I soak it a couple of times, then run the leaves under cold water before using it for all sorts of dishes.

Most of the time I stir fry fresh spinach in olive oil (heated first with a sliced garlic clove). It takes less than two minutes. Occasionally I add an ingredient or two, like orange peel and chili peppers or soy sauce and fresh ginger. But one of my favorites is this recipe for Stir Fried Spinach with Raisins and Pignoli Nuts. It sounds fancy, and can be, depending on what else you are serving.

But it needn’t be. I am making this tonight as a side dish. It takes just a few minutes. It’s National Fresh Spinach Day, so it seems like a good time for this dish. But any old time would be good too.

Stir Fried Spinach with Raisins and Pignoli Nuts

1/3 cup raisins

hot water

2 bunches fresh spinach

2 tablespoons olive oil

1 clove garlic, sliced

1 large shallot, finely chopped

1/4 cup pignoli nuts

salt and freshly ground black pepper to taste

Place the raisins in a small bowl, cover with hot water and let them rest for 10-15 minutes or until they soften and “plump.” Drain the raisins and set them aside. Wash the spinach carefully to remove all the sand, then dry in a salad spinner or kitchen towel. Set aside. Heat the olive oil in a stirfry pan or saute pan over medium-high heat. Add the garlic and cook for a minute or so or until the garlic slices are browned. Remove and discard the garlic slices. Add the shallot and pignoli nuts and cook, stirring occasionally, for a minute or until the nuts brown lightly. Add the raisins and spinach, sprinkle with salt and pepper to taste and stir fry for 2-3 minutes or until the spinach has wilted and the pan juices have evaporated (if there is an excess of liquid, place the cooked spinach in a strainer and press to get rid of the liquid). Makes 4 servings

Bastille Day and Julia Child

So here it is Bastille Day in France and I have to pay tribute to an American woman. Because she is the one who encouraged American home cooks to learn French cooking. 

Julia Child.

There never was anyone quite like her. Not showy. Not pretentious. She just thought that French cooking and methods and food shopping were superior to any others and knew that Americans could do better than the open-a-can cooking so prevalent in the States back then.

Most people are familiar with Ms. Child’s vibrant, energetic personality, especially those who have seen the movie “Julie and Julia.”

I saw a different side of her. She was one of the best teachers ever. I took 2 cooking classes with her once (along with several hundred other people) and saw for myself how calm she was. How she took us, step by step, to perfecting fish en croute and several other recipes. She was serious without being self-important, funny without putting on a show. 

In 1961 her book (she actually wrote it with Louisette Bertholle and Simone Beck), “Mastering the Art of French Cooking” was published. 

This was the book that not only encouraged Americans to learn French cooking, but instructed how to do that. This was the book that sparked all that followed, that helped create the environment that allowed American cooking to develop into the sophisticated cuisine it is today.  

Some people say the recipes in “Mastering” are too long and old fashioned now. We are used to a very different kind of food and recipe writing these days.

But the recipes are long not because they are complicated but because they are so very instructive. You can’t make a mistake if you follow the directions. That’s good for people who are fearful or new to the kitchen. Before you go off on your own, it’s smart to understand the basics, to know what something should taste like. 

And while it’s true, most of us do not dine on Veal Orloff or Caneton a l’Orange these days, the book also contains some terrific recipes for such items as hamburger, onion soup and chocolate mousse. 

Here’s to Julia Child. I still admire her and thank her for encouraging me on my own culinary journey. And here is her recipe for Chocolate Mousse from “Mastering.” I’ve adapted the instructions to conform to our more modern style, but the recipe is hers and it’s delicious.

Chocolate Mousse

4 large eggs, separated

3/4 cup plus 1 tablespoon finely granulated sugar

1/4 cup orange-flavored liqueur

6 ounces semi-sweet chocolate

4 tablespoons strong cold coffee

6 ounces unsalted butter, cut into 6 chunks

pinch of salt

2 cups creme anglaise or whipped cream

Beat the egg yolks with 3/4 cup sugar in the bowl of an electric mixer set on medium-high for 3-5 minutes or until thick and pale. Stir in the liqueur. Place the bowl over a pan of barely simmering water and cook, continuing to beat with a whisk, until the mixture is hot and bubbly, about 3-4 minutes. Melt the chocolate and coffee together in the top part of a double boiler set over simmering water. Remove the pan from the heat and beat in the butter, a piece at a time, until the sauce is smooth. Stir the chocolate mixture into the hot custard. In a separate bowl, beat the egg whites on medium-high speed until they stand in soft peaks. Add the remaining tablespoon sugar and continue to beat on high speed until the whites stand in stiff peaks. Fold about 1/4 of the beaten whites into the chocolate mixture. Fold in the remaining whites. Turn into a serving dish or individual serving dishes and refrigerate for at least 2 hours. Serve with creme anglaise or whipped cream. Makes 6-8 servings

Grilled Peach Melba

So Now It’s Women’s Soccer 
Today the U.S. Women’s soccer team will meet the French team in the FIFA semi-finals.
Great rivalry. 
I hope it goes the way the food rivalry has.
For centuries the French, who invented haute cuisine, were at …

So Now It’s Women’s Soccer

Today the U.S. Women’s soccer team will meet the French team in the FIFA semi-finals.

Great rivalry. 

I hope it goes the way the food rivalry has.

For centuries the French, who invented haute cuisine, were at the forefront of every new culinary idea there was. French cuisine was world renowned, fabulous, innovative.

But it got a bit stale and who took over? Americans. We picked up where the French left off. You know the names of the leaders: Julia Child. James Beard, Alice Waters, Mark Bittman, Thomas Keller. And so on.

American food, once regarded as so much hamburger and tuna casserole, is at the cutting edge of fine cuisine. Has been for decades.

So, let’s root on the American Women’s Soccer team with some great American food. You can watch the game on ESPN at 11:30 Eastern. And btw, if there’s anything else you want to know about this or anything else to do with soccer, take a look at this site.

And to celebrate victory, how about an American version of the classic and wonderful Peach Melba for dessert tonight?

Grilled Peach Melba

4 large, ripe freestone peaches

2 tablespoons melted butter

2-1/2 tablespoons sugar

2 teaspoons chopped fresh mint

3 cups raspberries (2 boxes)

vanilla ice cream

toasted almonds, pistachio nuts or crushed amaretti

Preheat the grill. Cut the peaches in half and remove the pit. Brush all the surfaces with melted butter and sprinkle with about 1 tablespoon of the sugar and with the mint. Grill the peaches for about 8 minutes, turning them occasionally, until they are crispy. Set aside. Puree the raspberries, strain them if desired, and stir in the remaining sugar. Spoon equal amounts of the raspberry mixture on 4 dessert plates. Top each with 2 grilled peach halves. Place small scoops of vanilla ice cream in the centers. Sprinkle with the nuts. Makes 4 servings

Too Hot for Dinner; Farro Salad with Vegetables, Scallions and Whatever

Today is one of those hot, sticky, humid days when I find it impossible to eat the kind of big, old style protein-starch-veggie dinner that was standard in my growing up years. So I’ll make a salad, which is to say, I’ll look in the fridge, chop up what I find, maybe add some lettuce and tomato and pour a fresh, homemade vinaigrette dressing over it.

Voila! Dinner!

Okay, I might cook a whole grain, like farro, which I absolutely love to eat and make into a salad. 

The good thing about salad is the interchangeable parts. You don’t have the same leftovers, deli items or frozen foods that I do, so experiment a little. Add cut up veggies, cheese, meat, fish, whatever. The recipe is entirely flexible.

Farro Salad with Vegetables, Scallions and Whatever

1-1/2 cups farro

1 cup cooked cut up broccoli, green beans, snap peas, frozen peas or lima beans, etc.

1 cup halved grape tomatoes

3-4 scallions, chopped

1 cup diced cooked chicken, salmon or shrimp

1/2 cup crumbled feta or blue cheese, optional

1/4 cup chopped fresh parsley

1/4 cup olive oil

3 tablespoons white wine vinegar

1 teaspoon Dijon mustard

1 teaspoon fresh thyme leaves

salt and freshly ground black pepper to taste

Place the farro in a saucepan and add enough water to cover the grain by one inch. Bring the water to a boil over high heat. Lower the heat, cover the pan and cook for 25-30 minutes or until the farro is tender but still slightly chewy. Drain if any liquid remains, and place the farro in a bowl. Let cool slightly. Add the broccoli, tomatoes, scallions, chicken or fish, cheese, if used, and parsley. Toss ingredients to distribute them evenly. In a small bowl, mix the olive oil, wine vinegar, mustard and thyme and pour over the salad ingredients. Toss, taste for seasoning and add salt and pepper to taste. Let rest for about 15 minutes before servings. Makes 4 servings