Grilled “Korean Style” Chicken

fullsizeoutput_848b.jpeg

Barbecue for Father’s Day: Ribs and Chicken

For years and years on Father’s Day our family, my brothers, parents and I, went to an extended family barbecue (called a “cookout”) at my Aunt Min’s house. All the cousins were there so it was a generally raucous event. My Uncle Herb made hot dogs and hamburgers.

I didn’t like it. I wanted to be with my father and and not everyone else’s. It wasn’t as if we never saw the cousins. There were always plenty of other occasions during the year.

Besides, I wanted my Mom’s delicious food. Uncle Herb was a nice guy and all but he tended to overcook everything so the hot dogs were shriveled and the burgers were like hardened play dough.

So one year I got really brave and told my mother I didn’t want to go.

Wow — she agreed! It was like a miracle. She loved the family thing (it was her family, not my Dad’s) so I was really surprised. Maybe she was looking for an excuse not to go? Maybe all the little, noisy kids were too much for her? Maybe the traffic was a hassle?

In any event, after that our family went solo with our own cookout and that’s the tradition I follow with my own children. It’s raucous enough just with us! 

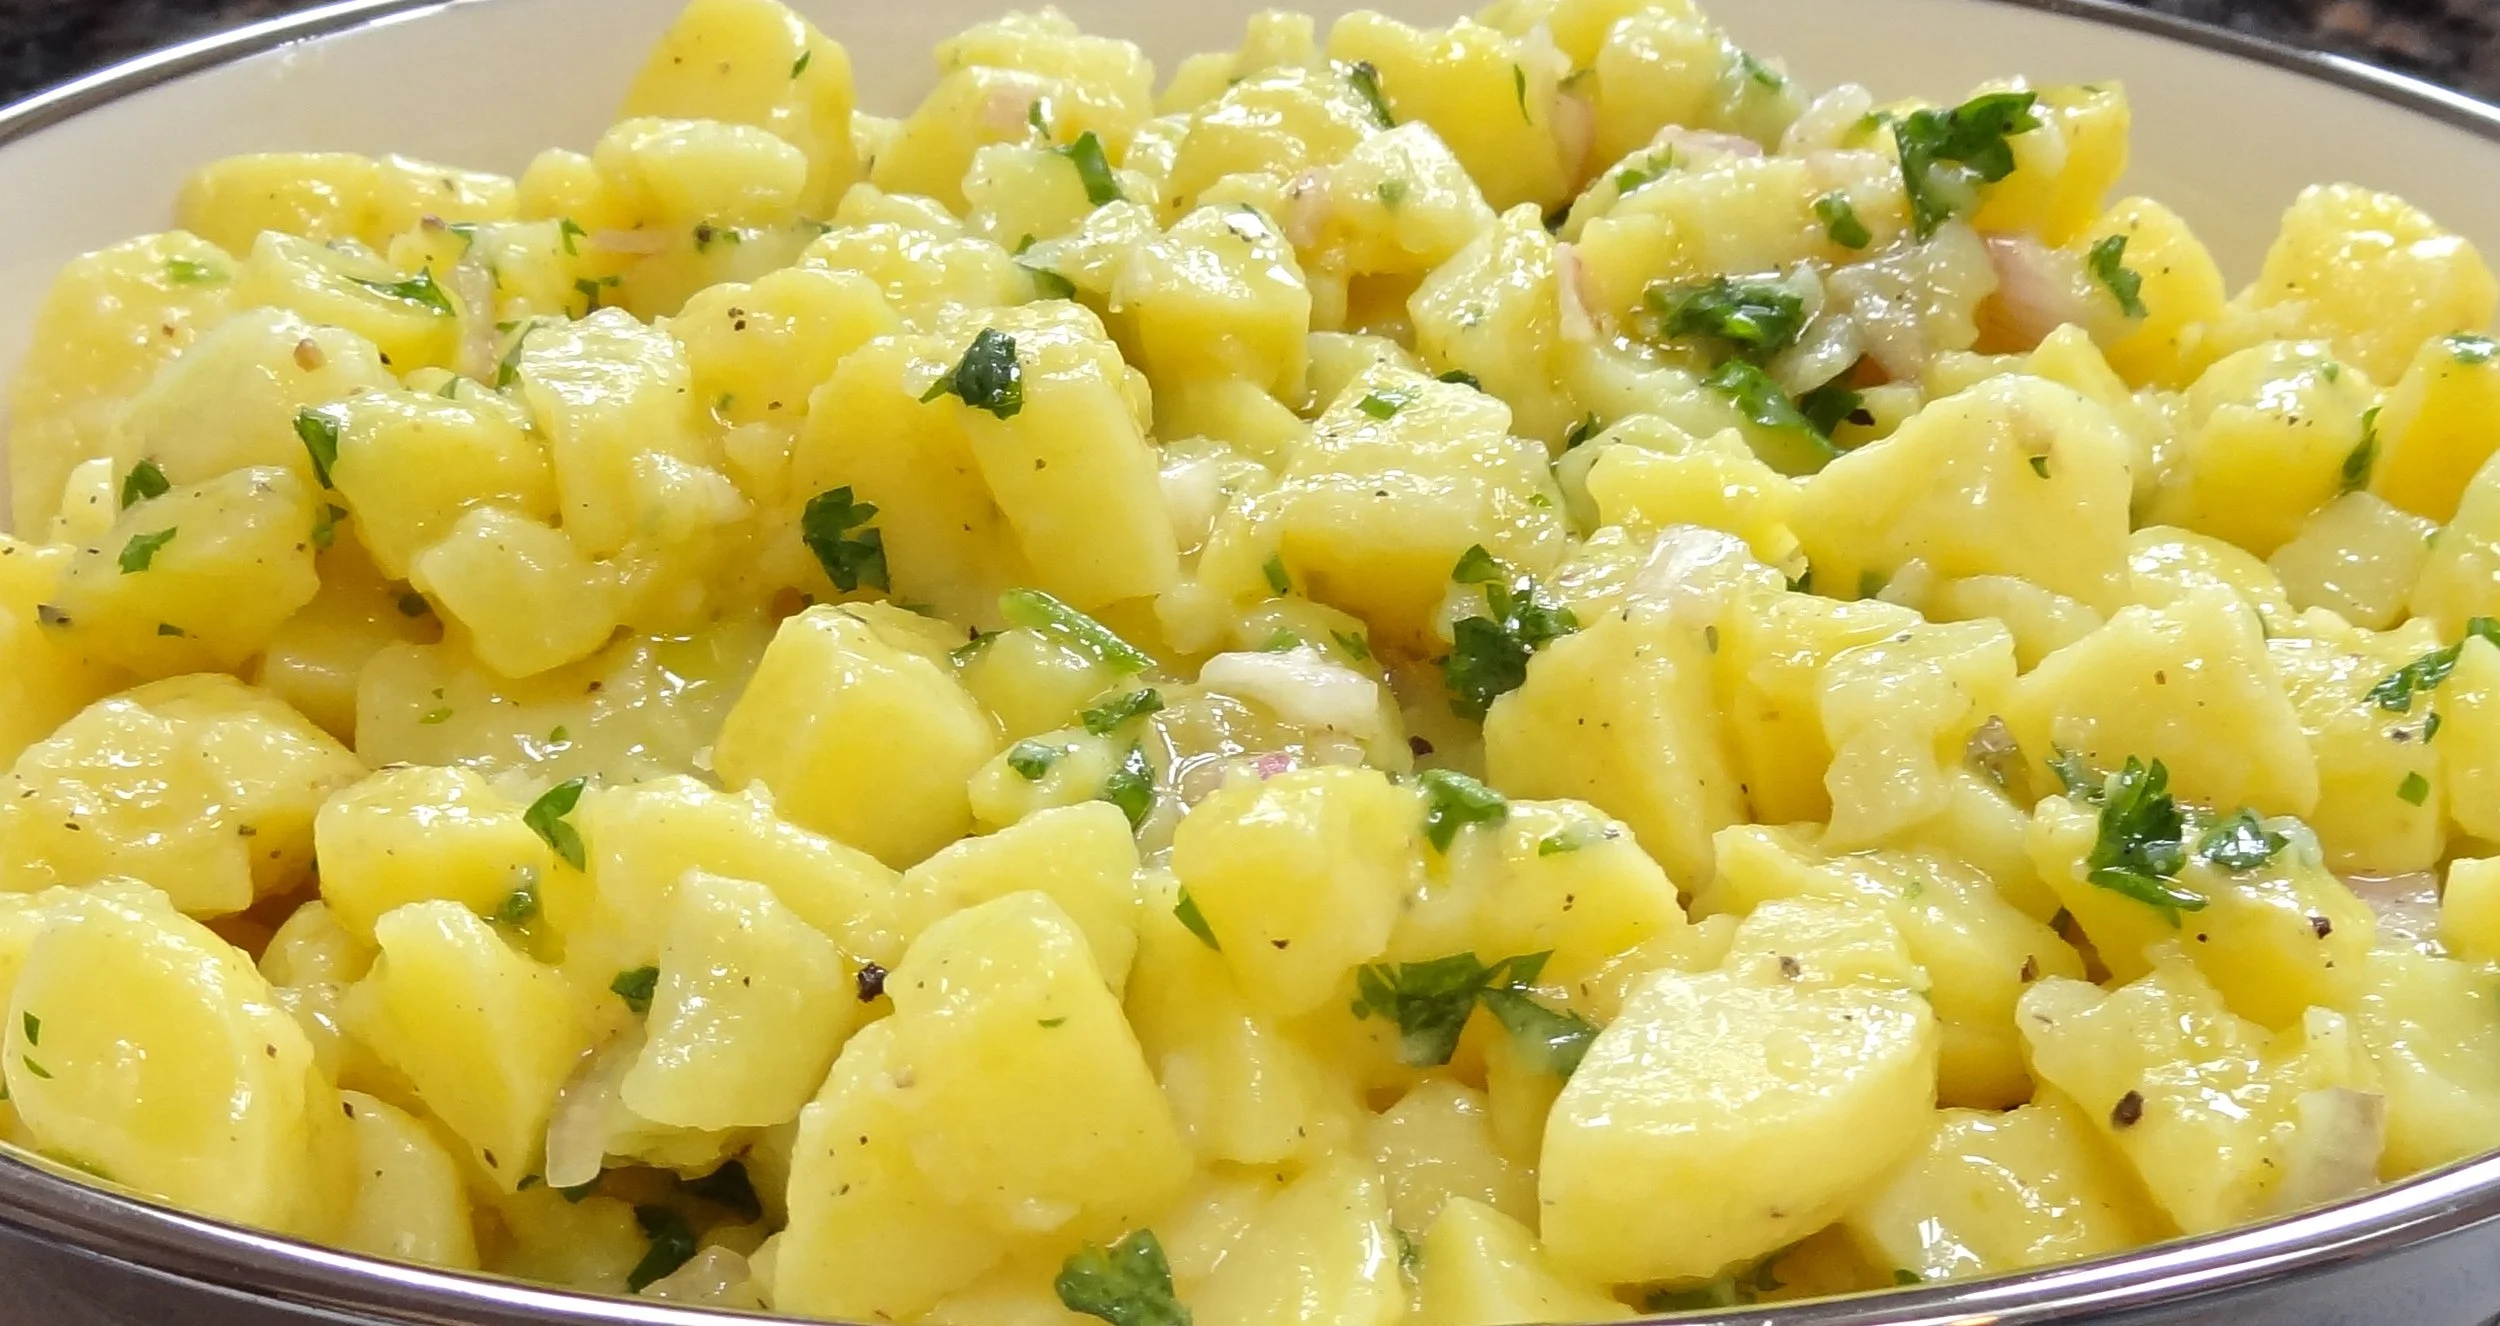
We change the menu from year to year, but it’s always something on the grill plus a few veggie and grain salads and maybe potato salad.

I just bought some beautiful beef ribs for Sunday. And some boneless, skinless chicken breasts. Here’s the recipe I’m going to use (it’s for the chicken, but you can use the same marinade for the beef ribs).

Grilled “Korean Style” Chicken

  • 1/3 cup soy sauce
  • 1/4 cup agave or honey
  • 2 tablespoons brown sugar
  • 2 tablespoons vegetable oil
  • 1 tablespoon sesame seed oil
  • 2 large cloves garlic, finely chopped
  • 2 thick scallions, finely chopped
  • 1 tablespoon finely chopped fresh ginger
  • freshly ground black pepper to taste
  • 4 large skinless and boneless chicken breast halves
  • 1 tablespoon toasted sesame seeds, optional

Combine the soy sauce, agave, brown sugar, vegetable oil, sesame seed oil, garlic, scallions, ginger and black pepper in a dish large enough to hold the chicken breasts. Mix the ingredients well. Immerse the chicken and turn them a few times to coat all surfaces. Marinate for 2-3 hours, turning the meat from time to time. Preheat an outdoor grill or oven broiler. Remove the chicken from the marinade and grill the breasts, brushing occasionally with the marinade, for about 8 minutes, turning once or twice, or until the breasts are cooked through. Sprinkle with the sesame seeds if desired. Makes 4 servings 


Tagged: Father's DayGrilled ChickenKorean Barbecue Sauce

Classic French Potato Salad

I don’t know how I know this but today is Vinegar Day in South Dakota.

I’ve never been to South Dakota and don’t really know anything about it, except that it’s where Mount Rushmore is and I want to see that.

Vinegar is another story. I know about vinegar because I use it a lot. Plain old white (actually clear) vinegar is good for cleaning toys that my grandchildren have chewed on and also for stuck-on stuff on cabinet doors (dilute with water in both cases). 

But mostly I use vinegar for cooking. I find the tart taste compelling and when you use vinegar, even in small quantities, it reduces the need for added salt. 

I used to think I hated vinegar. That it made everything taste sour. My Mom told me that because she hated vinegar. It’s amazing, all the stuff you pass down to your children, even unknowingly.

But because she wasn’t a fan of vinegar we didn’t have vinaigrette dressing or sweet-and-sour-anything when I was a kid.

Somewhere along the line I tasted both. and realized what I had been missing.

Not all vinegars are the same of course. I use different ones for different purposes: red wine vinegar for a marinade for beef, for example. Sherry vinegar (vinaigre de Jerez) for roasted asparagus, cooked carrots and other vegetables. Balsamic vinegar for salads that include cheese and/or nuts. And so on. But, like wine, I always try to buy a good brand; not necessarily one that’s the most expensive or that comes in a fancy bottle. Just something of quality.

In the summer I use a lot of white wine vinegar — for fish marinades and fish salads, summer vegetable salads and especially for potato salad. Here’s a recipe for a classic French Potato Salad. It calls for just a bit of vinegar. But it’s enough to give it some real vitality.

French Potato Salad

  • 2 pounds new potatoes or small red Bliss potatoes

  • 6 tablespoons white wine (or vegetable or chicken stock)

  • 1 large shallot, chopped

  • 1-2 tablespoons chopped fresh herbs such as savory, oregano, thyme, rosemary 

  • 2 tablespoons chopped fresh parsley

  • 1/3 cup extra virgin olive oil

  • 2-3 tablespoons white wine vinegar

  • 1 teaspoon Dijon mustard

  • salt and freshly ground black pepper to taste

Place the potatoes in a large saucepan, cover with water and bring to a boil over high heat. Reduce the heat and cook for about 15 minutes or until the potatoes are tender. When they are cool enough to handle but still warm, peel the potatoes and cut them into bite sized pieces. Place the potatoes in a bowl. Pour in the wine, shallot, herbs and parsley and toss ingredients together. In a small bowl, mix the olive oil, white wine vinegar and mustard. Pour over the potatoes and toss the ingredients. Sprinkle to taste with salt and pepper. Let rest at least 15 minutes before serving. Best at room temperature.

Makes 6 servings

The Right Recipe for Fatherhood

My Dad was a terrific man.  Not stereotypical for girls of my generation. He worked hard all right and long hours, but he wasn’t one of those there-but-absent fathers that most of my friends talked about. He bathed us kids, changed diapers, fed us and went to PTA meetings where he was the only man in the room, including the teachers. He hugged and said “I love you.” I know this sounds like “so-what” today, when fathers are expected to be …. well …. fathers. But it was a rare thing then.

He was also a really bad cook with absolutely no instinct for ingredients, timing or method. Best example: oversized meatballs made with meat only, no seasonings, topped with tomato paste and broiled to a crisp. That may have been the worst dinner ever.

I mean no disrespect. It’s just that cooking was not his forte.

When Father’s Day comes around I find I miss my Dad terribly. Miss the hugs. Miss the “I love you”s. Miss his presence. He didn’t have to be a good cook. He had the right recipe for fatherhood.

He did love a thick steak. Finnan Haddie. Shredded wheat. Wheatena.

One of his favorite foods was Roasted chicken wings. He really loved the wings but he knew his kids (me especially) loved the wings too so he always gave them to us. He once said he liked the breast and wings but learned to eat thighs and drumsticks after he had kids.

None of us ever said “here Dad, you can have the wing this time.”

Kids don’t do that.

But if he were around today I would make a roast chicken and gladly give him both wings.

Roast Chicken with Fresh Herbs 

1 roasting chicken, 4-7 pounds

2 tablespoons olive oil

1 tablespoon chopped fresh parsley

2 teaspoon chopped fresh chives

2 teaspoons fresh rosemary leaves, coarsely chopped

1 teaspoon fresh thyme leaves

2 tablespoons white wine or chicken stock

1 teaspoon Dijon mustard

salt and freshly ground black pepper to taste

Preheat the oven to 400 degrees. Remove any pinfeathers and excess fat from the chicken. Remove the package of giblets inside the cavity (roast with the chicken or use for stock (except the liver)). Rinse and dry the chicken. Combine the olive oil, parsley, chives, rosemary, thyme, wine and Dijon mustard in a bowl. Mix ingredients thoroughly. Place the chicken breast side down on a rack inside a roasting pan. Brush half the mixture over the chicken back. Sprinkle with salt and pepper to taste. Place the chicken in the oven and reduce the oven heat to 350 degrees. Roast for 50-60 minutes, basting once after the first 30 minutes. Turn chicken over so it is breast side up. Brush with the remaining herb mixture and sprinkle to taste with salt and pepper. Roast for another 45-60 minutes, basting 2 or 3 times, or until the juices run clear and a meat thermometer inserted into the thickest part of the breast reads 160 degrees (or, inserted into the thigh, reads 165 degrees). Remove the chicken to a carving board and let rest for 15 minutes before carving. Makes 6 servings

Simple Summer Lentil Salad

Everyone who knows me knows I’m an indoor sort of girl, like Jack called Rose in the movie “Titanic.” My husband Ed says that if the temperature goes below 66 or above 74, I’m not comfortable.
Actually, I’ve tried to be…

Everyone who knows me knows I’m an indoor sort of girl, like Jack called Rose in the movie “Titanic.” My husband Ed says that if the temperature goes below 66 or above 74, I’m not comfortable.

Actually, I’ve tried to be a little more accommodating over the years. My thermostat has a broader range now, but of course, there’s always the flying insects, like May flies and mosquitoes to consider too. Outdoors has its hazards.

But I do like to watch the outdoors from my kitchen window and also watch the people in my backyard who are running around and playing ball and all the other stuff I prefer to watch than do.

And besides, I can multi-task in the kitchen: watch the outdoor people and cook something for when they come in.

If my children and grandchildren are here and it’s summer and it’s hot out, it’s probably salad and something grilled. Like grilled chicken and this lentil salad, which is easy to put together, looks pretty, goes with almost any grilled meat and tastes good too. 

Simple Summer Lentil Salad

1 cup lentils

1 large tomato, chopped (or use 2 cups halved grape tomatoes)

1 cup thawed frozen or cooked fresh lima beans or peas

3-4 scallions, chopped

3 tablespoons chopped fresh parsley

2 tablespoons chopped fresh basil

1/4 cup olive oil

3-4 tablespoons red wine vinegar

1 teaspoon Dijon mustard

1/2 teaspoon grated fresh lemon peel

salt and freshly ground black pepper to taste

Place the lentils in a saucepan, cover with water and bring to a boil. Lower the heat snd simmer the ingredients for 15-20 minutes or until the lentils are tender. Drain the lentils and place them in a bowl. Add the tomato, lima beans, scallions, parsley and basil. Toss ingredients to distribute them evenly. Mix the olive oil, red wine vinegar, mustard and lemon peel and pour this mixture over the lentils. Toss to coat the ingredients with the dressing. Season to taste with salt and pepper. Let rest for at least 15 minutes before serving. Makes 6 servings

Chocolate Dipped Strawberries

Making Chocolate Covered Strawberries with Children

When children come to visit for a few days you have to think of lots of ways to entertain them. For me, well, there are just so many trips I can take to the Maritime Aquarium and the Stamford Nature Center. They are both terrific places, we are members and we go often, but it doesn’t add up to a whole weekend.

So this weekend, when two of my grandchildren ages 5 and almost one stayed over, we took a ride to Stew Leonard’s in Norwalk to see the talking cow, the model railroad train that scoots around the store, the singing lettuce and celery, egg laying chickens and milk cartons. And the acrobatic lobsters. And other things to keep the kids amused while you shop for corn muffins, green beans and milk.

We had 4 things to buy but on the way in we saw these fabulous looking local strawberries. They looked a thousand times better than the regular boxed, overgrown, tasteless berries that have the texture of wet tissue paper. They smelled like cotton candy, the way real strawberries smell. We bought two quart size boxes and decided to make chocolate covered strawberries for her Mom and Dad, who were coming back that afternoon.

We went home with 5 bags full of groceries, including 3 of the 4 things we actually went in for.

Chocolate Covered Strawberries are among the easiest recipes to make with kids, even a 5 year old. And there’s so much to talk about when you’re in the process!

First I told my grand daughter about why I bought the local, small, ruby red berries rather than the orange ones from who-knows-where that are grown for transport. I had her smell both boxes of berries and she agreed that the ones we picked smelled much better. 

Then we talked about what kind of chocolate we would use (Ghirardelli semisweet chocolate chips) and why I melted the chocolate in a double boiler (because chocolate burns easily over direct heat).

I added some vegetable shortening to the chocolate so it would dry firm, like chocolate candies — this is a short cut that you can use if you don’t want to go to the bother of tempering (too fussy to do with kids). It’s not as upscale as tempered chocolate, not as shiny, but it works.

We talked about washing the berries and drying them so the melted chocolate would cling better. About waiting and having patience until the chocolate firmed up.

Then I showed her how to dip one berry and she did the rest. We had enough leftover melted chocolate mixture to use on a bunch of raisins.

Of course there were the usual things said about washing hands, about the tools (I used a whisk) and cleaning up after cooking (AFTER licking the bowl and whisk) and so on. 

Here are some photos of our strawberry fest. One with the ingredients. One with my grand daughter, dipping a berry in the melted chocolate. One tasting a little sample of the chocolate. And voila! The chocolate coated berries.

Aren’t they beautiful? (I mean the kid and the berries.)

They sure were good. (I mean the kid and the berries.)

This recipe is enough for about 24 strawberries and 1/3 cup raisins.

Chocolate Covered Strawberries

  • 24 medium strawberries
  • 6 ounces semisweet chocolate chips (one cup) or chopped chocolate
  • 1 tablespoon vegetable shortening

Wash and dry the berries but leave the hull intact. Set aside. Melt the chocolate and vegetable shortening in the top part of a double boiler over medium-low heat, stirring until the chocolate and shortening melt. Whisk ingredients to blend them into a smooth, silky sauce. Dip the berries in the chocolate, about 3/4 way up the sides of the berries. Place them on waxed or parchment paper to dry (about 2 hours).

Makes 24

What IS "gourmet"?

Our family has always appreciated good food — mostly in restaurants, since it was clear from my youth that the fine cooking gene never got passed down even in my grandma’s time. We still follow our son Eli’s sage advice about how to identify a good restaurant, a set of two rules he developed at age 9 in Italy: 1) It’s a good place if everyone’s smiling or laughing and having a good time, and 2) If the name of the restaurant includes “Gourmet” it most probably isn’t. We’ve used those criteria in dining at home and abroad, and found that last maxim to be pretty accurate, except maybe for “downtown” L.A.’s Bottega Louie Restaurant and Gourmet Market. (Admittedly, we haven’t tried it (yet), but we’ve heard some good reports… www.bottegalouie.com)

Buono appetito, all!

submitted by: carol_selkin@sbcglobal.net

Blueberry Buckle. Or Cobbler. Whatever!

Yesterday I got a call from a woman who reads my newspaper food articles and she told me that long ago she clipped one with a recipe for Blueberry Buckle and has now lost it. It is one of her husband’s favorite desserts!

It is always so flattering when a reader calls to tell you they like your stuff, the articles, the recipes. Mostly I am thrilled that someone out there is actually cooking the recipes I give.

And this was one of her husband’s favorites! 

The call made my day.

I asked whether the recipe was actually mine — her description of the lemon-milk combination didn’t sound familiar — but she said yes it was. Then I asked her when the recipe was printed and she didn’t remember but thought maybe sometime in 1987!

1987!!

Good thing I have recipes so perfectly organized in files (Fruit: Bueberries). I went to that one immediately, but no luck. Then I looked in Fruit: Cobblers and Crisps. Uh-uh.

Good thing I have clipped all my articles over the years. I tape them into big black photo presentation folders. Yes, I know how old fashioned that is. Hard copy and all. But I have had some computer crashes, so I like to keep hard copies. Besides, some of my articles go back to a time BEFORE I had a computer.

So I looked in my 1987 book. I passed through recipes for Mustard-Macadamia Chicken. And Poor Knights of Windsor, which is a kind of almond crusted French Toast. Then I got to an article I wrote that summer on Cobblers!!  Eureka!

Only the Blueberry Buckle recipe wasn’t there.

So maybe it wasn’t one of mine after all. 

But there was this, which I will tell her about, because, while it may not be THE one, it is sweet, delicious and perfect for summer feasting:

Peach and Blueberry Cobbler

Filling:

5 cups sliced peaches

1 cup blueberries

3/4 cup sugar

3 tablespoons all-purpose flour or cornstarch

1 tablespoon lemon juice

1/4 teaspoon cinnamon

Biscuit:

1 cup all-purpose flour

1 tablespoon sugar

1-1/2 teapoons baking powder

1/2 teaspoon salt

4 tablespoons butter, cut into chunks

1/3 cup milk (approximately)

1 egg yolk

Preheat the oven to 400 degrees. Peel and slice the peaches and place them in a bowl with the blueberries. Add the sugar, flour, lemon juice and cinnamon and mix to distribute the ingredients evenly. Place the fruit in a baking dish. Make the biscuit: mix the flour, sugar, baking powder and salt in a bowl. Add the butter and work it into the flour mixture with your fingers until it resembles coarse meal. Mix the milk and egg yolk together, then pour it into the flour mixture. Stir to create a soft dough, adding more milk if the dough seems too sticky or dry. Drop the dough in small mounds on top of the fruit. Bake for 25-30 minutes or until golden brown. Let cool slightly and serve. Makes 6 servings.

I like to serve this dish with Cinnamon Whipped Cream:

1 cup heavy cream

2 teaspoons sugar

1/2 teaspoon cinnamon

Use a cold bowl and beaters to beat the cream, sugar and cinnamon with a whisk or an electric mixer until thick, but still pourable. Pour over still-warm cobbler.

Blueberry Pie

I was reading here that some recently “hot” New York dining trends are either slowing down or completely dead. Like the notion that “pies are the new cupcakes.” Several months ago several food authorities predicted that the cupcake thing might be over and that pie would replace it.

Well, in New York at least, cupcakes are still wildly popular and don’t seem to be going the way of blackened fish or jello molds. (And I know of a place in Portland, Oregon where the cupcakes and other bakery items are going strong!)

But I have to say, I love pie. I grew up in a household where the Mom baked, mostly cookies but also pie. We rarely had cake in the house and the only cupcakes we ever ate were from the Dugan’s box (2 chocolate, 2 vanilla, 2 strawberry). 

I loved those Dugan cupcakes, which everyone who knew anything knew how to eat: you peeled off the thick, sweet icing on top, ate it first in case there was a nuclear bomb attack and you didn’t make it through the day. Then you ate the cake part. The philosophy of eat the best part first.

Yet, I remain a pie person. I always have pie, not cake on my birthday (which was last week and we had apple pie for dessert). For me pie has never been a trend. It’s not just a Thanksgiving thing.

Different pies in different seasons of course. Summer is one of the best pie times because of all the magnificent blueberries, peaches, rhubarb and other stuff I can stuff under a crust. Here’s a good recipe for Blueberry Pie:

Blueberry Pie

Crust:

2-1/2 cups all-purpose flour

3/4 teaspoon salt

1/2 teaspoon sugar, optional

1/2 cup cold butter, cut into small chunks

1/3 cup cold vegetable shortening, cut into small chunks

4-5 tablespoons liquid (milk, water, orange juice, etc.)

Combine the flour, salt and sugar in the workbowl of a food processor. Add the butter and shortening and process quickly several times until the mixture resembles coarse meal (you can do this by hand too, working the fats into the dry ingredients with your fingers or a pastry blender). Pour in 4 tablespoons liquid and process until the mixture comes together as a soft ball of dough. Only use the extra liquid if necessary. Cut the dough in half, flatten each into a disk, wrap and let rest for at least 30 minutes (or refrigerate or freeze for future use). When ready, roll one disk to fit inside a 9-inch pie pan. Roll the other disk to use as a top crust.

Filling:

5-6 cups blueberries

1/2 cup sugar

5 tablespoons all-purpose flour

3/4 teaspoon cinnamon

1/4 teaspoon salt

2 tablespoons lemon juice

1 tablespoon butter, cut into small chunks

Preheat the oven to 375 degrees. In a bowl, combine the blueberries, sugar, flour, cinnamon, salt and lemon juice. Toss ingredients to distribute them evenly. Spoon the filling into the dough-lined pie pan. Dot the filling with the pieces of butter. Place the second piece of dough on top. Crimp the edges to seal the crusts together. Make 2-3 air holes on top. Bake for about one hour or until golden brown. Let cool and serve. Makes on 9-inch pie

Tiramisu is still in style.

It’s funny how we Americans latch onto a new food or recipe and eat it to death and then get bored with it. Like quiche and blackened fish, which were popular in the 1980s but we don’t hear about them much anymore. 

Tiramisu also came along in the 1980s, at least in the States. In Italy it was a long-standing classic. I had my first taste when we were on a family vacation with the kids and our waiter in some lovely restaurant near Venice suggested we “have the tiramisu.” None of us knew what it was but from the description it sure sounded good, which it was.

And then, when we got back home, Tiramisu was all over the news (the food pages anyway). I felt as if I had sent some sort of brain wave signal: Eat this — it’s great!

But of course, it’s just that some American chef or other had discovered this Italian dish and then it popped up at dozens of restaurants and then everyone wanted the recipe to make at home so there were dozens of versions for the food pages.

And then, as with so many other foods, people got tired of tiramisu because they had eaten it so often.

But only for a while. Tiramisu never really went out of style.

Tiramisu is still in style because it’s rich and creamy, it’s light and refreshing, it’s delicious and also easy to make. You can’t beat that.

Yes, there are complicated versions — the classic recipe calls for eggs and soaked ladyfingers and so on. But there are also some really good quick and easy ones too. Like the recipe here. It’s a good choice for a last minute dessert for Shavuot. But also suitable all summer and into the fall.

Easy Tiramisu

12 ounces Mascarpone cheese

1 cup small curd cottage cheese or ricotta cheese

2 tablespoons dairy sour cream or heavy sweet cream

1/2 cup sugar

4 tablespoons cold brewed coffee

2 tablespoons coffee flavored liqueur

ladyfingers 

1 teaspoon cocoa powder

1 teaspoon confectioner’s sugar

3-4 tablespoons finely chopped chocolate

Place the Mascarpone and cottage cheeses in an electric mixer bowl (or use a hand mixer) and beat at medium-high speed for 2-3 minutes or until smooth and well blended. Add the cream, sugar, 2 tablespoons coffee and the liqueur and beat to blend them in thoroughly,. Raise the speed to high and beat for 2-3 minutes or until thick. Place some ladyfingers in a serving dish. Brush with the remaining coffee. Spoon the cheese mixture on top. Dust with cocoa powder and confectioner’s sugar (best to use a small strainer). Sprinkle the chocolate on top. Refrigerate for at least one hour. Makes 6 servings