Lemony Doughnut Holes

DSC05009.jpg

When I lost my mother’s famous doughnut recipe I knew things were not going to be happy in our household. She made those doughnuts every year and they were the most fabulous, light, un-greasy puffy pastries you ever ate. Which is why I took the  recipe from her collection one day when I was about 15 in order to make them on my own.

I guess I threw the recipe out when I was cleaning up because we never saw it again. I have no idea whether my doughnuts were good or not because the recipe thing took over that day (with reminders every year at Hanukkah time) and the fact that I was careless and so on and so on.

I tried mightily to find a new recipe, but never found “THE” one and, you know, memories of food have a life of their own. No recipe would ever measure up.

So, life went on. My mother never made doughnuts again but I did, always trying to reconstruct that perfect one. 

I haven’t made raised doughnuts in years though. Sometimes I make the cake kind, that doesn’t need yeast — I’ll post a recipe here for that.

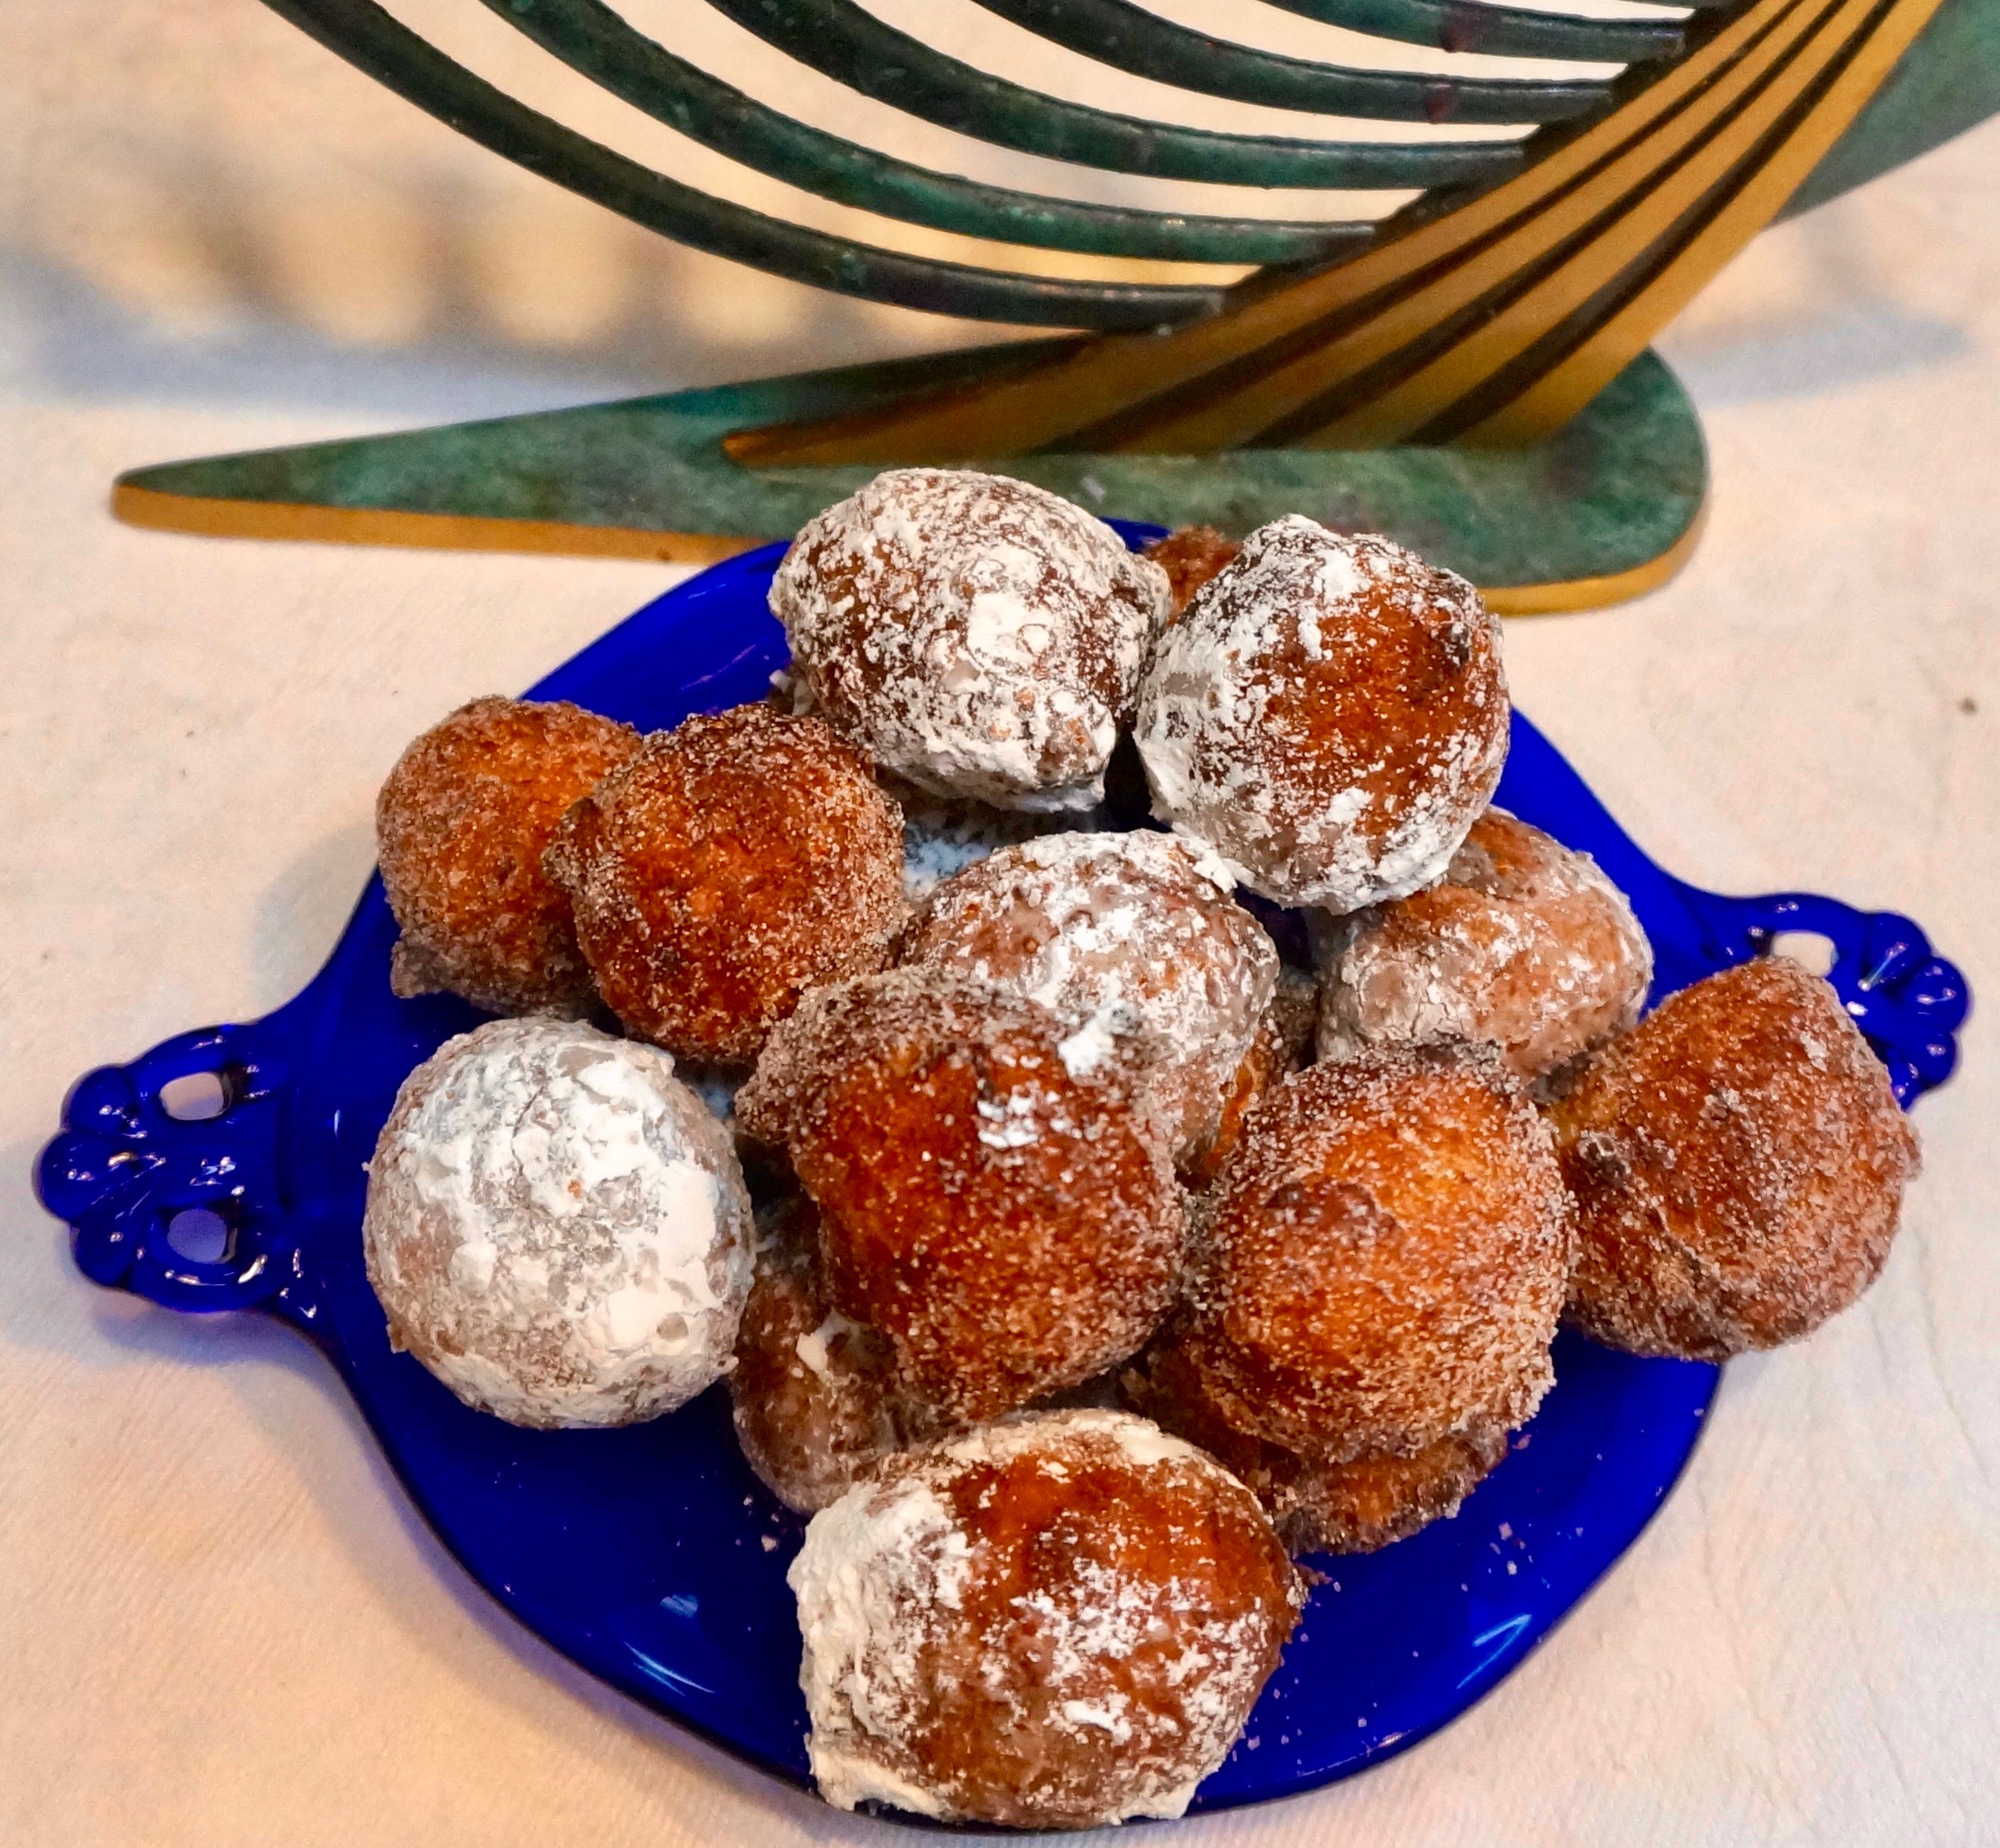
But my favorite Hanukkah doughnut is a very easy recipe that is actually a variation on profiteroles (choux pastry). Only instead of baking the dough, I fry it. I also add lemon peel to give it a refreshing edge. They come out more like doughnut holes.

When you eat them still warm, the cinnamon-sugar clinging to the surface and almost melting into it, it’s a delicious reminder of of the fact that on Hanukkah, we are celebrating.

And while I wish I hadn’t lost my Mom’s raised doughnut recipe, these Lemony Doughnut Holes are sensational. 

Lemony Doughnut Holes

  • 1 cup minus 2 tablespoons water
  • 1/4 pound unsalted butter cut into chunks
  • 1 cup all-purpose flour, measure, then sift
  • 3/4 teaspoon salt
  • 1-1/2 teaspoons freshly grated lemon peel
  • 4 large eggs
  • vegetable oil for deep frying
  • cinnamon sugar

Cook the water and butter in a large saucepan over medium-high heat. When the butter has melted, add the flour and salt all at once. Stir vigorously with a wooden spoon until the mixture is blended and comes away from the sides of the pan. Remove the pan from the heat. Let it cool for 3-4 minutes. Stir in the lemon peel. Add the eggs one at a time, beating after each addition and blending ingredients throughly. The dough will be slightly sticky. Heat about 2 inches of vegetable oil in a deep pan or fryer. When the oil reaches about 365 degrees (a small crumb of dough will sizzle immediately) drop small blobs of dough by the tablespoonful into the hot oil, leaving ample space between each. Cook the dough blobs, turning the pieces occasionally, for 1-1/2 to 2 minutes or until browned. Drain on paper towels. repeat with remaining dough until all is used. Roll the puffs in cinnamon sugar.

Makes about 60

Kichels

DSC03987.jpeg

Fried is one of my favorite foods. Fried anything, but especially potatoes, onion rings, chicken wings and doughnuts.

So on Hanukkah, when “fried” is fashionable, I’m not going to be the person who makes the healthy alternative. We eat relatively healthy stuff almost all of the time. Hanukkah is a celebration of delicious little goodies cooked to a crisp in vegetable oil!

I won’t do it for the entire eight days, but at least on the first night of Hanukkah (December 1st this year) it will be fried, fried, fried. Potato latkes for sure, but I’m thinking also about “kichels”, a kind of cookie my Mom used to make.

Kichels are an old Jewish family favorite and most recipes for them tell you to bake the dough. But my mother fried them. They were ultra-thin, crispy, not too sweet and absolutely impossible to resist. Her recipe is amazingly simple and only calls for one cup of flour, but it’s enough for a family of 4-6 as a first night treat. Or whenever.

Kichels

  • 1 cup all-purpose flour

  • 1/8 teaspoon salt

  • 2 large eggs, beaten

  • 1/4 teaspoon white vinegar

  • vegetable oil for deep fat frying

Place the flour and salt in a bowl. Add the beaten eggs and vinegar and mix thoroughly until a smooth dough has formed. Roll out the dough on a lightly floured surface until the dough is very thin, almost like paper. Cut into squares or rectangles or odd shapes as small as 1-1/2-inches or up to 3-inches. Heat about 2-inches vegetable oil in a deep saute pan (or use a deep fryer) over medium-high heat until the oil reaches about 375 degrees (a bread crumb or tiny piece of dough will sizzle quickly). Drop the cut-outs, a few at a time into the oil (they will puff up) on both sides until they are crispy and faintly browned. Drain on paper towels. Sift confectioner’s sugar on top.

Makes 4-6 servings

Potato Latkes Kinder on Knuckles and Nails

One year I made 100 potato latkes for my brother and sister-in-law’s annual Hanukkah party. That wasn’t enough according to everyone.

I have to ask here — are there ever enough potato latkes?

So I made 100 more.

Okay, I admit they were small, mini-latkes, about 1-1/2” size. Still, I did make 200 of them.

My hands were red and raw. Forget the manicure! I shouldn’t have bothered with one. And the thing is, these latkes went so fast that they were devoured in less time than it had taken me to even peel all the potatoes.

The year after that I suggested that they buy the latkes and I would bring a giant homemade challah. That’s been the deal since 2008.

Since then I still make potato latkes for my kids and grandkids (maybe a double recipe) and I have figured out a way to prepare the potatoes in a food processor and have them come out like the old fashioned hand grated kind.

In a food processor you really can’t “grate” the potatoes. You can either shred or chop them. Neither is exactly right for old fashioned potato latkes. So, I shred the potatoes first, then put them back inside the workbowl and use the S-blade to chop them finer (but chopping AFTER shredding results in a more grater-like chop). The result is almost grated potatoes.

It is MUCH kinder on hands, knuckles and nails and MUCH quicker too. Here’s the recipe:

Potato Latkes

4 large Russet-type baking potatoes, peeled

1 large yellow onion

3 tablespoons matzo meal, bread crumbs or potato starch

2 large eggs

1 teaspoon salt (or to taste)

freshly ground black pepper to taste

1/2 teaspoon baking powder

vegetable oil for frying

Shred the potatoes and onion using the shredding disk of a food processor. Remove the vegetables to a bowl. Replace the shredding disk with the S-blade and put the vegetables back into the workbowl. Pulse until the potato shreds are much smaller and look “grated.” Using a handful or two at a time, place the mixture into a kitchen towel and squeeze as much liquid out as possible, then place the mixture in a bowl. Repeat with the remaining potato-onion mixture. Add the matzo meal and toss the ingredients. Add the eggs, salt, pepper and baking powder and mix to distribute the ingredients thoroughly. Heat about 1/4-inch vegetable oil in a large saute pan over medium-high heat. When the oil is hot enough to make a matzo meal crumb sizzle, add some of the potato mixture to the pan, forming small pancakes, anywhere from 1-1/2-inch size to 3-inch size. Be sure to leave ample space between each latke so that they fry properly — if they are too close they will “steam” slightly and the latkes will be soggy. Be sure the vegetable oil remains hot — if the temperature gets too low the latkes may become soggy. Fry the latkes for 2-3 minutes per side or until crispy and browned. Drain on paper towels. Makes 24 small or 12 large pancakes

Sweet Potato Latkes

My life is holiday-ing by. Wasn’t it just Hallowe’en? And Thanksgiving is already gone. Here it is only a day after and in addition to thinking about turkey leftovers I’m thinking about latkes because Hanukkah is next week, starting at sundown December 1st. Before you know it it will be next summer and I’ll be making lemonade for the fourth of July.

Foodwise, leftover Thanksgiving and Hanukkah actually go very well. Turkey sandwiches with old fashioned potato latkes is something special. Turkey and sweet potato latkes may be even better.

If you’ve got a couple of sweet potatoes left here’s an easy latke recipe (a riff on the recipe in my book, Hip Kosher) you can make to accompany your turkey leftovers and you can also make these next week for Hanukkah:

Sweet Potato Latkes

2 medium sweet potatoes

2 tablespoons all-purpose flour

2 large eggs

1/2 teaspoon salt

1/4 teaspoon ground cinnamon

1/4 teaspoon freshly grated nutmeg

1/4 teaspoon baking powder

vegetable oil for frying

Shred the sweet potatoes in a food processor. Place the potatoes in a strainer and press down to extract as much liquid as possible (or squeeze the shreds in a kitchen towel). Put the shreds in a bowl. Add the flour and toss the ingredients. Add the eggs, salt, cinnamon, nutmeg and baking powder. Heat about 1/8-inch vegetable oil in a large sautepan. Scoop enough of the sweet potato mixture to form a pancake about 3-inches in diameter and 1/4-inch thick. Fry the latkes for about 2-3 minutes per side or until the pancakes are crispy and golden brown. Drain on paper towels. Makes 4 servings


Sweet Potato Cheesecake

_DSC9503.jpeg

Is it a yam or a sweet potato? This question comes up every year and, true to form, my sister-in-law and I talked about the very subject yesterday.

The answer is: unless you go to a special, local market or grow them yourself, you are not going to be able to buy yams. You will be buying sweet potatoes, no matter what the supermarket or greengrocer calls it. Yams are not grown commercially in the United States.

There are many varieties of sweet potato. Some almost white, some yellow, others are dark, rich almost burgundy-orange.

They’re all sweet potatoes.

As is the stuff in the cans.

Centuries ago some sweet potato varieties were called nyami by American slaves, who thought the vegetable looked like the African yam, a completely different plant species. And that’s how the confusion all began.

No matter. Whatever you call them, most people love them and will be making some sort of sweet potato dish for Thanksgiving.

If you need a really quick and easy recipe without all the sugar and butter and other stuff, here’s the simple way I make yams, er — sweet potatoes: I buy the dark orange organic sweets, roast them and when they are cool I spoon the flesh into a bowl. I grate the rind of a fresh orange over it, sprinkle in a few shakes of cinnamon and mix. Then I stir in enough orange juice to get the texture I like. That’s all there is to it.

This recipe is less caloric, less fatty. So that if you have any leftovers you can make an awesome, not-so-low calorie cheesecake for the rest of the weekend. Here’s a recipe:

Sweet Potato Cheesecake

  • ground toasted almonds (about 2 tablespoons), optional

  • 1-1/2 pounds cream cheese

  • 1 cup brown sugar

  • 1/4 cup white sugar

  • 1 to 1-1/2 teaspoons cinnamon

  • 1 teaspoon grated fresh nutmeg

  • 1 teaspoon ground ginger

  • 1 teaspoon grated fresh orange rind*

  • 1-1/2 teaspoon vanilla extract

  • 4 large eggs

  • 3/4 cup pureed sweet potatoes

  • 1/2 cup dairy sour cream or plain yogurt

  • confectioner’s sugar, candied ginger, etc. for garnish, optional

Preheat the oven to 350 degrees. Lightly butter an 8-inch or 9-inch springform pan (or cheesecake pan). Sprinkle with the toasted almonds and twirl the pan to lightly coat the sides and bottom with the nuts. Beat the cream cheese in the bowl of an electric mixer set at medium for 2-3 minutes or until smooth. Add the brown sugar, white sugar, cinnamon, nutmeg, ginger, orange rind and vanilla extract and beat the ingredients for 2-3 minutes or until well blended. Add the eggs one at a time beating after each addition. Mix in the sweet potatoes and sour cream, blending thoroughly.

Spoon the mixture into the prepared pan. Place the pan in a larger pan. Fill the larger pan with enough water to come up about 1-inch on the sides of the springform pan. Bake for about one hour or until set. Remove the springform from the larger pan and let cool to room temperature. Refrigerate for at least 4 hours before removing the cake from the pan to cool completely. Sprinkle with confectioner’s sugar or candied ginger if desired.

Makes one cake, serves 8-10

*if you use leftover mashed and seasoned sweet potatoes, cut down on the orange rind by half.

sprinklefingers: sharing jamie

sprinklefingers:

one of my all-time favorite cookbooks is jamie’s italy.
and my favorite recipe from that book is probably the simplest.

my husband calls it ‘baked pasta’ but that phrase has so many negative grade school cafeteria/high school graduation party connotations for me that i always make sure to…

The recipes I inherited from my grandmothers and their friends never had precise measurements. They always listed stuff by the handful or glassful. The challah recipe I make — from my grandmother’s collection — started out as “8 hands of flour” and so on. It took a while to figure out!

I always assumed the “glass” in “1/2 glass water” meant the little Yahrzeit glasses Jewish people use. These are small glasses filled with a candle that is lit on the anniversary of a loved one’s death. They burn for 24 hours. But they are not the size of an ordinary glass, like a tumbler for milk or juice or iced tea! And in fact today’s yahrzeit glasses are teeny compared to the ones I remember as a kid, so a measurement of “1/2 glass” would be different today than way back then.

Anyway, I think it is fun to interpret recipes like that. Makes you think and consider what you are doing and what part the ingredients play in the dish you are preparing. It also shows that recipes can be flexible. That’s a good thing because you can change things to suit yourself.

Thanks for this blog post Sprinklefingers! This was fun. I enjoyed hearing what you did with the recipe. Sounds delish. I also like the tips you give (like making some sauce way ahead).

Keep blogging. I really love your posts!

Bread Stuffing with Figs and Hazelnuts

Is it “stuffing,” “dressing” or “filling”?

Some people say it’s stuffing if it’s inside the bird, filling if it isn’t. But others say it’s a regional thing: “dressing” more of a Southern term, filling in Pennsylvania Dutch country. Or that “dressing” is British while “stuffing” is American.

My mother called it “filling” not stuffing. I always thought it was because her version was made with pasta, not the more traditional bread. It was filling, for sure (though no more than stuffing). And delicious too, made with egg-barley shaped noodles mixed with sauteed onions, mushrooms, celery and eggs.

I used to make “Nana’s Filling” every year until my kids told me they wanted something new.

I’ve been experimenting with recipes ever since and make new ones all the time (sometimes in addition to “Nana’s” or another old favorite). Sometimes I use bread, sometimes rice or whole grains like kasha or bulgur wheat. Maybe I’ll add fruit and nuts or a variety of mushrooms. Stuffing-dressing-filling is one of those versatile and forgiving recipes. You can more or less mix up a starchy ingredient, some texture foods (such as mushrooms, dried apricots, cashews, and so on), seasonings (chopped herbs and the like) and a binder of some sort (eggs, stock, cream, soy milk etc.), mix it all together and there you have it. Whatever you call it.

Here’s a recipe for a bread-based stuffing-dressing-filling with fresh and dried fruits and nuts too. We like it cooked separately from the turkey, but you can make it either way. This recipe makes about 12 cups — enough for a 14-15 pound turkey.

Bread Stuffing with Figs and Hazelnuts

3 tablespoons vegetable oil

1 medium onion, chopped

2 stalks celery, chopped

1 large Granny Smith or other crisp, tart apple, peeled, cored and chopped

1 cup chopped dried figs

1/2 cup raisins

1 cup chopped hazelnuts

8 cups 1/2-inch diced bread

3 tablespoons chopped fresh parsley

1 tablespoon chopped fresh rosemary (or 1 teaspoon dried)

2 teaspoons chopped fresh thyme (or 3/4 teaspoon dried)

1/2 to 1 cup chicken or vegetable stock

salt and freshly ground black pepper to taste

Heat the vegetable oil in a saute pan over medium heat. Add the onion and celery and cook, stirring occasionally, for 3-4 minutes or until slightly softened. Add the apple, figs and raisins and cook for another 2-3 minutes. Spoon the contents of the pan into a large bowl. Add the nuts, bread cubes, parsley, rosemary and thyme. Toss ingredients to distribute them evenly. Pour in 1/2 cup stock and sprinkle with salt and pepper. Toss ingredients. Add the remainder of the stock if you prefer a moister stuffing. Place inside the turkey. To bake separately, preheat the oven to 350 degrees, spoon the stuffing into a casserole, cover the casserole and bake for 30 minutes. Remove the cover and bake for another 12-15 minutes. Makes about 12 cups.

Turkey Salad with Chickpeas and Orange Vinaigrette

Food writers are always thinking a season ahead, so I’ve already gone over the prospective Valentine’s Day article with my editor at the newspaper. These discussions always reminds me of my Dad, who was a fabric buyer, and how he was writing orders for calico cotton in December and thick wool in July.

Still, it’s not even Thanksgiving. But this is how my mind works — I’m already contemplating turkey leftovers. We all love sandwiches the day after. But then I like to get more creative so I make up salads and stirfries for the rest of the meat. Here’s an easy salad recipe you can use for your leftovers.

Turkey Salad with Chickpeas and Orange Vinaigrette

  • 5 tablespoons olive oil
  • peel of half an orange cut into strips
  • 2 cups cooked diced turkey
  • 2 cups cooked chickpeas
  • 1 cup thawed frozen peas or cut up cooked broccoli
  • 3 tablespoons orange juice
  • 2 teaspoons lemon juice
  • 1-1/2 teaspoons grated fresh orange peel
  • salt and freshly ground black pepper to taste

Combine the olive oil and orange peel in a small saucepan and cook over low heat for 10 minutes. Let rest for 30 minutes. Discard the peel. Place the turkey, chickpeas and vegetable in a bowl and toss to mix the ingredients. In another bowl mix the flavored olive oil, orange juice, lemon juice and orange peel and pour over the turkey mixture. Taste for seasoning and add salt and pepper to taste. Let rest for at least 10 minutes before serving.

Makes 4 servings

Quick Pumpkin Spice Ice Cream

Pumpkin spice is the seasoning of the season. Not just for pie and cake. You see the words “pumpkin spice” everywhere, even for things like tea and coffee. Of course you really don’t get the pumpkin, just the spices that go with the pumpkin if you were making a pie.

So for all those pumpkin spice lovers, here’s a REALLY QUICK recipe you can make even an hour before Thanksgiving dinner or anytime at all. It’s for ice cream with all the fresh, warm spices we associate with the season.

This recipe takes about 5 minutes. The only thing you have to do ahead is remember to take the ice cream out of the freezer for about 15-20 minutes to soften.

If you are ambitious and have a few minutes more, spoon it into a graham cracker crust and you’ll have a pie. If you’re even more ambitious, grind up some gingerbread cookie crumbs (1-1/2 cups) mix them with 5 tablespoons of melted butter and press them into a 9-inch pie pan. Refrigerate the crust for an hour, then spoon the ice cream inside and freeze.

Quick Pumpkin Spice Ice Cream

1 quart vanilla ice cream, softened

1 cup mashed pumpkin (canned is fine)

1/2 cup dark brown sugar

1/2 teaspoon ground ginger

1/2 teaspoon ground cinnamon

1/2 teaspoon freshly grated nutmeg

1/4 teaspoon ground allspice

1/4 teaspoon ground cloves

Place ingredients in a bowl and mix ingredients thoroughly to blend them completely until smooth and uniform in color. Return to the freezer until chilled completely. Makes slightly more than one quart