edible gifts

Banana Bread with Dates and Figs

_DSC2355.jpg

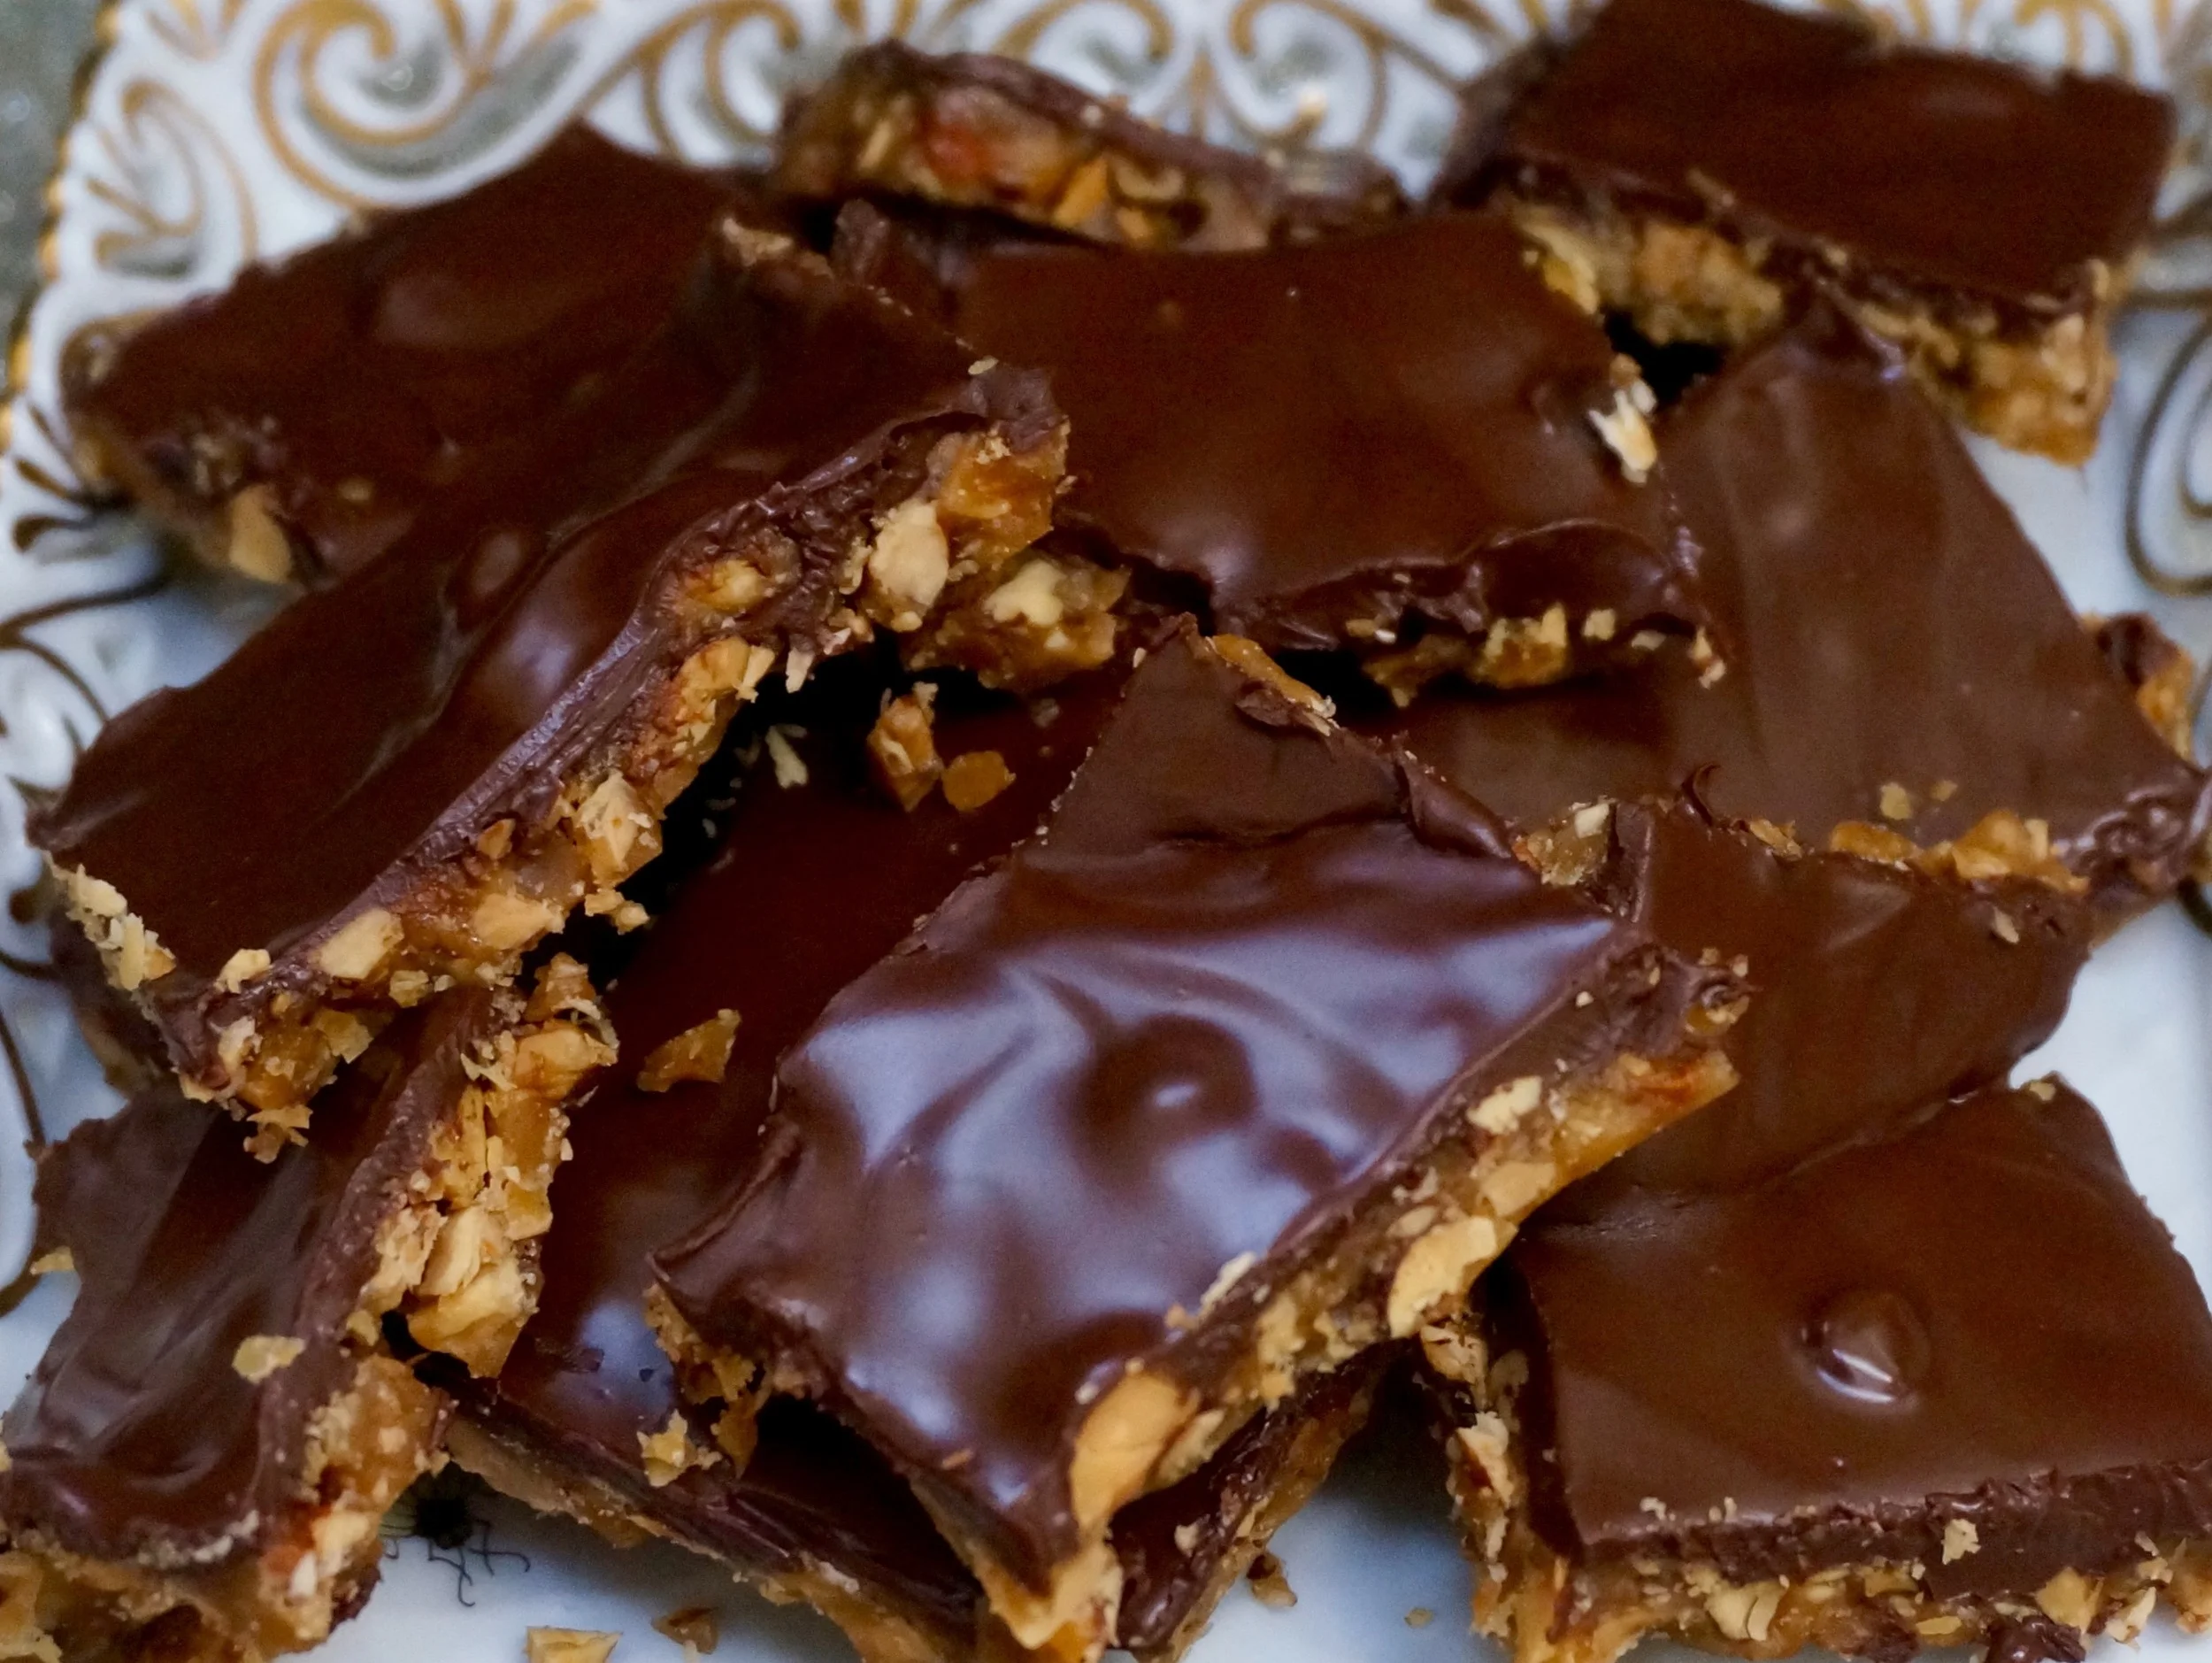
Every Purim I try new hamantaschen from different bakeries. I've also made my own hamantaschen using a variety of recipes.

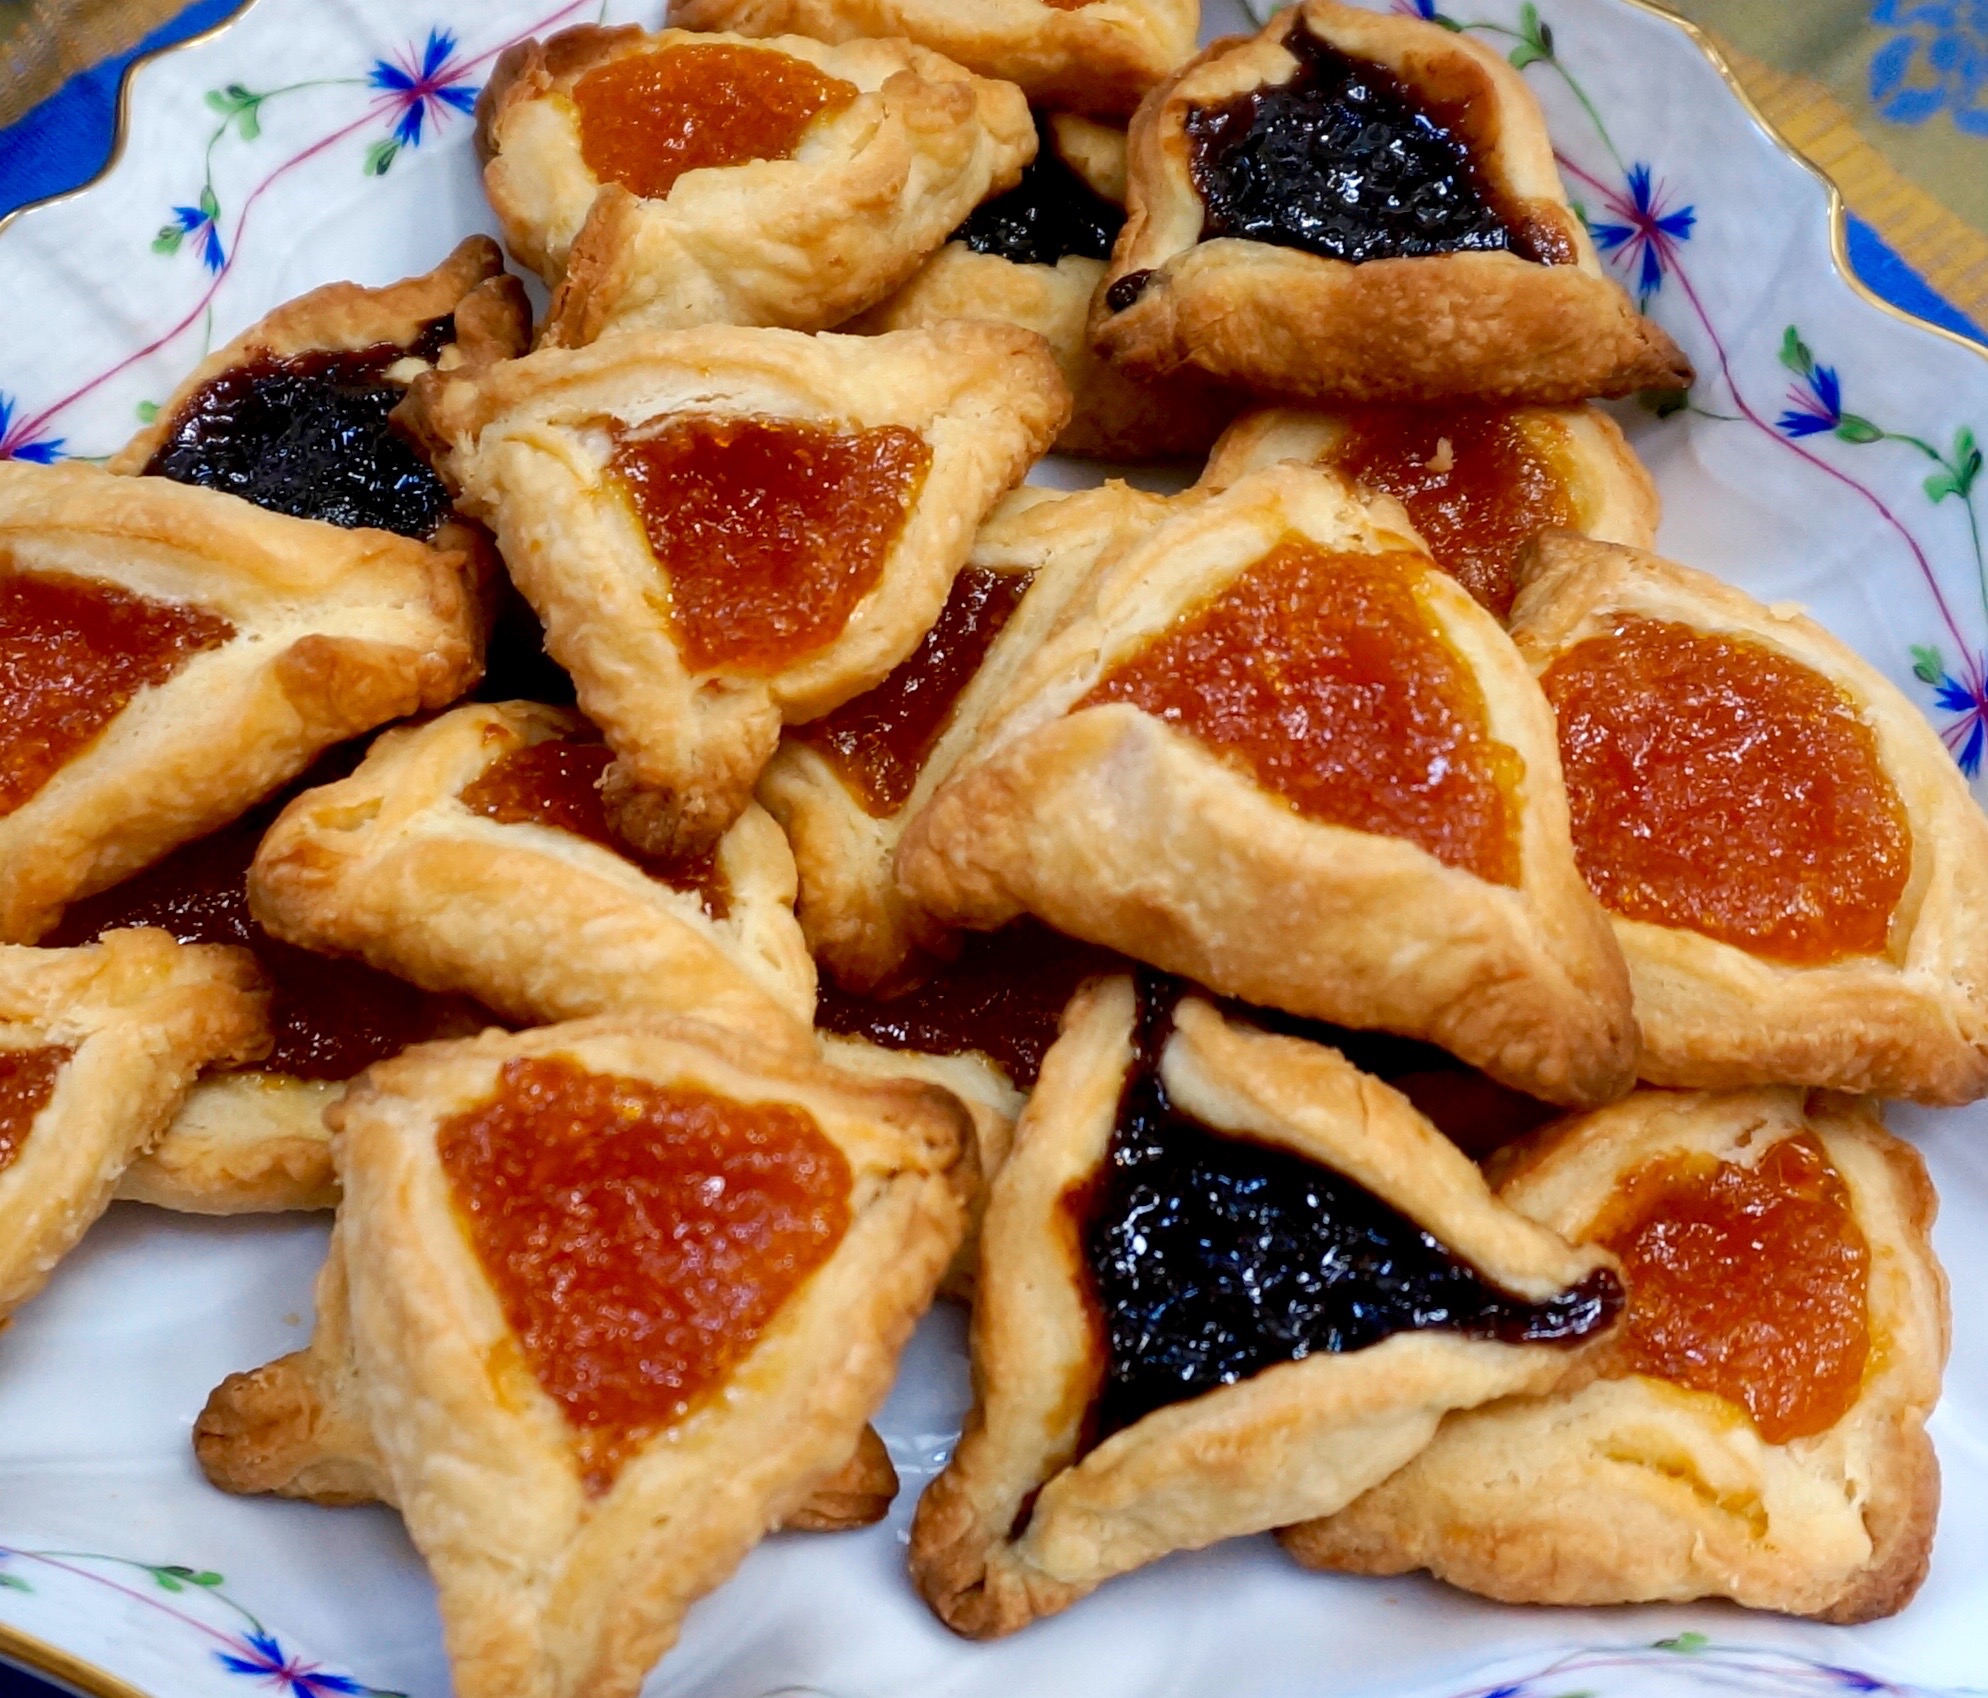
But so far, after years and years of buying this one and that one, my favorites are the (parve) ones I get at The Bakery, in Plainview, NY. For me, they are the enduring treats of childhood, never failing to please, never changing, even in a world where innovation is honored.

And so -- I will buy my hamantaschen this year. Old fashioned flavors: prune and apricot. At The Bakery.

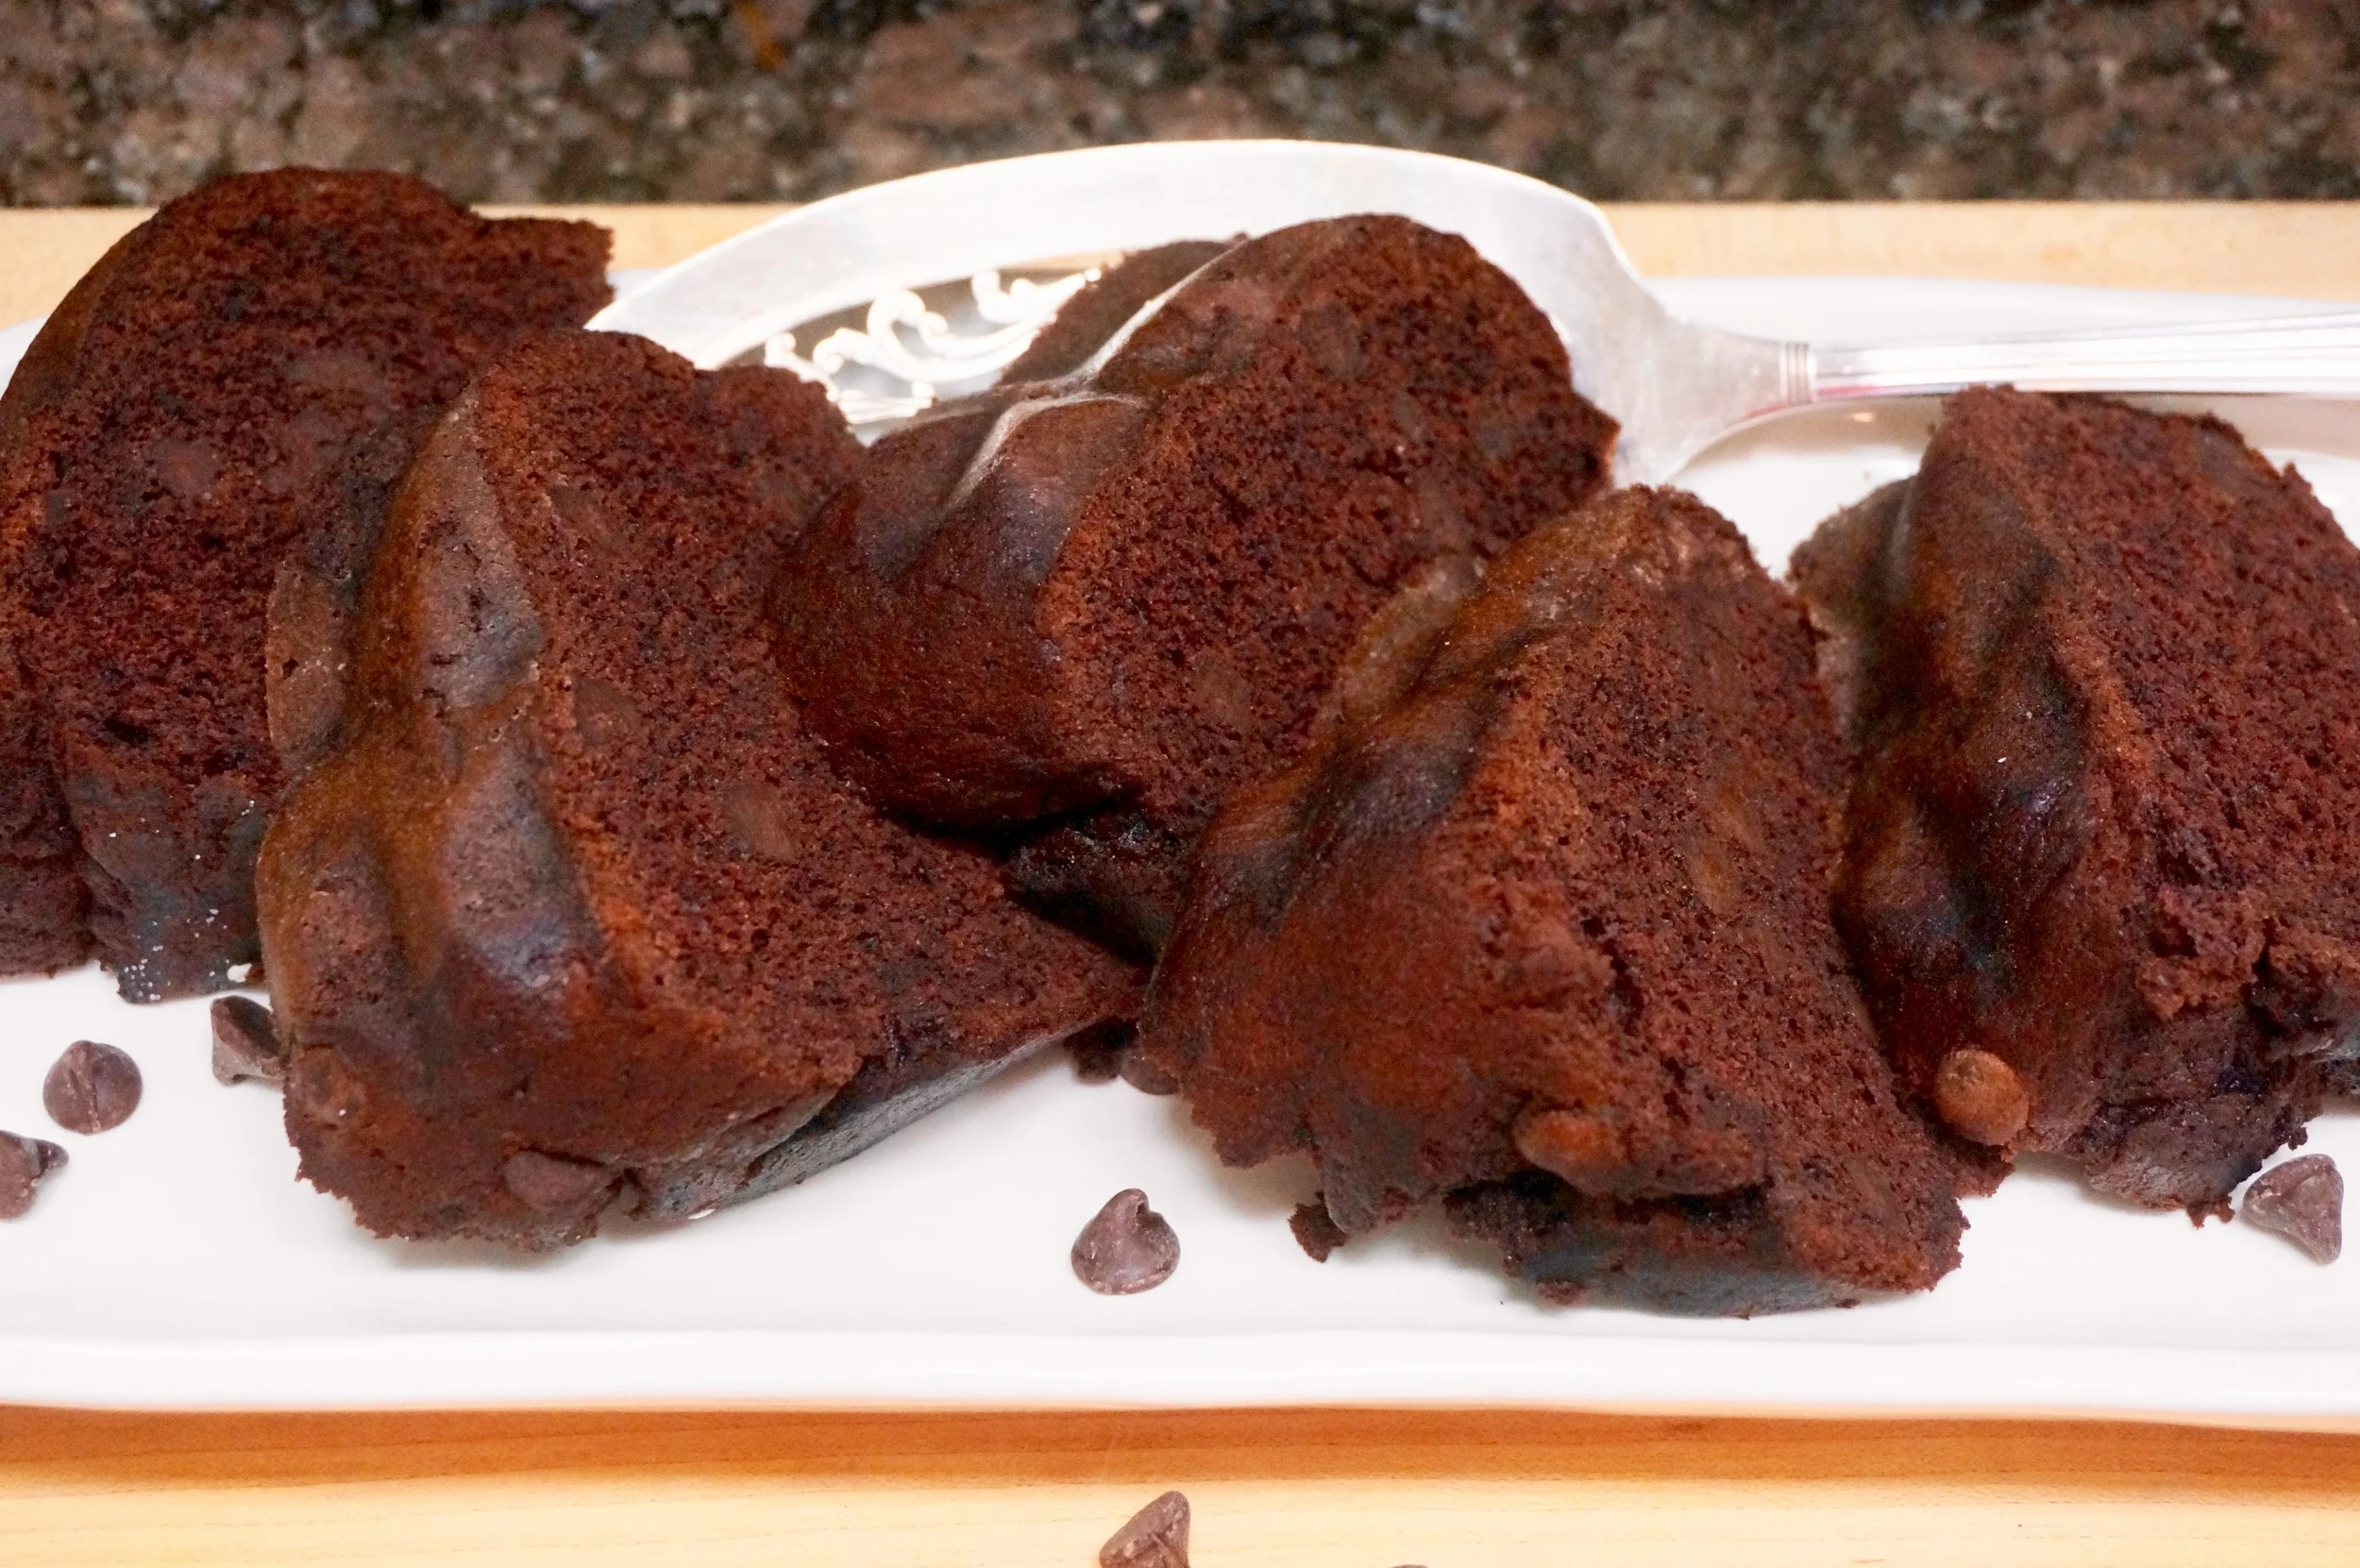
Which means that for Purim, instead of creating a completely new hamantaschen recipe or even trying a new pastry recipe with old fashioned filling, I am going to bake banana bread as mishloach manot gifts.

I have a zillion recipes for banana bread. Some with streusel. Some dairy-free. Some loaded with chocolate chips, some with coconut. Some all chocolate-y. Some spicy. And on and on.

This is my most recent banana bread recipe, one I came up with while revising my mother's date-nut bread recipe. 


Banana Bread with Figs, Dates and Nuts

  • 2-1/2 cups all-purpose flour
  • 1 teaspoon salt
  • 2 teaspoons cinnamon
  • 2 teaspoons baking soda
  • 1 cup vegetable shortening
  • 1-1/2 cups sugar
  • 4 large very ripe bananas, mashed
  • 4 large eggs
  • 1 cup chopped dried figs
  • 1/2 cup chopped dried dates
  • 1/2 cup chopped toasted almonds

Preheat the oven to 350 degrees. Grease and flour a 10-cup bundt pan. Mix the flour, salt, cinnamon and baking soda together in a bowl. In the bowl of an electric mixer set at medium speed, beat the shortening and sugar until well blended. Add the bananas and beat them in thoroughly. Add the eggs and beat them in thoroughly. Add the flour mixture and beat for a minute or so until the batter is well blended. Fold in the figs, dates and nuts. Pour the batter into the prepared pan and bake for about one hour or until a cake tester inserted into the center comes out clean. Remove from the oven and let cool in the pan for 15 minutes. Remove to a cake rack to cool completely.

Makes one bread, serving 16-18


Corn Syrup Free Butter Crunch

I once wrote that if doomsday was coming and there might not be a tomorrow, I would want some butter crunch before it all ended so I could at least die happy.

That's still my choice. I don't think there's a better candy, that gives that same salty-sweet combo better than butter crunch.

I love my original recipe, but recently someone asked me if I had a recipe that didn't include corn syrup. 

I didn't at the time, but do now.

Here it is: crunchy, salty-sweet and tender chocolate on top.

Don't stint on the good stuff. This recipe is too good for cheap chocolate.

Valentine's Day, mishloach manot for Purim, doomsday, whatever. This is a good choice in (or for) any event.


Corn Syrup Free Butter Crunch

  • 1 cup unsalted butter
  • 3/4 cup sugar
  • 1/4 teaspoon salt
  • 1/4 teaspoon vanilla extract
  • 1 cup chopped toasted almonds
  • 1 cup semisweet chocolate, chopped

Lightly butter a small sheet cake pan (about 10”x7” or a portion of a larger pan). Place the butter, sugar and salt into a deep saucepan. Bring the mixture to a boil, then cook over medium heat, stirring constantly with a wooden spoon until the mixture starts to bubble. Continue to cook, stirring occasionally, until the mixture is golden brown (about 7-8 minutes) (or until a candy thermometer reads 280 degrees). Quickly stir in the vanilla and nuts. Pour the mixture into the prepared pan and spread it out evenly to make a layer about 1/8”-1/4” thick. Immediately sprinkle the chocolate on top. Let it melt briefly, then use a spatula or the back of a large spoon to spread the chocolate evenly over the candy. Keep spreading until the chocolate is completely melted and smooth. Sprinkle the nuts on top and press them in lightly. Let cool until the chocolate is firm and set, at least 3 hours. Break into pieces.

Makes about 1 pound, enough for one person, or two if you want to share


Easy Peasy Fuss-Free Blueberry Jam

Things are still blooming in my garden. And I'm not usually so lucky when it comes to my produce plantings, so I only planted tomatoes and herbs.

Next year: going to try berries. Strawberries and blueberries.

In the meantime it's store bought for me (including farmer's markets).

So the other day, when Fairway had a sale on blueberries (each dry pint for $1!!!!)I bought 5 (the limit). Even though I already had some fresh blueberries at home.

And then I had to use them.

I made blueberry cake, blueberry muffins and blueberry soup (so refreshing on a summer day!). And a blueberry crisp.

And also blueberry jam.

I like jam, but don't like fussing with sterilizing jars and putting the jars in one of those water-bath things. So I only make an amount that will be used within a couple of weeks and store it in my fridge. For example, for:

Here's the simple recipe:

Fuss-Free Blueberry Jam

  • 4 cups blueberries
  • 2 tablespoons orange juice
  • 2 teaspoons grated orange peel
  • 1 cup sugar

Place the blueberries, orange juice, orange peel and sugar in a large saucepan. Bring the ingredients to a boil over medium-high heat. Stir, reduce the heat to medium and cook for about 30 minutes, stirring occasionally and pressing down on the ingredients with a wooden spoon to crush the berries slightly. When the liquid has thickened to jam-like, remove the pan from the heat. Let cool and spoon into a jar. Store in the refrigerator.

Makes about 1-1/2 cups


Zucchini Muffins

_DSC9968.jpg

This summer I was finally able to grow tomatoes. I had lots of them and there are still more to come!

I feel as if I finally did it right because I have failed every year up to now.

It makes me confident about next year, and not just about tomatoes. I might try to grow peppers and string beans and all sorts of things.

Maybe even zucchini. Now's the time of year that several people I know are harvesting their zucchinis, and some are gigantic! I'd like to see those in my garden.

For now I have to rely on my neighbors' and friends' generosity!

Here's what I did with zucchini this week. These muffins are not too sweet so you can have them for breakfast as well as snack.


Zucchini Muffins

  • 3 cups all-purpose flour
  • 1 teaspoon cinnamon
  • 1/2 teaspoon nutmeg
  • 2 teaspoons baking soda
  • 1/2 teaspoon salt
  • 2/3 cup vegetable oil
  • 1 cup sugar
  • 1/2 cup brown sugar
  • 3 large eggs
  • 2 teaspoons vanilla extract
  • 3 cups grated fresh zucchini
  • 1 cup raisins, optional 

Preheat the oven to 375 degrees. Lightly grease 12 muffin tins. In a large bowl whisk the flour, cinnamon, nutmeg, baking soda and salt until thoroughly combined. In a separate bowl combine the vegetable oil, sugar, brown sugar, eggs, and vanilla extract and whisk until well blended. Add the liquid ingredients to the flour mixture and stir just until blended. Fold in the zucchini and optional raisins. Spoon the batter into the tins. Bake for about 20-25 minutes or until golden brown and a cake tester inserted into the center comes out clean. Cool in the pan on a wire rack for 5 minutes. Invert the muffins onto the rack to cool completely.

Makes 12


Banana Chocolate Cake

My grandson wanted to bake a cake with me. I think he actually liked the licking-out-the-bowl part the best and I actually was most thrilled that he came up with the idea about combining banana bread and chocolate cake.

I looked through my recipes for endless variations of banana bread. And chocolate cake. I fooled around with them, combining this and that from several of the recipes and came up with the one here. It's dairy-free, so his sister, my 3-1/2 year-old grand daughter, could eat some too. And we added some chocolate chips, just for good measure.

He did like the licking-out-the-bowl thing.

He also told me the cake was too dry. But I think that was because the temperature indicator on my oven has been cleaned so often for so many years that the numbers have disappeared and I can only estimate the proper cooking temperature. I do have an oven thermometer but that also needs "updating." so I don't know if the cake baked at exactly the right temperature.

Also, I forgot to set the timer.

Anyway, everyone else declared the cake delicious. Even my grandson said it was and would want it again when I finally decide what oven I want to get to replace the old one.

So here it is, the creation.

Banana Cocoa Chocolate Chip Cake

  • 1-3/4 cups flour
  • 3/4 cup unsweetened cocoa
  • 1 teaspoon salt
  • 2 teaspoons cinnamon
  • 2 teaspoons baking soda
  • 1 cup vegetable shortening
  • 1 cup sugar
  • 4 large very ripe bananas, mashed
  • 4 eggs, slightly beaten
  • 2 teaspoons vanilla extract
  • 1 cup chocolate chips

Preheat the oven to 350 degrees. Grease and flour a 10-inch (8-cup) bundt pan. Mix the flour, cocoa, salt, cinnamon and baking soda together in a bowl. In the bowl of an electric mixer beat the shortening and sugar at medium speed for 2-3 minutes or until well blended. Add the bananas and blend them in thoroughly. Add the eggs and vanilla extract and blend them in thoroughly. Add the flour mixture and beat until batter is well blended. Fold in the chocolate chips. Pour into the prepared pan and bake for 60-70 minutes or until a cake tester inserted into the center comes out clean. Remove from the oven and let cool in the pan for 10 minutes. Remove to a cake rack to cool completely.

Makes 16-18 servings


Rich Tangerine-Chili Chocolate Truffles

I love the tradition of mishloach manot -- giving away food to family, friends and even strangers during Purim. Besides the actual mitzvah of giving, it is an opportunity to do what I love: cook a lot and give the food away. It's like having the thrill of eating -- without the calories.

If you make edible gifts for Purim or as a host/hostess gift when you are invited to someone's house or for any other occasion, you might want to try truffles. They take some time but are actually quite easy to make and I guarantee they're rich and tasty and anyone would be thrilled to get them.

Check out the photo and you'll notice that I don't make my truffles perfectly rounded. Candy truffles get their name because they look like the the underground fungi, the ones that are highly fragrant and are dark, small and irregularly shaped. So the sloppy look is actually more authentic.

I made this recipe using tangerine juice and cayenne pepper. I had once tasted tangerine-chili chocolates and thought they were amazingly wonderful. The extra bit of heat pops the citrus and chocolate into one harmonious whole.

Yes, orange juice and peel are fine, though not as flavorful. And you can leave out the cayenne pepper, though I think the truffles are better with the heat.

Pack these in small cardboard or wooden boxes or small cellophane bags (you can get them at most craft stores) and you have a beautiful homemade gift for any occasion.

Or treat yourself and your family. They'll be happy.

Tangerine-Chili Chocolate Truffles

  • 12 ounces semisweet or bittersweet chocolate
  • 1 cup heavy cream
  • 2 tablespoons tangerine juice
  • 6 tablespoons butter at room temperature
  • 2 teaspoons finely grated fresh tangerine peel
  • 1/8 teaspoon cayenne pepper, approximately
  • 1/2 cup unsweetened cocoa powder, sprinkles, toasted coconut, ground nuts, etc. (approximately)

Chop the chocolate in a food processor. Heat the cream over medium heat until it is hot and bubbles form around the edges of the pan. With the processor on, pour in the cream through the feed tube and process until smooth and well blended with the chocolate (you may have to scrape the sides of the bowl once or twice). Refrigerate the mixture for 30 minutes (in the processor bowl). Add the juice, butter, tangerine peel and cayenne pepper and blend them in thoroughly. Spoon the mixture into a bowl and refrigerate for at least one hour or until the mixture has firmed enough to form a soft “dough.” Take small pieces of the dough and shape into small balls (they don’t have to be perfectly rounded) (I do this wearing disposable gloves). Place the balls on waxed paper or aluminum foil on cookie sheets. Refrigerate until firm, at least 30 minutes. Roll the balls in cocoa, sprinkles, etc.

 Makes about 3 dozen. 


Classic Dairy Hamantaschen

You can't get through Purim without eating at least one hamantaschen.

It's tradition, and for me, a treat I look forward to every year. Hamantaschen are among my very favorite desserts.

Over the years I've tried dozens of different kinds from a variety of bakeries: the classics, filled with poppy seeds or with prune, apricot or raspberry lekvar, and in recent years some with more contemporary fillings including white chocolate and halvah and fig and rhubarb and so on.

The traditional fillings are the ones I love best. 

I usually buy hamantaschen at a place called The Bakery, in Plainview, New York. It's right across the street from my contact lens doctor, so in the past, whenever I had an appointment with him I'd go to the bakery and stuff my trunk with a dozen hamantaschen (also mandelbread, babka and a few other treats I can't get (as delicious) in Connecticut).

However, this year I had cataract surgery and don't wear contact lenses anymore! A good thing too because my contact lens doctor retired.

So am I going to drive all the way to Plainview, Long Island for hamantaschen when there is no other reason to go?

Well, I might.

But in the meantime I decided to make my own. I never made dessert hamantaschen before (I did make lamb-phyllo hamantaschen for a recipe contest though and won a jar of tahini from Soom Foods!).

Here's my dairy version of classic sweet hamantaschen. The dough is tender and vaguely flaky and very rich. The ones in the photo all got gobbled in a flash.

I will make more for sure. With classic prune and apricot lekvar filling.

Dairy Hamantschen

  • 2-1/4 cups all-purpose flour
  • 1/4 cup sugar
  • 1 teaspoon salt
  • 1 cup butter, cut into chunks
  • 8 ounces cream cheese, cut into chunks
  • 1 medium or large egg, beaten
  • lekvar (about one cup)

Place the flour, sugar and salt in the bowl of an electric mixer and mix briefly. Add the butter and cream cheese and mix on low-medium speed for a minute or so until the mixture is crumbly. Raise the speed to medium and continue to mix until a smooth dough has formed. Wrap the dough in plastic and refrigerate for at least 8 hours. Preheat the oven to 350 degrees. Using small chunks of dough at a time, roll the dough thin (about 1/8th-inch) and cut out circles with a 3-inch cookie cutter. Brush each circle lightly with the beaten egg. Place one slightly mounded teaspoon of lekvar in the middle of each circle. Bring up the sides to shape the circles into a triangle. Press the sides tightly to keep them from opening when they bake. Place the triangles on a lightly greased cookie sheet. Refrigerate for at least 30 minutes. Bake for about 30 minutes or until lightly browned.

Makes about 36

Sriracha- Parmesan Popcorn

_DSC9822.jpg

When I was really young, movie theaters were open early on the weekends so parents could send their kids off to to watch cartoons and some "westerns" and maybe even a newsreel.

It's like weekend TV today, only not everyone had a TV back then and also, children don't get the news on their favorite channels.

I don't remember any of those old movies. Just that I went with my older brother and had to share the popcorn with him.

I hated the way he doled out the pieces.

Maybe that's why, when it comes to popcorn, I am a gobbler. Stuff the stuff into my mouth without stopping until I am ready to explode.

I like all kinds of popcorn. Plain. Caramel. Chocolate-Marshmallow Heavenly Hash.

Recently I made some Sriracha-Parmesan Popcorn. Sriracha can be overbearing, especially if you just sprinkle it over or splash it on to food. But I popped the kernels and seasoned them with Carrington Farms Coconut Oil -- just one tablespoon was enough to give a hint of hot, enough to satisfy without tasting like fire.

I got the sriracha oil from a new website, Crafted Kosher, which is an absolute boon for anyone looking for kosher products that are unusual and hard-to-find, the kind of ingredients and packaged items that inspire creative cooking. Of course they also carry stock items (beans, pastas, spices, pancake and cake mixes, olive oils, soup mixes, coffee/tea, sauce/salsa, etc.) But it's so good to find so many specialty items (like Murray River Salt, Mango Vinegar, Coconut Nectar, Tandoori Masala) too, all in one place.

If you're a person who might be watching the Iowa caucus results tonight, or the Superbowl on February 7th or the Academy Award ceremony on February 28th or a movie or TV program any time, snack on this popcorn for a change.

Sriracha Parmesan Popcorn

  • 2 tablespoons vegetable oil
  • 1/2 cup corn kernels
  • 3 tablespoons butter
  • 1 tablespoon Sriracha flavored vegetable oil
  • 1/2 cup grated Parmesan cheese
  • salt to taste

Heat the vegetable oil in a large pot over medium-high heat. Add the kernels. Cover the pan and cook, popping the corn until all the kernels have popped. Place the popped corn in a large bowl. Heat the butter and Sriracha oil over low heat until the butter has melted. Mix and pour over the popcorn. Sprinkle with Parmesan cheese and salt, toss and serve.

Makes about 10 cups

Celebrate! with Sun-dried Tomato Dip

Sun-Dried Tomato Dip.jpg

A colleague of mine, Elizabeth Kurtz, who blogs at GourmetKosherCooking, has written a beautiful cookbook.

"Celebrate" celebrates not only good food and the beauty of Shabbat, but also benefits an organization called Emunah, a social service agency that helps families in physical or emotional distress -- at-risk teens, lonely seniors, young children who may have been neglected or abandoned. And much more. 

The book is filled with interesting recipes. Like the Everything Bagel Chicken, which I made for dinner last weekend. You know that bagel topping that has poppy seeds and sesame seeds and garlic and all? That's a really good coating for boneless chicken breasts!

I also loved the Butternut Squash Soup with Curry and Sweet Apples, a comforting dish on cold winter days.

There's lots to love here, including the luscious photos.

But my cooking mind is turning to Superbowl this week, so I looked for a recipe that I could bring to my brother and sister-in-law's annual party. I picked the Sun-Dried Tomato Dip -- it's easy to make, you can cook it a couple of days ahead, serve it with crudites or crackers. Elizabeth says it's also wonderful as a spread for challah (I liked it with warm pita) and even as a topping for chicken or salmon (I think it would be terrific, mixed with some mayo, on a burger). I made this for my New Year's Eve get-together and everyone gave it a thumbs up! (I used vegetable stock, not pareve chicken broth).

Whether it's a day of rest, a day together with friends and football, a birthday or anything else, it's always good to celebrate with good food. Like this:

Sun-Dried Tomato Dip (from "Celebrate" by Elizabeth Kurtz)

  • 1 (8-ounce) jar sun-dried tomatoes, packed in oil, drained and chopped, 1 tablespoon oil reserved
  • 1/2 yellow onion, thinly sliced
  • 1 clove garlic, minced
  • 1 cup water
  • 1/2 cup pareve chicken broth
  • 1/4 cup red wine vinegar
  • 1/4 cup dry red wine
  • 2 tablespoons sugar
  • 1/2 teaspoon dried thyme
  • 1/2 teaspoon kosher salt
  • 1/2 teaspoon ground black pepper


Heat reserved sun-dried tomato oil in a large skillet over medium. Add tomatoes, onion, and garlic; cook 5 to 7 minutes, stirring frequently until onion is soft and beginning to brown at the edges.

Add water, broth, vinegar, wine, sugar, thyme, salt, and pepper to skillet; bring to a boil over high heat. Reduce to a simmer, cover, and cook 30 minutes. Uncover and continue simmering another 5 to 10 minutes, or until most of the liquid has evaporated and mixture is the consistency of jam.

 With an immersion blender or food processor, puree until blended but still a little chunky.

Serve warm or at room temperature with pita chips or vegetable crudite. Store refrigerated in a clean glass jar (the one from the sun-dried tomatoes works great!) if not using immediately. It will keep 2 weeks.

Makes 1-1/2 cups


Cookies That Taste Like Home

I don't celebrate Christmas, but I do celebrate cookies. And cookies are a big part of the Christmas season. 

And so -- cookies.

When it comes to cookies, Lebkuchen is a seasonal special, with the magical fragrance of spices that make you feel warm and cozy when the weather's cold. I have tasted many many versions over the years, the best on a trip to Germany a few years ago.

So I tried my hand at baking some, a few recipes that were just okay. Then I baked these. My Hungarian friend Eva says they taste like "home." I took that as a win.

Happy holidays, whatever one you celebrate.

Lebkuchen Gingerbread Cookies

  • 3 cups minus 2 tablespoons all-purpose flour
  • 2 teaspoons grated fresh orange peel
  • 1 teaspoon ground cinnamon
  • 1 teaspoon ground ginger
  • 1/2 teaspoon ground cloves
  • 1/2 teaspoon ground allspice
  • 1/2 teaspoon grated nutmeg
  • 1/2 teaspoon baking soda
  • 1/2 teaspoon salt
  • 1/2 cup honey
  • 1/2 cup molasses
  • 3/4 cup brown sugar
  • 2 tablespoons coconut oil (or shortening or butter)
  • 1 tablespoon orange juice (or use lemon juice)
  • 1 large egg
  • all-purpose flour
  • candied ginger, dried cranberries, etc, optional

Combine the flour, orange peel, cinnamon, ginger, cloves, allspice, nutmeg, baking soda and salt in a large mixing bowl (or electric mixer bowl), whisk to distribute the ingredients evenly and set aside. Place the honey, molasses, brown sugar and coconut oil in a saucepan and cook over low-medium heat, stirring to blend the ingredients, until the coconut oil has melted and the liquid is smooth and evenly colored. Pour the liquid into the mixing bowl with the flour mixture. Add the orange juice and egg and mix ingredients thoroughly to make a smooth, evenly colored dough (about one minute at medium speed). The dough will be soft. Sprinkle the dough with some flour, wrap the dough or place it in a covered plastic container and refrigerate for at least 8 hours. Preheat the oven to 350 degrees. Lightly grease cookie sheets. Roll the dough (in portions) on a floured surface to a 1/4-inch thickness. Cut out shapes. Place the shapes on the prepared cookie sheets, leaving some space between the cookies. Garnish the center with optional ginger, etc., if desired. Bake for 10-12 minutes or until lightly golden. Remove the cookies from the oven and brush with icing while they are still warm.

Icing:

  • 1 cup sugar
  • 1/2 cup water
  • 1/4 cup confectioners sugar
  • 1/2 teaspoon vanilla extract

Prepare the icing while the cookies are baking. Place the sugar and water in a saucepan and cook, stirring to dissolve the sugar, for 1-2 minutes. Remove from the heat and whisk in the confectioners sugar and vanilla. Brush on the cookies while they are still warm.

Makes about 3-1/2 dozen 2-inch cookies