comfort food

Macaroni and Cheese

What do I cook when the grandkids come for a visit? Well, lots of things depending on which one, but I know I am safe if I have some Macaroni and Cheese on hand. Just in case.

All of my grandchildren like Macaroni and Cheese.

Doesn’t everybody?

If I have time, I make the recipe ahead and freeze portions in one-serving casserole dishes, then thaw and bake them until they’re hot enough.

Macaroni and Cheese is easy enough to make. And yet people ask me questions about it all the time. Mostly about the sauce separating or feeling grainy or gritty. So, here’s some tips for would-be Macaroni and Cheese makers out there. Followed by my standard recipe.

1. You can use a variety of cheeses, even blue-type cheeses, which give the dish a tangy taste. Although most people use cheddar by itself, that can make the texture grainy.

2. Use young cheeses such as asiago, non-aged cheddar, havarti, muenster, non-aged gouda, and so on. These have more water content than aged, older, drier cheeses and melt more easily, keeping the mixture stable.

3. Include American cheese; adding a bit of American cheese to the mix can stabilize the sauce too.

4. Use whole milk rather than skim because fat serves as a stabilizer.

5: Shred, chop or grate the cheese so that it melts more easily when you add it to the hot white sauce. Only add a little at a time and mix it in thoroughly before adding more. If you add cheese all at once there’s more of a tendency for the sauce to separate.

Macaroni and Cheese

  • 8 ounces elbow macaroni

  • 3 tablespoons butter

  • 3 tablespoons all-purpose flour

  • 2 cups whole milk

  • 1/2 teaspoon salt or to taste

  • pinch or two of freshly grated nutmeg

  • 4 ounces American cheese, shredded or chopped

  • 2 ounces Muenster, Gouda or a blue-veined cheese, shredded, chopped or crumbled

  • 2 ounces sharp cheddar cheese, shredded or chopped

  • 1/2 cup grated cheddar cheese

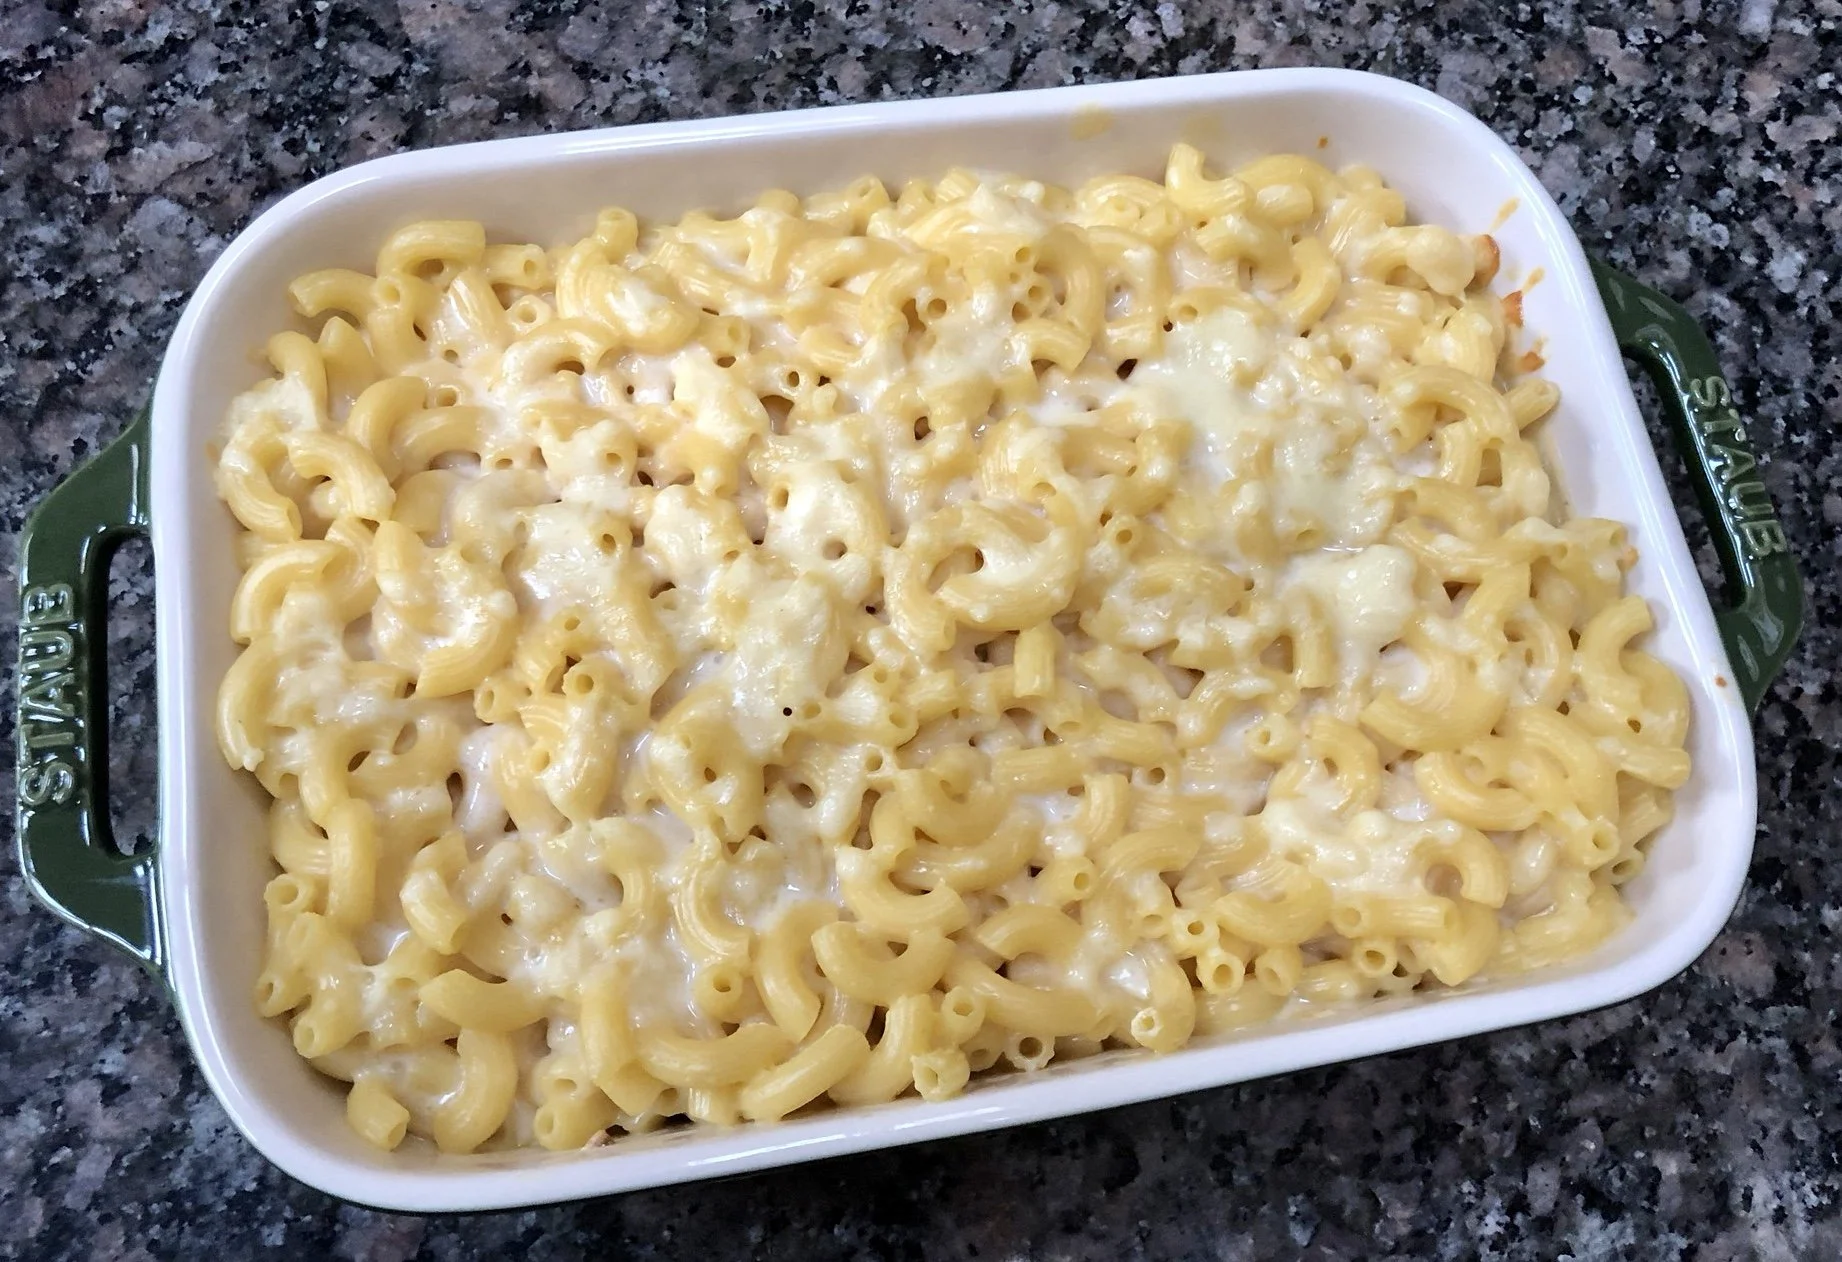
Preheat the oven to 350 degrees. Cook the macaroni until it is al dente, drain and set aside. In a saucepan melt the butter over low-medium heat. When it looks foamy, add the flour and cook, stirring constantly, for 2 minutes, without letting the mixture become brown. Gradually add the milk and stir constantly using a whisk until the sauce is smooth and thickened. Stir in the salt, nutmeg, American cheese, Muenster (or other) cheese and 2 ounces of cheddar cheese and whisk the sauce until the cheese has melted and the sauce is smooth. Stir the sauce into the cooked macaroni. Spoon into a baking dish and top with grated cheddar cheese. Bake for a few minutes until the grated cheese is hot and melty or the bread crumbs are golden brown.

Makes 4 servings

Rice Krispy Crusted Macaroni and Cheese

Mac and Cheese

"What are you going to be for Hallowe’en?"

It’s the question my granddaughter Nina asked recently as we were walking down the street.

So I said “I’m going as a grandma. And Grandpa is going as a grandpa.”

She thought that answer was so funny she stopped to laugh out loud for a long time. And said “but you are already grandma!”

So I told her that I was going to buy a gray-haired wig and a cane and go trick-or-treating looking like an old, bent-over woman. And I showed her how I would do it and what I would sound like when I said “trick or treat” with my best old-person voice.

But of course I am not going trick or treating because I am in Egypt. Yes, that’s right. Egypt. Cairo. Tahrir Square, the Pyramids, Sphinx and the whole bit. That’s why I haven’t been blogging as much as usual.

But I also just learned that our group, which has 9 women, will be having an early Halloween and we will be wearing gulabyas (Egyptian dresses) so I guess I will be in costume after all.

When my neighbors at home come to my door on the real Halloween and they realize I am not home I hope they don’t vandalize the place too much. One year our doors got sprayed with that stuff that comes flying out of a can like neon colored string and we had to have everything painted because the string didn’t come off.

It’s been years since I went trick-or-treating with my children. They are grown and go trick-or-treating with their own kids now. But I remember that Halloween night was always the turning point for the weather. It was always cold and frequently rainy on that night (why couldn’t nature wait one more day???)

So there was always something warm and delicious when we got home. Like soup or Mac and Cheese and certainly hot chocolate with marshmallows.

If you go trick-or-treating and need some warm nourishment afterwards, before the candy gobbling, try Macaroni and Cheese. I would give a nourishing and warm Egyptian recipe but —- more on that some other day. Here’s a good recipe for Macaroni and Cheese.

Macaroni and Cheese

  • 8 ounces elbow macaroni

  • 2 tablespoons butter

  • 3 tablespoons all-purpose flour

  • 2 cups whole milk

  • 1/2 teaspoon salt

  • few grindings of nutmeg

  • 4 ounces American cheese, cut into small pieces

  • 4 ounces cheddar cheese, grated or chopped

  • 1 cup Rice Krispies cereal (or similar), optional

  • 2 tablespoons melted butter, optional

Preheat the oven to 350 degrees. Cook the macaroni until it is al dente. Drain and set aside. In a saucepan, melt the two tablespoons of butter over medium heat. When the butter has melted and looks foamy, add the flour and stir it into the melted butter using a whisk. Cook for about a minute. Gradually add the milk, whisking constantly to form a smooth sauce. Add the salt, nutmeg, American cheese and cheddar cheese and stir until the sauce is smooth and thick. Stir in the macaroni and coat all the pieces. Spoon the macaroni into a baking dish. If you like a top crust, mix the cereal and melted butter and sprinkle on top of the macaroni. Bake for 12-15 minutes or until the cereal is browned and crispy.

Makes 4 servings

Carrot and Parsnip Soup

Need a quick soup for Rosh Hashanah? Try this Carrot and Parsnip Soup, which comes from my book Hip Kosher. Just a few ingredients. And ingredients can be substituted to make it fit in a meat, dairy or pareve meal. It can be frozen too, so you can m…

Need a quick soup for Rosh Hashanah? Try this Carrot and Parsnip Soup, which comes from my book Hip Kosher. Just a few ingredients. And ingredients can be substituted to make it fit in a meat, dairy or pareve meal. It can be frozen too, so you can make plenty and store it for when it’s cold outside and you need a good, light, but nourishing starter for dinner.

And also — it’s loaded with vegetables. That’s a good thing.

Carrots and parsnips are both sweet vegetables, which makes this soup particularly nice for Rosh Hashanah, when sweet foods are in order. While not quite as ubiquitous as honey, carrots have always been a key High Holiday food. The Yiddish word for carrot is “mehren,” which means to “increase” or “multiply,” and thus underscores wishes for good fortune and good deeds in the new year.

So here it is. Good, cheap and easy to make.


Carrot and Parsnip Soup


·      2 tablespoons olive oil

·      1 large onion, chopped

·      2 medium garlic cloves, chopped

·      1 teaspoon finely chopped fresh ginger

·      1/2 pound carrots, peeled and chopped

·      1/2 pound parsnips, peeled and chopped

·      1 teaspoon ground cumin

·      3/4 teaspoon ground coriander

·      salt and freshly ground black pepper to taste

·      4 cups vegetable or chicken stock


Heat the olive oil in a soup pot or large saucepan over medium heat. Add the onion and cook for 2-3 minutes, or until the onion is slightly softened. Add the garlic and ginger and cook for another minute. Add the carrots, parsnips, cumin, coriander and salt and pepper to taste and stir. Pour in the stock and one cup water. Bring to a boil, then lower the heat to a simmer. Cook, partially covered, for about 25 minutes or until the vegetables are tender. Puree the ingredients, return the soup to the pan and reheat to serve.


Makes 4-6 servings


For cream soup: use vegetable stock; add 1/2 cup half and half cream; reheat.

For dairy soup: prepare soup with vegetable stock and serve with a dollop of plain yogurt or dairy sour cream

For parve cream soup: use coconut milk or soy milk

Garnish: with croutons or pita crisps

Pita crisps: brush pita bread wedges with olive oil and bake for 5-6 minutes at 400 degrees (or until crispy and browned)


Lily Vail's Apple Pie; Sibling Rivalry, part 1

fullsizeoutput_97f0.jpeg

Sibling Rivalry, Part I

I timed last year’s apple pies perfectly. Every September I call Blue Jay Orchards in Bethel, Connecticut and order a bushel of Rhode Island Greening apples. They are one of the only orchards that I know who still grows this stupendously wonderful apple variety that is the absolutely best apple for pie no matter what anyone else, even the most expert of experts in the food business, says.

I make 12 apple pies every year and then, as the months go by, eat them down when company or my eldest grand child (who eats almost nothing but likes my apple pie) comes.

So now I have one pie left, which we will have this week because I just called Blue Jay and put in my order for this year.

When I called them last week they weren’t sure they would have the apples this year because of all the rain and hurricanes, especially Hurricane Irene. Ohmyohmyohmy, that sounded like terrible news at the time and I actually began to think about other apples I could bake into a pie.

But they told me to call back in a day or so and sure enough, when I did they told me that they have some! So I am in luck.

I never did decide on what apples I would have used.

Anyway, my Mom made apple pie every year too. Her sister, my Aunt Beck, made apple cake. And, you know, sisters will be sisters. They loved each other lots but they had this kind of apple-baking rivalry come September, when the new apples came out. They each not-so-secretly let everyone in the family know that the pie or cake was much better than the cake or pie.

And so it went. I liked both, but, being daughter to the pie baker, I learned to bake the pie.

My mother was the one who clued me into the Rhode Island Greening apples. And she showed me how to make the dough and how to cut the butter and shortening into the flour so the crust would be crumbly and how not to add too much liquid because that makes the dough rubbery. She also taught me how to roll the dough gently, so it would be tender. “Don’t murder the dough!,” she used to caution.

Her apple pies were the best of the best and I use her recipe, so, well, I don’t want to brag but —- everyone says mine are the best of the best.

Here’s the recipe., You might not be able to find Rhode Island Greening apples. So you’re on your own here. If you use a sweeter apple, cut back on the sugar.

Apple Pie

crust:

  • 2-1/2 cups all-purpose flour

  • 1 teaspoon sugar

  • 3/4 teaspoon salt

  • 1 teaspoon grated fresh lemon peel, optional

  • 1/2 cup cold butter

  • 1/3 cup cold vegetable shortening

  • 4-6 tablespoons cold milk, juice, water or melted ice cream

  • apple filling

  • 1 tablespoon butter

To make the crust: Combine the flour, sugar, salt, and lemon peel, if used, in a large bowl. Cut the butter and shortening into chunks and add the chunks to the flour mixture. Work the fat into the flour mixture until the ingredients resemble crumbs (use your hands, a pastry blender or the pulse feature of a food processor). Add the liquid, using only enough to gather pastry into a soft ball of dough (start with 4 tablespoons). Cut the dough in half and flatten each half to make a disk shape. Wrap the dough in plastic wrap and let it stand at least 30 minutes.

Preheat the oven to 350 degrees. Lightly flour a pastry board or clean work surface. With a rolling pin, roll one half of the dough on the floured surface into a circle about 1/8-inch thick, making sure the circle is larger than the pie pan by about 1 inch. Place the dough in a 9” or 10” pie pan. Pour the apple filling into the pastry-lined pan. Cut the butter into small pieces and place on top of the filling. Roll out the remaining dough and place it over the filling. Gently press the bottom and top crusts together along the flared edge of the pie pan. For a fluted rim, press your thumb and index finger against the outside of the rim, or crimp it with the tines of a fork or the blunt side of a knife. Cut steam vents in the top crust with the tip of a sharp knife or the tines of a fork. Bake the pie for 50-60 minutes or until golden brown.

Apple Filling:

  • 3 pounds pie apples (Rhode Island Greenings, Granny Smith, Gravenstein, Northern Spy, Golden Delicious, Idared, Stayman, Winesap, Baldwin, Jonagold, Braeburn

  • 1/2 cup sugar, approximately

  • 2 tablespoons lemon juice

  • 3/4 teaspoon ground cinnamon

  • 2 tablespoons all-purpose flour

Peel and core the apples then cut them into slices. Place the slices in a bowl. Add the sugar, lemon juice, cinnamon and flour and toss the ingredients to coat the apple slices evenly.

What to cook when it's just me for dinner

fullsizeoutput_86a7.jpeg

My husband won’t be home for dinner tonight so it’s just me. So this can be a delicious night of something that only I like to eat. Or it can be a night of picking tidbits from the fridge and thinking I am eating nothing but actually consuming millions of calories.

My husband Ed likes almost everything I cook, so looking for something he doesn’t like but that I do is nearly impossible. I am not complaining here. His good humor about dinner is a blessing.

But cooking for one shouldn’t be a lonely, burdensome deal. Better for it to be a guilty pleasure of sorts.

Maybe I’ll make meatloaf. Ed hates meatloaf. He always hated it and keeps telling us the story about how his grandmother made meatloaf for him and hid it under the spaghetti, which he did like, so that when he got to the bottom of the pile of pasta, there it was, a slab of beef he had to eat because his grandmother was watching.

His aunt Alice, who was also at the house on occasion would say “Ma, you know Eddie doesn’t like meatloaf!” To which grandma would insist that Eddie did.

When Ed and I were married he made me promise never to make meatloaf. He’s one of the only men I know who really doesn’t like it despite what his grandmother said.

So, because I can’t think of anything else he hates, I guess I’ll make meatloaf because I love it. Especially the next day, cold, on a sandwich with ketchup.

I hate ketchup. But that’s another story for another day.

Meatloaf

  • 2 tablespoons olive oil
  • 1 small onion, finely chopped
  • 1 stalk celery, finely chopped
  • 2/3 cup fresh bread crumbs
  • 1 8-ounce can tomato sauce
  • 1/2 cup water
  • 2-3 tablespoons chopped fresh parsley
  • 1 pound ground beef
  • 1/2 pound ground veal
  • 1/2 pound ground turkey
  • 1 large egg
  • 2 teaspoons Worcestershire sauce
  • 2 teaspoons fresh thyme leaves
  • salt and freshly ground black pepper to taste
  • 1 cup bottled chili sauce, optional

Preheat the oven to 350 degrees. Heat the olive oil in a saute pan over medium heat. Add the onion and celery and cook for 3-4 minutes or until the vegetables are soft. Set aside to cool. In a large bowl, combine the bread crumbs, tomato sauce and water and let soak until all the liquid has been absorbed. Add the beef, veal, turkey, egg, Worcestershire sauce, thyme, salt and pepper and the cooled vegetables. Mix gently but thoroughly to distribute the ingredients evenly. Place the mixture in a loaf pan (or shape the mixture into a large oval and place it in a roasting pan). Bake for 30 minutes. Top with the chili sauce, if desired and bake for another 30 minutes.

Makes 6 servings

Soft Matzo Brei

IMG_4290.jpeg

“There’s no French Toast during Passover.” That’s what I told my grandkids when they were here for a few days for Seders and sleepovers. They’re used to French Toast when they come to grandma’s house because I always have a spare challah in the freezer, or we make one and then have leftovers, and everyone on earth knows that the best French Toast is made with challah.

But never mind that. “Israeli Toast” is on the menu, is what I told them.

You know. Matzo Brei. It’s the same thing as French Toast but instead of using bread, you use matzo.

But here’s a dilemma. Topping for French Toast is easy: either maple syrup, cinnamon sugar or jelly. A lot of people do the same for Matzo Brei. But when I was a little girl my grandma served Matzo Brei sprinkled with salt and topped with a big blob of sour cream. Sometimes applesauce.

My husband Ed always thought this was weird. But it’s how I served it to my own daughters too, who think it’s weird to drizzle matzo brei with anything as sweet as maple syrup. If I had sour cream in the fridge, that’s what they would choose. But we’ve switched to fat-free Greek yogurt instead.

“Israeli Toast” or Matzo Brei is so easy to make. And a delicious switch from every other cereal-based breakfast. So if you want to give it a try, here’s my recipe:

Matzo Brei

  • 3 pieces of matzo

  • hot water

  • 2 large eggs

  • salt

  • butter

  • sour cream or plain Greek style yogurt

Break the matzot into small pieces into a bowl. Cover with hot water and let it soak until the pieces are soft. Drain any non-absorbed water, then squeeze the pieces to extract as much excess water as possible. Add the eggs to the soft matzo pieces and mix until the matzo and egg are well combined. Sprinkle to taste with salt. Heat the butter in a saute pan over medium heat. When the butter has melted and looks foamy, add the egg-matzo mixture. Cook for 2-3 minutes per side or until golden brown and crispy. Serve with sour cream or plain yogurt, or, if you must, with maple syrup.

Makes 2-3 servings

The Differences Among Matzo Balls

OMG it’s April already! April 1st! No fooling!

Passover is only 18 days away.

It’s not as if I haven’t been thinking about it. I have written three separate articles about it already (you can see one in Jewish Woman Magazine about Passover desserts here: http://www.jwi.org/Page.aspx?pid=2751) and the one at kosher.com about Haroset here: http://blog.kosher.com/2011/03/25/old-world-charosis-gets-a-hip-makeover/. The third article (on quinoa) hasn’t appeared yet and I’ll post it when it comes out next week.

But I haven’t really thought about my own Seder yet.

Except for the turkey. There’s always a turkey.

And there’s always a bunch of other stuff like spinach pie and braised eggplant. Cranberry sauce. A lot of veggies. And even though I like to make new recipes and serve less traditional foods, it wouldn’t be Passover without Matzo Ball Soup.

In our family we have had the same important discussions about these as everyone else: which is better, light fluffy matzo balls or chewy firms ones? Like politics, opinions on this subject tend to be definite and once decided, difficult to change. 

When I was a kid and my grandma and then mother had the Seders, my cousin Essie would bring her famous matzo balls. They were cannonballs, like in a children’s picture book — you could picture one falling out of the plate and bouncing out the window and into the city streets and out into the countryside.

But her husband and kids loved them. Fortunately, my mother also made a batch of spongier ones too.

The difference among matzo balls has to do with how many eggs you use, what kind of fat you mix in, how much you handle the dough, how long you cook them, whether you include spices or chopped fresh herbs and so on and so on. I use goose fat, which I put in in the freezer in December (from the goose I make for Hanukkah) because it gives the matzo balls a smooth, rich texture. And I include chopped fresh parsley or dill because it adds some flavor but also enhances the look. And mostly I use chicken soup in the mix, though occasionally I will use seltzer instead.

Here’s the recipe we use. These make medium, slightly-firm, soup soaked delicious matzo balls.

Matzo Balls

1 cup matzo meal

1 teaspoon salt

freshly ground black or white pepper to taste

1 tablespoon finely chopped fresh parsley or dill, or both, optional

4 whole large or extra large eggs, slightly beaten

1/4 cup melted goose fat, chicken fat, margarine or vegetable oil

1/4 cup chicken soup, water or seltzer

In a bowl. combine the matzo meal, salt, pepper and parsley or dill (or both). In another bowl, beat the eggs, melted fat and soup together. Add the egg mixture to the matzo mixture and blend thoroughly. Stir in the liquid. Cover the ingredients and refrigerate for about 30 minutes.. Bring a large pot of lightly salted water to a boil. With wet cold hands shape the matzo mixture into balls 1/2-inch to 1-inch balls (you may have to re-wet hands occasionally). Add the matzo balls one by one to the boiling water. Lower the heat so that the water is at a simmer. Cover the pan and cook for at least 50 minutes (do not lift the cover) or until they are tender. Remove the matzo balls from the water. Place into the soup to soak up more flavor. Makes up to 20

Classic Osso Buco

Osso Buco

I’m teaching Osso Buco this afternoon which means my house smells really really good right now! This dish needs lots of time, so I cooked a batch beforehand for my students to eat and the stuff they make will be dinner for …. me and my husband, next week (this dish freezes very well!)!

Osso Buco

  • 4 large or 8 small veal shanks, about 2-inches thick

  • 1/4 cup flour

  • 2 tablespoons butter

  • 2 tablespoons olive oil

  • 1 medium carrot, finely chopped

  • 1 medium onion, finely chopped

  • 1 stalk celery, finely chopped

  • 1 large clove garlic, finely chopped

  • 1 strip lemon peel, about 1-1/2 inches long

  • 1/2 cup dry white wine

  • 1/2 cup veal or beef stock

  • 2 large tomatoes, chopped OR 28-ounce can Italian tomatoes, drained and chopped

  • 2 tablespoons tomato paste

  • 1/2 teaspoon salt or to taste

  • freshly ground black pepper to taste

  • 2 teaspoons chopped fresh marjoram or oregano

  • Gremolata, optional

Dredge the veal shanks in the flour. Heat the butter and olive oil in a large saute pan over medium heat. When the butter has melted and looks foamy, add the shanks and cook, turning them occasionally, for 8-10 minutes or until lightly browned. Remove the meat to a plate and set aside. Add the carrot, onion, celery and garlic to the pan and cook for 3-4 minutes, stirring occasionally. Add the lemon peel, wine, stock, tomatoes and tomato paste to the pan. Bring the ingredients to a simmer. Return the meat to the pan and spoon the other ingredients on top. Sprinkle with salt, pepper and the marjoram or oregano. Cover the pan, turn the heat to low and cook for about 2-1/2 hours or until the meat is very tender. Serve topped with Gremolata if desired. Makes 4 servings

Gremolata:

  • 1/2 cup chopped flat-leaf parsley

  • grated peel of one medium lemon

  • 3 large cloves garlic, finely chopped

Mix the parsley, lemon peel and garlic in a bowl.

Makes about 1/2 cup

Mom’s Raisin Bran Apple Crisp

Wanna Sell Your House? Smell this!

Yesterday I baked a Banana Bread that I couldn’t eat because I’m allergic. But I always have leftover bananas around so I make Banana Bread a lot. I love the aroma. In fact, I mentioned yesterday that it is one of the best kitchen smells there is.

Which reminded me about when we were selling our old house. The real estate agent told us to make sure there were some good aromas coming out of the kitchen in order to entice prospective buyers.

So I got to thinking about the good smells that come out of a kitchen and what I could bake or make to make my kitchen be the one someone wanted to cook in and therefore buy my house. I even wrote one of my newspaper articles about house-selling aromas.

Choices I considered: fresh coffee, tomato sauce, fresh-baked yeast bread, anything with baking apples.

Well, fresh coffee is the easiest but you can’t have it going all day or it tastes and begins to smell bitter.

Yeast bread is my favorite, but I didn’t always have the time to bake one.

Tomato sauce may be among my favorites but the garlic could be off-putting to some.

So, apple it was. Baked apple. Apple pie. Apple Crisp. 

Fortunately we had some wonderful desserts during that time. We did sell the house too!

Here’s a recipe with an intoxicating aroma — my 

 Mom’s Raisin Bran Apple Crisp:

  •  2 tablespoons butter

  • 4-5 large, tart apples, peeled, cored and sliced

  • 2 tablespoons sugar or honey

  • 1 teaspoon cinnamon

  • pinch or two of salt

  • 1/3 cup sugar

  • 3 tablespoons butter

  • 1 tablespoon all-purpose flour

  • 2 cups slightly crushed raisin bran cereal

Preheat the oven to 350 degrees. Melt the 2 tablespoons butter and set aside to cool slightly. Combine the apples, 2 tablespoons sugar, cinnamon, salt and melted butter and place in a baking dish. Cream the 1/3 cup sugar and 3 tablespoons butter with an electric beater until well combined. Beat in the flour. Add the raisin bran and work it into the creamed mixture gently, leaving the bran flakes more or less intact. Sprinkle this mixture on top of the apples. Cover the pan and bake for 30 minutes. Remove the cover and bake for 10-15 minutes or until crisp and golden brown.

Makes 8 servings

Loft's Butter Crunch

Which was better, Loft’s Butter Crunch or Loft’s Parleys?For you young ones, those are the two iconic candies once sold by Loft’s, a candy company that went out of business in 1990. I’ve been in mourning ever since.Their Butter Crunch was always my …

Which was better, Loft’s Butter Crunch or Loft’s Parleys?

For you young ones, those are the two iconic candies once sold by Loft’s, a candy company that went out of business in 1990. I’ve been in mourning ever since.

Their Butter Crunch was always my favorite. My brother insisted that the better choice was the Parley, a giant milk chocolate cigar looking thing with soft nougaty stuff inside.

Parleys were okay but Loft’s Butter Crunch was incomparable. The toffee was thick and brittle. It snapped when you broke it. The chocolate layer wasn’t overly thick so it didn’t detract from the candy part. And the nuts on the outside were tiny and soft, a sensational contrast to the velvety-tender chocolate and the crunchy center.

As well balanced as a dinner straight out of the government’s food pyramid.

I have tried for years to find a Butter Crunch as good as Loft’s, to no avail. There are fancier ones, made with single-estate chocolate or 70% cocoa chocolate. Some really expensive stuff and others from mass producers. Nothing comes close. I will grant you that Loft’s probably didn’t use great chocolate. It wasn’t your most upscale store. It sold modestly priced candies.

It’s just that their Butter Crunch was the best I ever ate.

When I was pregnant with my older daughter I refrained from sweets, to keep my weight at a decent level. But right after she was born I polished off the 2 boxes of Loft’s Butter Crunch that someone brought to me as a gift.

I’ve been experimenting making my own version lately. I made the ones in the photo yesterday to bring as a dinner gift this evening. These are good, so I’m posting the recipe. If you make them with milk chocolate and in a smaller cake pan (8”x8”) they’ll taste like Loft’s. Otherwise use dark chocolate of your choosing and use the larger pan — most people like the crunch part thinner than I do.


Butter Crunch

1 cup butter

3/4 cup sugar

1/4 teaspoon salt

2 tablespoons light corn syrup

2 tablespoons water

9 ounces semisweet chocolate, chopped (1-1/2 cups chocolate chips)

3/4 cup chopped lightly toasted almonds

Lightly butter a 9”x13” sheet cake pan. Place the butter, sugar, salt, corn syrup and water into a deep saucepan. Cook over medium heat, stirring constantly with a wooden spoon until the mixture starts to bubble. Continue to cook, stirring occasionally, until the mixture is golden brown (about 7-8 minutes) or until a candy thermometer reads 280 degrees. Pour the mixture into the prepared pan and spread it out evenly. Immediately sprinkle the chocolate on top. Let it melt briefly, then use a spatula or the back of a large spoon to spread the chocolate evenly over the candy. Keep spreading until the chocolate is completely melted and smooth. Sprinkle the nuts on top and press them in lightly. Let cool until the chocolate is firm and set, about 2 hours. Break into pieces. Makes about 1-1/4 pounds